
This post contains affiliate links.
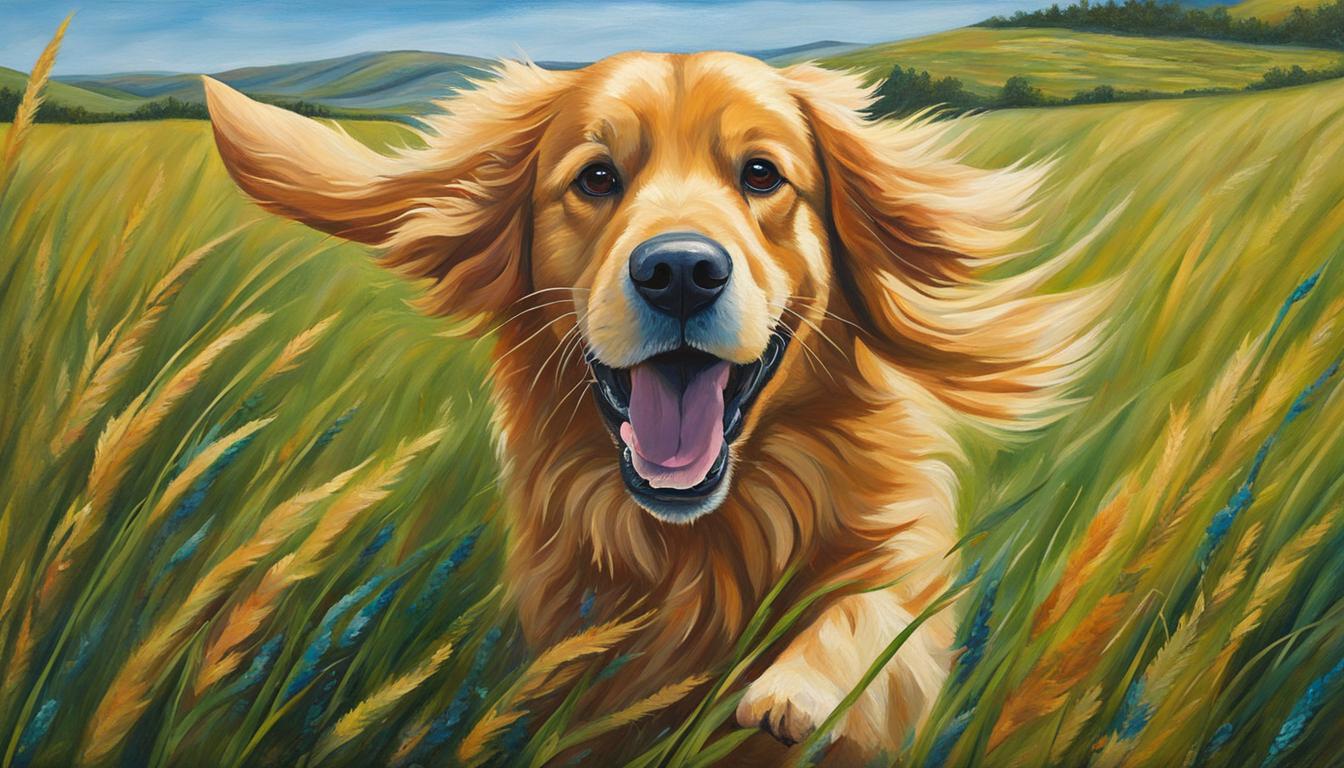
Imagine capturing the warmth of your furry friend’s gaze, the softness of their fur, and the loyalty etched into their very being with each brushstroke. You’ve felt the overwhelming desire to immortalize your pet’s essence on canvas, and with Acrylic painting tutorials, that emotional connection passes through your hands into art. Engaging in a Step-by-step dog painting guide can seem like deciphering a canine’s thought process — complex, yet deeply rewarding. As you embark on the journey of dog portrait painting with Acrylics, rest assured, the bond with your four-legged muse transcends the painting; it becomes a timeless conversation between two souls — no words necessary, just pure, unspoken love transferred from paint to canvas.
Key Takeaways
- Gaining a personal connection with your canine subject enhances the emotional depth of your painting.
- Acrylics offer a versatile medium for capturing the textures and spirit of your dog’s unique presence.
- Starting with solid fundamentals from a detailed guide is essential for realistic and touching dog portraits.
- Understanding your pet’s anatomy, especially the eyes and nose, is key to bringing the portrait to life.
- High-quality reference photos provide a crucial foundation for achieving a true likeness in your artwork.
- Patience and practice in mastering Acrylic paint technique will yield a portrait worthy of your furry companion.
Embarking on Your Artistic Journey with Dog Portraits
So you think you’re ready to dive into the world of acrylics with an endearing wag and a woof? You’re not alone. For creatives yearning to blend passion and career, a beginner’s guide to painting dogs offers the perfect canvas to unleash your artistry. Swoosh, dab, and stroke your way through this trajectory that demands much more than just replicating Fido’s furry façade on canvas.
Starting with Pet Portraits: A Gateway to Artistic Growth
Begin with the faithful gaze of man’s best friend. Dogs, beloved for their loyalty, become canvases challenging artists to capture complex emotions and intricate textures with acrylic painting tips for pets at their fingertips. This foray into pet portraits not only offers a potential revenue stream but also serves as a proving ground for refining your signature style. Transform every brushstroke into a silent conversation between painter and pet.
Why Dogs Pose a Unique Challenge for Artists
Each breed of dog carries with it a story told through layers of lush fur, expressive eyes, and a palette of personality traits. A Labrador’s sheen, a German Shepherd’s sharp gaze, a Poodle’s curls—each demands a fresh approach, a blend of science and soul in creating realistic dog paintings. Revel in the challenge, as mastery over these canines’ diverse visages sets the trajectory towards becoming a seasoned artist.
Developing a Game Plan Before Painting Your Canine Subject
Before the first dollop of paint meets canvas, ask yourself—do you truly see the subject? Is the quality of your reference photo en pointe to discern every tuft? Are you privy to the subtleties of its colors and the stories behind those soulful eyes? Crafting a game plan means studying the coat length, the posture—the essence—so when you are ready, your brush dances with purpose, displaying not just a dog, but a companion, a family member, a friend painted in loving detail.
Selecting the Perfect Reference Photo for Your Dog Painting
Picture this: You’re about to embark on an acrylic adventure, immortalizing man’s best friend on canvas. But where to begin? Selecting the perfect reference photo for your dog painting is like choosing the right kind of peanut butter for a PB&J—crucial. It’s the foundation of your Acrylic animal art tutorials and pivotal for honing your painting techniques for dogs. So grab your brush, and let’s delve into the makings of a masterpiece.

Evaluating Photo Quality: Lighting and Detail
When it comes to acrylic painting, your artwork will only be as vivid as your reference. Ever seen a blurry dog photo? Not helpful. You need to observe the scintillating sparkle in their eyes, the subtle shadows in their fur, and that playful glimmer that says, “I’m about to steal your socks.” This is why you must scout for a photo with impeccable lighting and exquisite detail, ultimately setting you up for an authentic portrayal of your furry subject.
Understanding the Impact of Camera Angle and Lens Distortion
Now, even if Fido is photogenic, the wrong camera angle can turn your regal beagle into a disfigured pooch. It’s all about perspective—literally. A slight tilt of the camera can create a fun-house-mirror effect on your four-legged pal. So, it’s essential to understand lens distortion and choose a photo that showcases your doggo in the right proportion, making your painting believable and engaging.
Navigating Reference Photos When Painting Posthumous Pet Portraits
For those angels with paws that have crossed the rainbow bridge, the challenge of posthumous pet portraits awaits. Working with limited references requires a blend of skill and sensitivity. You become an artistic detective, piecing together memories and photographs to capture a departed pet’s essence. It’s not about replicating a photo; it’s about recreating a cherished moment and the love that never fades.
Mastering Fur Textures and Lengths in Acrylic
Enter the realm of painting where every stroke brings to life the lush fur of man’s best friend. Yes, your acrylic painting tutorials for that perfect dog portrait are about to get much more specific. You’ll find that with each step-by-step dog painting guide, the choice of brush and technique is more than just a choice; it’s an art in itself.
The Importance of Brush Selection for Different Dog Breeds
Forget one-size-fits-all. When it comes to painting Poodles or Great Danes, each breed requires your brush to dance differently on the canvas. Whether you’re gliding along flowing locks or stippling for stubbly textures, your brush is as crucial as your paint. Just imagine, a Poodle painted with a brush suited for a Bulldog? That would be a hairy blunder!
Techniques for Capturing Various Fur Textures
As you embark on this step-by-step dog painting guide, the secret is in the bristles. The right movement makes all the difference between a clumpy mess and the realistic touch of fur. With precise strokes and layering techniques, you can emulate the dog’s fur so convincingly; you may think it’s possible to feel its warmth.
Adapting Brush Techniques for Poodles and Labradors
Now, let’s dissect the methodology. If you’re depicting the sophistication of a Poodle, arm yourself with a filbert brush. It’s ideal for those curly, decorative locks. For your beloved Labradors, a round brush is your best friend, dealing well with their shorter, smoother fur. Oh, and for the tiny wisps that give the coat depth? Reach for that detail brush, and work its magic strand by strand.
Remember, every fur type is a new adventure, a different story told in textured strokes. Now go forth and conquer the canine world of acrylics with this tailored approach!
How to Paint Dogs Using Acrylics
Embarking on your acrylic painting tutorials journey with man’s best friend as your muse, you’ll soon learn that every strand of fur, every twinkle in those soulful eyes, bears the hallmark of your attention to detail. Your canvas beckons as you prepare to capture the warm spirit of your canine companion with a step-by-step dog painting guide that’s as dedicated as you are.

But before you dip your brush in vibrant hues and bold aspirations, there’s a hierarchy of steps to consider. Let’s delve into the artist’s playbook, where the painting techniques for dogs are spelled out in black, white, and every shade in-between.
- Select the perfect reference photo, with rich textures and natural lighting setting you on a path of certainty. Think of it as the blueprint to your masterpiece.
- Next, it’s onto deciphering the code of colors. Mixing and blending until your palette reflects the exact shade of your dog’s coat—each stroke adding depth and character.
- The eyes, windows to the soul, require a steady hand and an intuitive sense of shading. Remember, it’s in the eyes where your furry subject’s story is told.
- And let’s not neglect the nose, often glossy, always prominent, and so very telling of your furry model’s persona. It’s a focal point that demands precision and finesse.
As your brush dances across the canvas, layer by layer, the essence of your subject comes to life. With each refined stroke, you imbue the painting with warmth, vitality, and that unmistakable dogged spirit.
| Fur Type | Brush Type | Technique |
|---|---|---|
| Short and Smooth | Flat Brush | Short strokes, layering for depth |
| Long and Wavy | Round Brush | Long, flowing strokes with subtle blending |
| Curly | Filbert Brush | Twirl the brush to mimic curls |
| Wire-like | Rigger Brush | Delicate lines to give a coarse effect |
There, in a symphony of shadow and light, texture and tone, you’ll find the bridge between craft and creation. Remember, whether a buoyant puppy or a stately senior dog, the essence captured on your canvas will serve as a timeless tribute to your four-legged muse.
Mixing Acrylic Colors to Match Your Dog’s Coat
Success in the vibrant world of acrylic painting tutorials begins with mastering the art of color, especially when your subject is as lively as your beloved canine companion. As a budding artist following this beginner’s guide to painting dogs, let’s prepare you to conquer the palette and create a fur-realistic masterpiece. Don’t worry, you won’t be barking up the wrong tree here; painting techniques for dogs can be quite a tail-wagging fun!
Building Basic Tones: A Palette for Every Pooch
Starting with a foundational palette is crucial for capturing the essence of your pup’s coat. Key colors such as Carbon Black, Titanium White, Burnt Sienna, Burnt Umber, and Yellow Ochre form the backbone of your dog-painting arsenal. Regardless of your four-legged muse’s breed or color, these versatile hues will have you covered from nose to tail.
Tips for Painting Black, White, and Brown Fur
Now, let’s dive into the nitty-gritty of hues and cues. When painting black fur, remember that true black is rare – reflections are your friend for bringing out the coat’s hidden colors. Alternatively, whites are deceptive; they are seldom pure snow, and you’ll often find them brimming with unexpected undertones. And oh, those brown furbabies? They can range from creamy milk chocolate to the rich depth of dark espresso, so keep your browns as varied as a barista’s menu.
Crafting the Ideal Shade for Yellow and Cream Canines
Your yellow and cream pooches deserve their spotlight. I mean, who could resist that buttery fur? Play with proportions of Yellow Ochre, Titanium White, and just a touch of Buff Titanium to catch that glint of sunshine in their coats. The magic lies in balancing the ratios to imitate the warmth and softness accurately – it’s less about intense color and more about nailing the nuance.
Let’s lay down a framework with a table that breaks down these basic fur colors and the acrylic mixes to achieve them:
| Dog Fur Color | Base Acrylic Color | Mixing Partner(s) | Reflective Undertone (Optional) |
|---|---|---|---|
| Black | Carbon Black | Titanium White (for highlights) | Payne’s Grey or Ultramarine Blue |
| White | Titanium White | Lilac or Light Blue (for shadows) | Buff Titanium (for warmth) |
| Brown | Burnt Umber | Carbon Black, Titanium White | Burnt Sienna (for richness) |
| Yellow / Cream | Yellow Ochre | Titanium White, Buff Titanium | — |

By grasping these essential painting techniques for dogs, your acrylic painting tutorials at home will lead to portraits that not only look spot-on but also capture the very soul of your furry friends. Now, isn’t that the ultimate goal? Go unleash your creativity—your dog deserves a masterpiece!
Bringing Your Dog’s Eyes to Life with Acrylics
You’ve captured the curve of the tail, the fluff of the fur, but now it’s time for the real magic – those sparkling eyes that speak a thousand words. Yes, your pet portrait will only truly spring to life when you master the gaze of your beloved pup with your acrylics. Your toolkit’s prepared, and your canvas awaits, so let’s dive into the soulful windows of your four-legged muse.
Why the Eyes Are Key in Dog Portraits
Capturing your pet’s essence is all about nailing the look in their eyes. They convey emotion and personality; they’re the focal point that viewers will inevitably gravitate towards. Get these right with your dog portrait painting using acrylics, and you’ve clinched most of the battle.
Step-by-Step Guide to Realistic Canine Eyes
- Start by sketching the outline of the eyes. Pay attention to the unique shape and direction — no two dogs’ eyes are the same.
- Choose a round brush and begin with the iris. A mix of burnt umber and ultramarine creates a natural base color before you add the individual hues that reflect your pooch’s look.
- Define the pupil but remember to leave a tiny white space to mimic the reflection of light, adding the sparkle to the eye that denotes life.
Striking the Right Balance: Blending and Sharp Details
Now, this is where the finesse comes in — blending without muddying the waters. Gently layering on shades on the iris requires a delicate touch with a smaller brush, one that allows you to work in tiny strokes. You’re playing with acrylic painting tips for pets here, and the goal is depth and dimension. Don’t forget those tiny lines that radiate from the pupil; they speak volumes in creating realistic dog paintings.
| Iris Technique | Pupil Detailing | Reflection Highlights |
|---|---|---|
| Use feathery strokes to blend colors outwards from the pupil. | Focus on creating a sharp, crisp edge to make it pop. | Save for final touches, use pure white for a glistening effect. |
| Introduce subtle complementary colors for realism. | Inset a slightly off-centered highlight to mimic light source. | Apply with a fine detail brush, delicately dabbing on the canvas. |
Trust your instincts, take a step back, and observe. Adjust the contrast and sharpness as needed, but remember, it’s often the smallest detail that turns a good painting into a great one. With acrylics in your hand, and this guide by your side, your dog portrait painting with Acrylics will not just stand – it will leap off the canvas right into hearts.
The Art of Painting a Dog’s Nose
Ever tried to capture the quintessence of a pup’s sniffing apparatus? Well, strap in, as we delve into a symphony of greys and the realms of texture. A dog’s nose can either be your pièce de résistance or a splodgy afterthought, and we’re here to steer you towards the former.
Finding the Right Shape and Shades for the Nose
First, let’s talk silhouette. The nose isn’t just a slapdash of ebony; it’s a cocktail of shades that you, the artist, get to mix. Your palette will need a base of grey – imagine a cloudy day put into a pot of paint. From there, dream up the realm of shadowy glazes because your furry friend’s nose has more contours than your favorite coffee mug.
Glazing and Texturing Techniques for a Realistic Look
The trick is in the layering. Each swipe of your brush adds another whisper of realism, each glaze another sentence in the story of your portrait. A glaze, my fellow creators, is a thin, transparent layer that adjusts the tone without a cover-up. It’s like a sheer curtain fluttering over a window, changing how the light dances in the room.
Adding Dimension with Highlights and Markings
Once those shadows have laid the groundwork, it’s time for highlights – those little glimmers of light that embody the wet, shiny snout. Think of these as strategic strikes of brilliance, right where the light loves to linger. And let’s not forget about markings. A dash of pink here, a speckle there; intricate details that tell a story of sunny days with tennis balls and afternoons spent with noses in the flowerbeds.
| Feature | Color Technique | Brush Tip |
|---|---|---|
| Base | Various greys, mix to match | Medium round for smooth coverage |
| Shadows | Glazes of darker hue | Small round for precision |
| Texture | Pointillism with lighter tones | Stiff brushes for a speckled effect |
| Highlights | Bright, reflective areas | Thin liner for razor-sharp light points |
| Markings | Subtle pink, as needed | Fine tip for delicate lines |
There you have it, a beginner’s guide to painting dogs that can make even the coldest cat person’s heart melt. Painting a dog’s nose can be complex, but it’s nothing a little patience and practice can’t conquer. Your newly acquired knowledge of acrylic painting tutorials for pets is your roadmap to nose nirvana. So, ready the canvas and let your brushes bring to life that adorable snout with all the love it deserves.
Top Tips for Creating Realistic Dog Paintings
Welcome back, diligent artist! You’re on your way to master the incredible way of capturing your furry friends on canvas. Before diving into the nitty-gritty of acrylic painting tips for pets, let’s ensure your brush is ready to wag as joyfully as a puppy’s tail!
Ensuring Accuracy in Form and Key Features
You might think your dog’s endearing gaze is all that matters but nailing the form and features of your canine companion is crucial for that wag-worthy portrait. You need an eye for detail sharper than a hound’s nose – start with those quality references you sniffed out. Good boy!
Adjusting Tones with Black and White Paint
When it comes to painting techniques for dogs, it’s not just about slapping down some brown and calling it a day. A truly top-dog artist knows the magic is in the tones. The secret? Use black and white to add depth to your pupper’s fur. It’s about creating the illusion of every strand, every weave of undercoat, every whisper of highlight. Yes, it’s nuanced. Yes, it’s meticulous. And yes, it is absolutely worth it.
Enhancing Realism with Attention to Eyes and Nose
You’ve probably heard that the eyes are the windows to the soul? Well, in the world of acrylic painting tutorials, they’re also the key to a realistic dog portrait. Pour that love and detail into capturing the soulful eyes and that all-knowing nose, and watch as your canine subject’s personality leaps off the canvas and licks the face of reality—figuratively, of course.
Remember, your goal is to make viewers want to reach out and pet the painting, to feel the warmth, the life, and the boundless enthusiasm contained within. With these tips and your creativity, your next dog acrylic painting will not just fetch compliments but also steal hearts. Happy painting!
Conclusion
Through the brushstrokes of your journey, your fur-covered canvases have turned into a stunning gallery of glossy coats and expressive gazes. It’s about capturing more than just a likeness—it’s about bottling the very essence of what makes each dog unique. High-quality reference photos, suitable brush selections, and a palette that faithfully represents your canine subject’s coat are the cornerstones of your artistry in acrylic animal art tutorials.
Recapping the Essentials for Aspiring Canine Artists
Your toolkit—laden with step-by-step dog painting guides—is now well equipped with brushes of all sizes, and your color-mixing prowess can create every hue from the golden sheen of a retriever to the shadowed tresses of a shaggy sheepdog. It’s these elements, finely tuned, that lay the foundation for creating realistic dog paintings with an authentic soul to each one. Remember, the essence of true artistry lies in the details.
Sharing Your Finished Works and Continuing Your Artistic Journey
Unleash your creativity into the world by sharing your finished masterpieces. Engage with the vibrant community of artists who find solace and joy in every muzzle and paw print. Tag your creations on platforms like Instagram or curate a collection on Pinterest. Don’t forget the power of YouTube for connecting with fellow painters—visualize your process and impart your knowledge, because art is not just about creation; it’s also about connection. As you continue to hone your skills, each painting becomes a stepping stone to greater heights in capturing the vivacious spirit of man’s best friend.
FAQ
What are the best acrylic painting tutorials for beginners wanting to paint dogs?
Look for tutorials that break down the process into simple steps. Online platforms like YouTube offer a variety of step-by-step guides that cater specifically to different skill levels and styles.
Can you give a quick guide to painting dogs with acrylics?
Start with a good sketch, select appropriate brushes for fur textures, mix basic colors for your dog’s coat, and pay close attention to the eyes and nose to bring your painting to life. Progress step-by-step, allowing layers to dry and refining details as you go.
Why are dogs considered a unique challenge for acrylic artists?
Dogs have a vast variety of fur types, colors, and textures that can be challenging to replicate. Capturing their expressive features and personality also requires careful observation and skill.
How should I develop a game plan before painting my canine subject?
Study your reference photos closely, considering lighting, angle, and the unique features of your dog. Plan your color palette and decide on which brushes will best represent the textures you’re aiming to portray.
What should I look for in a reference photo for painting dogs?
Aim for high-quality photos with natural lighting and fine details visible. The pose should be natural, and the photo should be taken at the dog’s eye level to prevent distortion.
What techniques can be used to capture various fur textures in acrylic?
Employ different brushes—like filbert or round—and techniques like dry brushing, glazing, or scumbling, adjusting your strokes according to the length and curliness of the fur.
What are some basic acrylic color mixes to start with for dog portraits?
A basic palette includes Titanium White, Carbon Black, Burnt Sienna, Burnt Umber, and Yellow Ochre. The right color mix will depend on your dog’s coat color and the lighting in your reference photo.
Why are eyes so important in dog portraits, and how can they be made realistic?
Eyes are the windows to the soul and capture the dog’s personality. Create realism with accurate shapes, shades, and highlights, using fine brushes for details and reflections.
How do you paint a dog’s nose to look realistic in acrylic?
Start with a grey base and build up texture with different values. Use glazing for the wet look and add highlights to indicate light reflection for a more three-dimensional effect.
What are your top tips for creating realistic acrylic dog paintings?
Focus on achieving accurate tones and proportions, invest time in detailing the eyes and nose, and be patient with layering to build depth and texture.
How do you ensure accuracy in form and key features in a dog painting?
Measure proportions carefully from your reference, observe the direction of fur growth, and make note of any specific markings or color patterns that are unique to that dog.
How can I share my finished dog paintings with others?
Share your work on social media platforms, online galleries, or local art shows. Use hashtags to reach a wider audience and ask for feedback to help you grow as an artist.
Source Links
- https://stepbysteppainting.net/2022/08/24/pet-portraits-how-to-paint-your-pet-online-acrylic-tutorial/
- https://studiowildlife.com/how-to-paint-a-dog-in-acrylics-top-tips-for-realistic-pet-portraits/
- https://theartsherpa.com/videos/1279/realistic-black-dog-beginners-learn-to-paint-acrylic-tutorial-step-by-step-baq21
This post contains affiliate links.