
This post contains affiliate links.
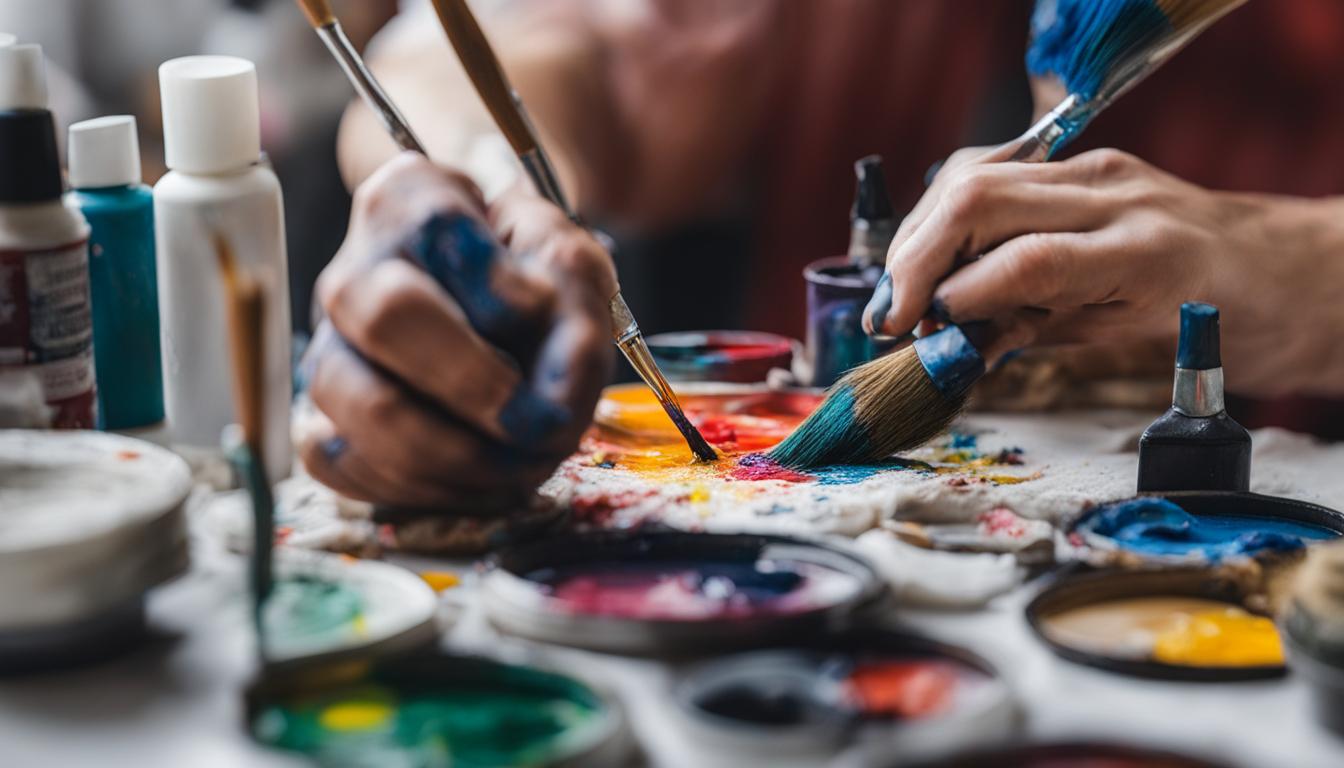
“Every artist was first an amateur,” Emerson once stated, and in your journey with acrylics, each mistake is merely a step towards mastery. Whether you’re dabbling in brushstrokes for the first time or have a portfolio bursting with canvases, fixing acrylic painting mistakes becomes an art in itself. If your latest piece has taken an unexpected detour, fear not. Artistic blunders aren’t just remedies waiting to happen; they’re opportunities to evolve your craft. From acrylic painting error correction to clever cover-ups, let’s dive into the transformative world of revision — because knowing how to fix acrylic painting mishaps is your secret superpower.
Draw Paint Academy’s very own Dan Scott whispers a truth – perfection in painting is a myth, and the real beauty lies in the correction of errors. Painting is a dialogue, a continuous conversation filled with queries and replies. As you stand before your canvas, listening to its story unfold, sometimes the narrative takes an unexpected turn. This is where your prowess at fixing acrylic painting mistakes comes into play — turning those twisted plot lines into a tale of triumph. Through honed artist tips for fixing acrylic mistakes, each error becomes a whisper of wisdom from your creative soul.
Key Takeaways
- Recognize that making mistakes is inherent to the artistic process and can be pivotal to growth.
- Learn the art of pausing and evaluating errors to devise a tailored fix, avoiding hasty decisions that could exacerbate the issue.
- Gain insights on the importance of a methodical approach to acrylic painting error correction.
- Discover resources to improve your correction techniques, preparing you for any artistic challenge.
- Understand Dan Scott’s advice on the significance of knowing when to start afresh and when to correct existing problems.
Understanding Acrylic’s Forgiving Nature
Have you ever found yourself staring at your canvas, bemoaning what could only be described as an ‘oopsie’ in vibrant hues? Fear not, intrepid artist, for acrylic paint is essentially the superhero of mediums, poised to rescue you from the clutches of such despair. Its versatility is unmatched, allowing for ample experimentation without permanent dismay.
The Versatility of Acrylic Paint
With acrylics, you wield the power to undo the ‘un-undoable.’ A dab here, a swipe there, and voilà! Your acrylic painting damage repair mission is well underway. These paints dry quicker than a New York minute, offering you the luxury of layering, modifying, and perfecting without the wait. Whether it’s glazing over a misjudged stroke or completely overriding a color catastrophe, acrylics are your trusty sidekick.
Why Acrylic is Ideal for Beginners
Hold tight, beginners; your fear of the irreversible is about to vanish into thin air. Acrylic paint is the forgiving friend who doesn’t hold grudges. Make a blunder? No problem. Acrylics understand that everyone has to start somewhere, and they patiently stand by as you learn the ropes of DIY acrylic painting mistake repair. With these paints, those all-too-common acrylic painting errors are just pit-stops on your road to masterpiece ville.
- Quick-drying for rapid corrections
- Layers effortlessly for dynamic changes
- Durable after drying, for longevity
The next time you mix up your mauves and magentas, remember, with acrylics, you’ve got this. They’re not just paints; they’re your creative safety net.
Initial Steps to Manage Acrylic Painting Errors
You’ve dipped your brushes into a vibrant palette, your canvas eagerly awaits, but lo and behold, there’s an acrylic mistake staring back at you. Fret not, fellow artist, because like a true maestro at troubleshooting acrylic painting mistakes, your next moves are critical. Before you embark on a journey to rectify this little hiccup, halt! Let’s make sure that paint is as dry as your humor on a Monday morning.

The Importance of Allowing Paint to Dry
Dan Scott, the sage of acrylics, preaches patience is not just a virtue but a necessity when addressing those pesky acrylic painting mistakes. It’s like baking a cake; you wouldn’t slather the frosting on while it’s still warm and squishy, would you? Similarly, let the paint settle. Trust us; it’s worth the wait.
Techniques for Quick Drying
If the idea of watching paint dry makes you feel like you’re mastering the art of time travel to the age of fossils, there’s good news! Accelerate the process by kissing the paint with some warm air from a hairdryer or give it ample breathing space in a well-ventilated area. It’s time to harness the power of the elements and have you back on track, pronto!
Remember, your masterpiece-in-progress deserves the TLC it takes to bring it to life sans reminders of little oopsies. Every brushstroke is a step closer to perfection—or at least, a perfect lesson in the art of acrylic recovery.
Common Acrylic Painting Errors Fixes
So, you’ve hit a snag with your latest masterpiece? Don’t sweat it! Even the most visionary artists have faced the dreaded acrylic painting mishaps. But worry not, as the solutions for artist mistakes are within reach. It’s all about embracing those blunders with a spirit of ingenuity and a few savvy tricks up your sleeve.
“Every artist dips his brush in his own soul, and paints his own nature into his pictures.” — Henry Ward Beecher
Tackling techniques that shed light on how to fix acrylic painting mishaps might just be your next big breakthrough. Say goodbye to the days when a little slip of the hand could mean a canvas catastrophe. Instead, arm yourself with these insider tips for acrylic painting mistakes.
Drawing Disasters: Oops, did your sketch go awry? Whip out a grid to realign perspectives. Photoshop or a classic overhead projector can be your best pals for tracing and scaling exact proportions.
- Wobbly edges? Time for some edge control. A steady hand and a masking tape can guide your brush to crisp perfection.
- Balance is key! If your values are out of whack, squint at your painting. Yes, squint. Highs too high? Lows too low? Adjust with glazes or bold strokes.
- Color conundrums can be deceiving. Snap a pic, convert it to grayscale, and compare. Not matching? Adjust hue and saturation until it clicks.
- When light sources play tricks on your canvas, create a mini mock-up. Shine a light, observe real shadows, and replicate with confidence.
Keep in mind, the most resilient part of your artist toolkit is your attitude. With these solutions for artist mistakes, every error is merely a stepping stone on your path to greatness. Now, let’s turn those ‘oops’ moments into ‘aha’ revelations!
Fixing Acrylic Painting Mistakes: Tips & Solutions
Ah, the colorful journey of acrylic painting – as vibrant and forgiving as it is, occasionally it leads us to the land of ‘Oops’ and ‘Oh no’. But fear not, intrepid artist, as there are many paths back to the masterpiece you envisioned. Correcting acrylic painting errors doesn’t have to be a trip through a funhouse mirror of despair. Armed with the right acrylic painting mistake solutions and some nifty tips for correcting acrylic painting errors, you’ll have your artwork back on track in no time.
Correcting Mistakes with Lighter Colors
When you’ve accidentally painted your sky a smidge too stormy or rendered your sunsets a little overzealous, a straightforward strategy is your best ally. Lighter colors can act as your art’s eraser, softly covering up the brush strokes of regret. This method does wonders for both minor blunders and the more sizeable artistic oopsies that need more than just a spot treatment.
When to Use a White Overcoat
Think of a white overcoat as the great equalizer. When certain areas of your painting need to be completely reset, applying a white overcoat can neutralize the canvas. It’s like turning back time on particular sections of your painting while leaving others untouched, ready for you to reattempt that once-elusive perfect shade.

Remember, light colors are forgiving and can easily blend into their surroundings. Here’s a visual to illustrate when and how you might use lighter shades and the trusty white overcoat in your acrylic error-fixing journey:
| Error Type | Correction with Lighter Colors | White Overcoat Applicability |
|---|---|---|
| Minor Smudge | Layer similar light color until smudge blends away | Not necessary unless area is dark |
| Color Too Dark | Gradually brighten with incrementally lighter layers | Consider if drastic tone shift needed |
| Large Area Overhaul | Light colors to incrementally shift palette | Ideal for resetting large areas before repainting |
| Wrong Color Altogether | May require several light layers for correction | Best option for starting afresh with correct color |
Now that you’re armed with these expert tips for correcting acrylic painting errors, go forth and conquer those canvas conundrums with a renewed sense of hope and a pot of white paint at the ready!
Troubleshooting Smudges and Smears
Oh, you’ve been there, haven’t you? One minute you’re creating a stroke of genius on your canvas, and the next, an unintentional smudge or smear threatens to derail your entire piece. But don’t worry, your acrylic masterpiece is not doomed; here’s the lowdown on fixing acrylic painting mistakes when it comes to those pesky smudges and smears.
Firstly, take a chill pill and give that smear a little time out; let it dry. Your next move is a stealthy one, where you engage in a cover-up operation by gently painting over it with the exact background color. Think of it as your little secret—a do-over where the smear once lived. Voila! A seamless fix to what was one of the common acrylic painting mistakes.
Now, for those of you who live on the edge and prefer dealing with matters more immediately, you’ll want to lightly scrape away the offending smear before it has time to settle in. Remember, gentle is the operative word here. You wouldn’t want to go from “Oops, a little smear” to “Oh no, what have I done?”
“Acrylic painting is as much about forgiving as it is about creating. Embrace the blunders, for they make your story as a creator whole.” — A Wise Artist
But let’s say you’re a wildcard who likes to experiment. Why not turn that mistake into an impromptu texture or a new element in your painting? Sometimes those happy little accidents aren’t just mistakes; they’re opportunities in disguise. And there you have it—you’ve gone from acrylic painting error fixes to art innovator like a pro.
Keep these tips in your art arsenal, and the next time smudges or smears try to cramp your style, you’ll be ready. And remember, fixing acrylic painting mistakes is just another brushstroke in the grand canvas of learning.
Handling Wrong Color Accidents
So, you’ve dipped into the wrong color on your palette and streaked it across your near-perfect acrylic masterpiece. Before you call it abstract art and throw in the towel, let’s take a dive into averting this chromatic chaos. Here’s the lowdown on how to caress those colors back into compliance.
Immediate Actions for Fresh Mistakes
If you’ve caught the rogue hue before it’s set in stone (or rather, dried on canvas), you’re in what artists might call the “sweet spot” for mistake management. There’s no shame in a slip-up; it’s an opportunity to blend in—or blend away—your acrylic painting mistakes while the paint is still wet. You have two choices here, my friend: a swift swipe with a damp cloth to remove the mess or a valiant attempt at color mixing on-canvas to turn that oops into a eureka.

Long-Term Solutions for Dried Paint
Now, if time has elapsed and your paint mishap has dried into a rather permanent feature, fear not. It’s time to whip out your artist’s cap savvy and slap on another layer of paint. However, tread lightly, as the goal here is to fix—not further complicate—the common acrylic painting errors. Fixes come in many forms, and a strategic cover-up can be your savior. Just remember: you’re aiming for acrylic harmony, not a paint-cake catastrophe.
| Mistake Type | Immediate Fix | Post-Drying Fix |
|---|---|---|
| Unwelcome Color Streak | Wipe off with damp cloth | Overpaint with correct color |
| Color Blending Boo-boo | Blend to correct while wet | Glaze with transparent color |
| Edge Overrun | Feather out edges with water | Define edges with new layer |
Remember, art is not about stressing over the errant splash, but about the journey in finding how to fix acrylic painting mishaps. Your creativity is not defined by perfection but by your ability to adapt and overcome the unexpected textures of your artistic path.
Acrylic Painting Damage Repair: The Denatured Alcohol Trick
Discovered a smudge or a gloomy blob lurking on your radiant acrylic masterpiece? Before you dub it a catastrophic misstep, hold on to your brushes – because the denatured alcohol trick might just be your art-saving grace. Yes, for those do-it-yourself maestros eager to correct their paint’s path, this method is touted as a lean, mean, acrylic-correcting scheme.
How to Use Denatured Alcohol
Armed with just a dab of denatured alcohol, you can tackle those pesky paint particles head-on. Simply moisten a cotton swab with this potent potion and gently coax the unwanted acrylic away. But go easy there – too much zeal, and you might go from acrylic painting error correction to ‘Oh no, I’ve erased half my canvas!’
Sanding Techniques for Surface Preparation
Once the offending pigment has made its gracious exit, it’s time to smooth things over – quite literally. Grab your finest sandpaper, and with the tender care of a sculptor, prep your canvas for its new coat. And voilà! You are now ready to lay down those colors with renewed confidence.
| Action | Tools Needed | Expected Outcome |
|---|---|---|
| Apply Denatured Alcohol | Cotton Swabs, Denatured Alcohol | Removal of Unwanted Acrylic Paint |
| Sanding | Fine-grit Sandpaper | Smooth Canvas Ready for Paint |
| Repainting | Acrylic Paints, Brushes | Restored Section Matches Original |
In your quest for acrylic painting damage repair, remember: while you do wield the power to edit and enhance, the most enlightened artists forge ahead with both boldness and a light touch. So, recalibrate your canvas with savvy and let every stroke count as you beautify those blemishes into brilliant artistry.
Optimizing Layering in Acrylic Paint Correction
Troubleshooting acrylic painting mistakes can often feel like tiptoeing through a minefield of ‘happy little accidents.’ But fear not! The right layering technique is your trusty ally, turning those oops moments into a chorus of oohs and aahs. So, let your canvas sing with seamless blends and pristine finishes as we dive into the art of layering corrections.
Benefits of Thin Layer Application
Now, why tread lightly with thin layers, you ask? Imagine you’re a maestro conducting an orchestra of colors. Each thin layer is a harmonious note that blends into a symphony without overwhelming your audience. This finesse allows for controlled opacity and superb blending, giving you the power to erase those common acrylic painting errors with a magician’s grace.
Understanding Artist-Grade Titanium White
When faced with a particularly stubborn painting blunder, your knight in shining armor is often artist-grade titanium white. This pigment is praised for its unparalleled opacity, which means it can conquer any stray streaks in a single coat. It offers acrylic painting mistake solutions by preparing a clean canvas for your colors to bloom once more.
| Layering Technique | Benefits | Perfect For |
|---|---|---|
| Glazing with Thin Layers | Achieves depth and luminosity | Subtle color shifts and glow effects |
| Titanium White Underpainting | Offers a fresh start with strong coverage | Covering darker tones and misapplied colors |
| Scumbling | Creates a textured, nuanced surface | Adding complexity and rich textures |
| Dry Brushing | Deposits paint only on the texture’s peaks | Highlighting and enhancing texture |
Remember, in the world of acrylics, errors are just pit stops on the journey to your masterpiece. With the right techniques and a little patience, the solutions to common acrylic painting errors are right at the tip of your brush. Go ahead, wield your tools with the confidence of a seasoned artist, and let those mistakes fear your newfound correction prowess!
DIY Acrylic Painting Mistake Repair: A Step-by-Step Guide
So, you’ve hit a snag in your masterpiece, and now you’re staring down at a veritable Bermuda Triangle on your canvas. Not to worry! With the right approach, you can navigate through the choppy waters of diy acrylic painting mistake repair. Let’s roll up our sleeves and dive into the step-by-step guide to fixing those pesky acrylic painting mishaps.
First things first, take a breather. Rash decisions might turn a small blip into a full-blown abstract disaster. Once you’re ready, approach the hiccup with the patience of a monk and the precision of a surgeon.
Remember, in the realm of art, your so-called mess-up might be the unexpected twist that propels your work from good to gasp-worthy.
- Assess the problem area—Is it a rogue streak of blue in your sunset sky? Or perhaps a scale too shiny on your mermaid muse?
- If the paint’s still wet, a damp cloth could be your BFF. Gently dab, don’t rub, to lift unwanted paint.
- For those oops moments that have dried into history, it’s palette knife time. Carefully scrape off the excess layers. A steady hand and a light touch are your allies here.
- If the mistake has escalated to code red, you might need to wipe the slate clean. Remember, an artist is a resilient creature. Starting over can sometimes lead to results even more magnificent than the original plan!
And here’s a little table of tricks to help you determine your next move:
| Mistake Type | Immediate Solutions | Long-term Fixes |
|---|---|---|
| Wet Paint Smudge | Lightly dab with a clean cloth | Overlay with background color when dry |
| Dried Paint Goof | Scrape off with the palette knife | Layer with correct color or texture |
| Color Calamity | Blend with adjacent colors | Apply an isolation layer, then repaint |
| Overworked Area | Light sanding (for the brave) | Apply thin layers to build up texture |
Each step you take is a brushstroke in your journey as an artist, including those that require a bit of tweaking. So wield your tools with confidence and embrace the paths to solutions for artist mistakes as part of the adventure.
With this guide, you’re now equipped to turn those “oops” into “oohs” and “aahs”. So go forth and paint with the boldness of a DIY acrylic warrior. Your canvas is waiting!
Advanced Techniques for Correcting Paint Opacity Issues
Imagine you’re at your canvas, and your artwork’s veneer is just not playing nice; it’s too transparent where you crave richness or perhaps too opaque where delicacy was the goal. If fixing acrylic painting mistakes along these lines is what you seek, fret not, for your quest ends with the strategic application of isolation coats. Not only do they fine-tune paint opacity, but they also act as peacekeepers between your acrylic masterpiece and its protective varnish, yielding a layer that’s fortress-strong yet can vanish without leaving a trace during conservation work. It’s your artwork’s secret service detail—it’s there but never takes the spotlight.

But what is an isolation coat, you ask? It’s a clear, non-removable layer that smooths out surface irregularities and creates a uniform sheen. So, let’s roll up those sleeves and explore this cloak of invisibility for suburban Picassos.
The Role of Isolation Coats
Think of an isolation coat as your project’s personal security guard, keeping the unwanted elements at bay while ensuring the artwork beneath remains untarnished. It’s a critical player in artist tips for fixing acrylic mistakes, separating the paint from the varnish, and, if needed, allowing for its easy removal. Acrylic painting error fixes are a breeze when you’ve got this savvy technique up your sleeve.
Mixing and Applying an Isolation Coat
You’ve identified the problem, now let’s mix up some magic with GOLDEN Soft Gel Gloss or a high-quality pre-mixed isolation coat. Here’s where you tap into those alchemist vibes—measuring, mixing, and preparing your concoction before applying it with the precision of a heart surgeon. Results? A painting so durable, you’d think it was wearing armor.
| Material | Type | Ratio (Gel to Water) | Application Tips |
|---|---|---|---|
| GOLDEN Soft Gel Gloss | Homemade | 2:1 | Apply with a soft brush in even coats. |
| Pre-mixed Isolation Coat | Ready-to-use | N/A | Gently stir, do not shake, to avoid bubbles. |
| Finishing Varnish | Subsequent layer | N/A | Apply after isolation coat has fully dried. |
Just ensure each coat has dried thoroughly before you add another, avoiding the dreaded “acrylic painting error fixes” becoming errors themselves. Yes, patience is a virtue, and in this case, your best ally. To skillfully accomplish these fixing acrylic painting mistakes, precision and attention are your guiding stars.
Tips for Correcting Acrylic Painting Errors with Textured Effects
Ever hit that bumpy road on your canvas, where textures went askew or your brush betrayed you? You’re not alone. Fixing acrylic painting mistakes can be a textured tale of trials and triumphs. But fear not—whether you’re dealing with an accidental impasto or unintended rough spot, certain techniques are your DIY heroes for acrylic painting damage repair.
Why Texture Matters in Repairs
Before diving into the how-to portion of this textured saga, let’s touch on the why. Texture isn’t just about looking touchable—it’s integral to the visual depth of your masterpiece. When your painting’s texture goes rogue, it’s more than a flub—it’s a tactile bug, convincing views that something’s amiss. Repairing texture is akin to stealthily fixing a rip in the fabric of acrylic harmony. It’s about those tactile subtleties that give your work life, conveying intention with each subtle ridge or valley.
Employing the ‘Tonking’ Technique
In the grand mixing palette of painting techniques, one traditional method stands out for its textural finesse—the ‘tonking’ technique. Traditionally an oil painter’s secret weapon, it can be your accomplice in the acrylic realm too. But how, you ask?
- Find a sacrificial paper, nothing glossy—think newsprint or a paper towel.
- Approach your dreaded texture mishap and, like a ninja, lay the paper onto the wet, painted surface.
- Apply gentle, even pressure, just enough to say “I know you’re there,” and then lift it off. Presto!
What this cunning technique does is lift excess paint (bye-bye overzealous brushwork) and smooth out your texture without smudging the area into oblivion.
Remember to be as gentle as an art conservator with a Q-tip. This way, you won’t just be fixing a mistake; you’ll be finessing your way back to textural integrity, ensuring your desired effects shine without the tell-tale signs of a touch-up.
| Technique | Use Case | Best For |
|---|---|---|
| Tonking | Excess oil and evening texture | Large, troubled areas |
| Sanding | Smoothing a rough patch | Preparing for a rework |
| Layering | Covering up color mistakes | Thin imperfections |
Texture matters, and it often sings or whispers silently in the background. Armed with these tricks, you’re well on your way to not only fixing those pesky imperfections but also elevating your acrylic oeuvre with the kind of tactility that beckons viewers to look and touch. Whether you’re erasing a small whoopsie or retexturing an entire section, you’re the maestro of mediums, the fixer of faux pas. Go ahead, wield that brush (or paper) with confidence!
How to Fix Acrylic Painting Mishaps without Damaging Canvas Toothy
Alright, let’s dive into the crux of safeguarding the precious canvas tooth while you troubleshoot those acrylic slip-ups. No doubt, the canvas’s texture is your sidekick in this art adventure — it helps your streaks stick and your gestures grip. But when mishaps happen (and they will), remember the canvas has teeth too, metaphorically speaking. They need TLC if they’re to help you spin your next masterpiece.
Identifying Canvas Tooth Loss
Let’s get up close and personal with your canvas. Detecting canvas tooth loss is a bit like playing art detective — you’re looking for signs that your painting surface has become as smooth as a jazz tune, which is to say, too smooth. It happens when too much brushing or layering lays down the grind. But fear not, you can catch it early. Keep a keen eye on the texture; is it retreating? Is your paint sliding into oblivion? If so, you’ve got tooth loss. Now’s the time for a gentle touch.
Preventing Tooth Loss in Corrections
You’ve identified the issue; it’s time to tread lightly with corrective measures. Think of it as surgery for painting — no heavy hands, just precise, considerate gestures. Use brushes softer than a whisper, and apply layers that are lighter than air. This isn’t the time for grand, sweeping motions — instead, focus on the finesse. Like a culinary maestro ensuring every spice sings, ensure every brushstroke counts without overwhelming the canvas’s delicate texture.
And remember, the aim here is twofold: you’re correcting an error and preserving that gritty character of your canvas. A bit of a balancing act, eh? But you’ve got this. With a dash of patience and a sprinkle of expertise, you’re well on your way to becoming a maestro of acrylic painting error correction.

Armed with these tips for correcting acrylic painting errors, you’re prepared to face those inevitable blips head-on. And hey, this is all part of the grand tapestry of your artistic journey. So next time your canvas tooth is in peril, rescue it with the grace of an art ninja — stealthy, swift, and oh-so-smart. Happy painting!
Acrylic Painting Mistake Solutions for Overworked Areas
Have you ever found yourself in that moment, where your eyes squint at the canvas, seeing an area caked with layers of acrylic paint? Your masterpiece suddenly feels like a mud pie. But before you declare a Code Red, let’s walk through the ‘what to do next’ in rescuing those overworked sections—the areas that probably say “I’ve had enough!”
First and foremost, you’re not alone. Finding solutions for artist mistakes, specifically how to fix acrylic painting mishaps, is a part of mastering your craft. Gentle scraping to the rescue! Gradually scrape away excess layers to reveal a more workable surface, you’re like an archaeologist discovering an ancient city under a desert. Be cautious not to turn it into a paint excavation site though.
But let’s say your artwork is too far gone for mere scraping. Enter the powerful isolation coat—your acrylic painting’s new BFF. This clear magician will seal what’s already there, offering you a fresh start without further distress to the underpainting. Think of it as a reset button, giving you another shot at achieving your vision.
Now, how about we put your newfound knowledge into a visual table of common fixes for common acrylic painting errors? Behold: Your acrylic SOS guide!
| Common Mistake | Visible Problem | Fix Strategy |
|---|---|---|
| Overworked Painting | Muddy Appearance, Loss of Detail | Scrape away layers, apply isolation coat if necessary |
| Heavy Brushstrokes | Thick Texture, Obscured Imagery | Gently sand the area, then repaint |
| Over-Saturated Colors | Too Intense, Distracting from Composition | Neutralize with opposite color on the color wheel, then glaze with desired hue |
| Dull, Lifeless Areas | Lacks Contrast, Depth | Apply a glaze of vibrant color or increase tonal contrast |
Remember these tips next time your acrylic journey hits a rough patch. And the beauty of acrylics lies in their flexibility. A mishap today could pave the path to a masterpiece tomorrow. Every error is an opportunity to learn, grow, and sometimes, create something even better than you intended. Happy correcting!
The Importance of Embracing Mistakes as Learning Opportunities
As an artist working with acrylics, you’ve likely had your share of “happy accidents,” a term made famous by the beloved painter Bob Ross. It’s easy to view mistakes as setbacks, but what if you saw them as invaluable lessons instead? This mindset can be game-changing for your artistic journey.
Drawing Inspiration from Bob Ross and Other Artists
Bob Ross is a name synonymous with joyous creativity and the beauty of turning blunders into wonders. But he’s not alone. History is replete with artists who have made triumphs out of trials. Imagine the countless masterpieces that were once just a palette of “oops” moments. Let their stories remind you that each time acrylic lands awry on your canvas, you’re in excellent company.
The Artistic Growth from Correcting Mistakes
Every brushstroke gone astray is an opportunity for growth. When you correct an acrylic painting mistake, you’re developing skills that go beyond the canvas. You’re learning persistence, patience, and creative problem-solving. So next time a blob of paint mocks your artistic intent, think of it as a challenge to your ingenuity, a chance to flex those creative muscles and evolve as an artist.
| Mistake | Learning Opportunity | Artist Tips for Fixing |
|---|---|---|
| Wrong Color Applied | Better color understanding | Overlay correct color after drying |
| Blurred Edges | Sharpening attention to detail | Refine using a clean brush and a steady hand |
| Overworked Area | Knowing when to stop | Apply isolation coat; restart with fresh perspective |
| Canvas Damage | Proper material treatment | Gently sand affected area; prime before repainting |
Remember, dear artist, your erstwhile “acrylic painting mistakes” are but stepping stones to your masterpiece. Embrace them, learn from them, and let them guide you to your next vivid vision. What masterpiece will your mistakes lead you to create?
Conclusion
So you’ve made a few slip-ups with your brush—relax, it isn’t the apocalypse for your acrylic masterpiece. In fact, knowing how to fix acrylic painting mishaps becomes a defining part of your artistry. Each error you encounter and amend enriches your painter’s toolkit, ensuring that the next strokes you lay down are informed by more than just theory but seasoned experience. Whether it’s a smudge that turned your serene seascape a bit stormy or a hue that rebelled against your envisioned palette, deploying the right acrylic painting error fixes can turn panic into prowess.
Your journey in acrylics is bound to have its ‘oops’ moments, and that’s perfectly alright. After all, a pristine canvas is just a space waiting for a story—with all its twists and turns. The treasure trove of tips for acrylic painting mistakes you’ve accumulated will guide your hand, sometimes leading you to unexpected yet welcome outcomes. Figuring out how to reclaim areas that seemed lost to unintended splashes or unwelcomed textures adds layers not only to your work but to your growth as an artist.
Remember, a little stumble may just help you find a new rhythm. While ‘happy accidents’ as Bob Ross coined, aren’t the goal, they are often the stepping stones to greater artistic feats. Every misstep is a lesson in disguise, pushing you toward developing a keener eye and a steadier hand. Keep your head high and your brush ready; with these acrylic painting error fixes at your disposal, each new piece becomes an opportunity to demonstrate just how resilient and inventive you can be as an artist. Now, ready your palette, and let’s turn those mishaps into milestones!
FAQ
What makes acrylic paint a forgiving medium for artists?
Is it necessary to let acrylic paint dry before fixing a mistake?
What are some common errors in acrylic painting, and how can they be corrected?
How can I fix a smudge or smear in my acrylic painting?
What should I do if I’ve applied the wrong color in my acrylic painting?
Can denatured alcohol be used to fix mistakes in an acrylic painting?
How should I prep a painted surface for repainting after making a mistake?
Why should I use thin layers when correcting parts of my acrylic painting?
What is the benefit of using artist-grade titanium white in corrections?
How can I ensure I am not overworking an area when correcting mistakes?
What role do isolation coats play in correcting acrylic paintings?
How do I maintain or repair the texture in my acrylic painting during corrections?
How can I fix a mishap without damaging the canvas tooth?
What approach should I take towards overworked areas in my acrylic painting?
Why is embracing mistakes important for an artist’s growth?
Source Links
- https://www.theartstory.org/movement/pop-art/
- https://magazine.artland.com/art-movement-pop-art/
- https://paintwithlovejoy.medium.com/the-evolution-of-acrylic-paint-1254389ed8a1
This post contains affiliate links.
[…] the lovers of texture, impasto is your canvas-shaping companion. This is where you let your stiff brush or palette knife share your […]