
This post contains affiliate links.
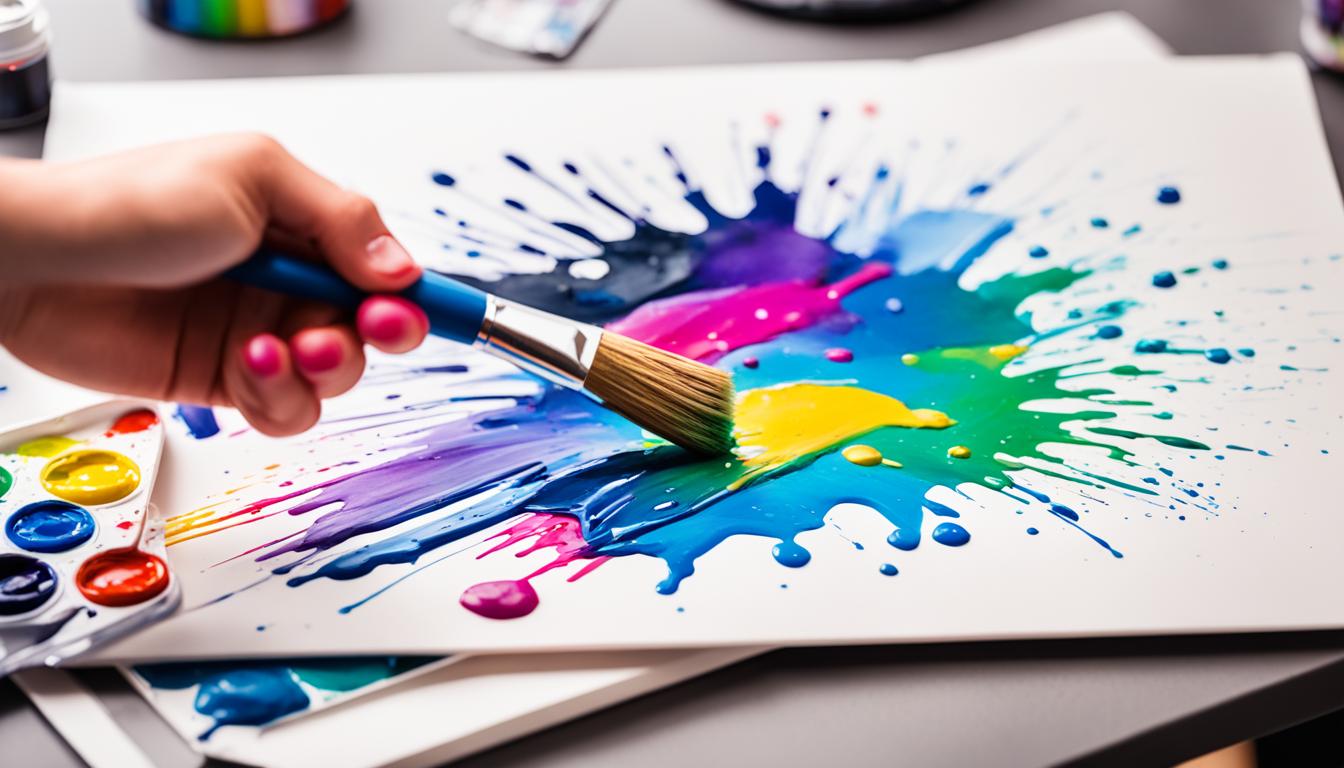
Ever scrolled through social media, where imagery is king, and found yourself stopping, mouth agape, at a riveting piece of acrylic art? You can almost feel the texture and the burst of colors, right? Now, imagine that being your creation stopping thumbs in a frenzied scroll. It’s not just about the brush strokes you lay on the canvas; it’s also the savvy acrylic painting photography tips that catapult your work from hidden studio gems to social media sensations.
You already wield a painter’s palette like a sorcerer’s wand, but the magic doesn’t end there. With top-tier social media photography for artists, you’re opening a digital exhibit for the world to witness. Let’s embark on this visual voyage, ensuring you know exactly how to photograph your acrylic paintings for social media success. First, pour yourself a fresh cup of inspiration as we lay out the groundwork for transforming pixels into a painterly prowess.
Painting Photography Tips Key Takeaways
- Embrace photography as an essential tool in your creative arsenal for successful online representation.
- Learn from pros like Howard Sherman and Arthur Brouthers for insights on presenting your acrylic pieces on Instagram.
- Discover the significance of a well-lit and keenly photographed artwork for professional online impact.
- Prepare to navigate the digital landscape with high-quality images that make show juries and clients take notice.
- Acquire tips to set the perfect scene, achieving clarity and capturing the true essence of your acrylic paintings.
- Understand the key roles of camera settings, lighting, and post-production to polish for social media stardom.
The Impact of Stellar Photography on Your Art’s First Impression
As an acrylic artist striving to stand out in the digital sea, your success on social media platforms can be significantly affected by how well your acrylic paintings are photographed. Before diving into the nuances of creating captivating digital portfolios, understand the irreplaceable value of presenting your work through superior quality images that captivate and speak volumes to viewers and potential customers.
Understanding the Importance of High-Quality Images
Imagine your artwork catching the discerning eye of gallery directors or show juries; that’s the power of high-resolution, clear acrylic painting images in the realm of social media. It’s not just about color balance or avoiding shadows—every pixel should convey your expertise, broadening your reach and showcasing your acrylic art on social media with the prestige it deserves.
There’s a less talked about, yet crucial aspect of sharing your art online—misrepresentation due to poor photography is the nemesis you didn’t know you had. While the details in your brushstrokes and the vibrancy of your palette might be evident in person, on screens, it’s the quality of the photograph that calls the shots. Think of stellar photography as your silent spokesperson, ensuring your work is not just seen, but felt, evoking emotions and, ultimately, action.
Navigating Digital Submission Requirements for Exhibitions and Grants
Got an eye on that high-profile exhibition or chasing an elusive grant? Your entry is often your photography. Photography tips for acrylic artists become your golden rules. You’ve got one shot at a first impression—make it count. Craft images that embrace and translate the essence of your art; accurately portraying your work’s dimensions, textures, and true colors.
High-quality images can clinch that coveted spot in a gallery or secure a grant for your next masterpiece. Remember, your photograph doesn’t just showcase your creation, it underscores your professionalism and dedication to your craft. Neglect this, and well, you might as well be sending a blank canvas.
Now that you’re armed with the practical insights into the impact of photography on your art’s digital journey, grasp that camera, and show the world what you see in your unique pieces—through the lens of your unerring eye.
Preparing Your Artwork for a Photoshoot
Before you even consider capturing that perfect shot of your acrylic masterpiece, it’s paramount to prep like a pro. You’re not just taking a picture; you’re capturing acrylic paintings for social media, where every pixel speaks volumes of your aesthetic finesse. Delve into this acrylic painting photography guide without a hitch by first bidding adieu to reflective foes: frames and glass are a big no-no! Once liberated, lay your art bare on an unblemished wall or board—this is where the magic begins.
Ric Deliantoni and Al Parrish, seasoned art photographers, profess a near-sacred trick: use flat-headed tacks for a seamless hang, because when your painting’s perfectly flat against the wall, shadows don’t stand a chance. But their wizardry doesn’t end there; they swear by a color guide—a photographer’s talisman—to ensure your work’s hues stay true under the lens. That’s capturing your art’s soul without losing an iota of its vibrancy!
Now picture this: with a touch of elegance and precision, attach a color guide right to the edge of your canvas, subtly out of frame but close enough to whisper the truth about your palette to the camera. Speaking of which, have you chosen your best angle yet? Let your intuition guide you, but remember, you’re aiming for that sweet spot where the lighting is just right, the colors are singing, and your painting’s texture could virtually be felt through the screen.
Think like a maestro at your easel; only instead of a brush, wield your camera with the same artful intent. This is not just photography—it’s your artwork’s grand debut to the digital world.

- Remove all glass and backing to abolish glare and unwanted reflections.
- Use flat-headed tacks for an impeccable surface alignment against the wall or cork board.
- The color guide is your best friend for post-edit consistency, make sure it’s there during the shoot.
It’s almost showtime, but rest easy—your masterpiece is now dressed for the occasion. With your artwork primed and pampered, it’s ready for its close-up. All that’s left is for you to capture it, one click at a time, as the world waits in anticipation to double-tap that masterpiece of yours into viral fame.
Strategically Setting the Scene for Your Acrylic Paintings
As an artist striving for social media success, you know the drill—you need your work to look as stunning online as it does on your easel. But before your fans can gasp at your talent, you need to nail that photoshoot. Setting the scene is about more than just finding good light; it’s about creating a backdrop that makes your artwork pop.
Finding the Perfect Background for Clarity
Let’s talk backdrops. Forget the busy tapestries or that brick wall that’s nice but no cigar for your minimalist pieces. What you want is simplicity: a white, black, or gray backdrop to get those colors in your acrylics looking true-to-life. Imagine the silent gasps of awe as your followers scroll through their feeds and your painting holds them hostage. That’s the power of the perfect background. Now, get that canvas up against something neutral and watch as it commands attention.
Height Adjustments: Eye-Level Alignment Matters
Now that you have your background sorted, it’s time to elevate your game—literally. The middle of your artwork should be a straight shot from the eye of your camera, whether it’s sitting pretty on a tripod or propped on a steady surface. You’re aiming for the Goldilocks zone; no soaring high-angle shots that make your work look like it’s cowering away, and no low-angle shots that turn it into a looming giant. Just right at eye-level, and your artwork will look like it’s meant to be there, confident and proportioned just as you intended.
Remember, achieving acrylic painting photography guide perfection is your ticket to captivating an audience on social media. Set the scene with precision, and your art will do the rest, speaking volumes to each and every admirer scrolling through their digital gallery. Keep these tips in your creative arsenal and watch as your social media success takes on a new hue—the kind that comes with likes, shares, and an ever-growing community of art aficionados.
How to Photograph Your Acrylic Paintings for Social Media Success
Imagine your vibrant acrylic painting is ready to dazzle onlookers across the digital universe. But first, let’s talk acrylic painting photography tips designed to elevate your art from studio to social media stardom. Perfecting your photo skills is not just about snapping a pic; it’s about becoming a curator of your artwork’s digital persona.

Before you dive into the exciting realm of showcasing acrylic art on social media, you gotta get the basics down pat. That means aligning your tripod with military precision to ensure it’s dead-on with the center of your artwork. No asymmetry welcomed here – center stage is where your painting shines!
Now, let’s talk camera settings. You’ll want to be sure that ISO feels right at home at a comfy 100, keeping digital noise as absent as a truant student. The aperture? Oh, that’s where the f-stop party starts, ideally swinging between f-8 and f-11, like the perfect pendulum for that sweet sharpness.
Your artwork should fill the shot with the air of importance it so rightfully deserves—yet leave a smidge of room for cropping, because sometimes a little trim is necessary for that tailor-fit look on each platform. We’re not only capturing an image; we’re crafting an experience that your future audience just can’t scroll past!
| Camera Setting | Why It Matters | Tips for Mastery |
|---|---|---|
| ISO | Lower ISO equals less grain and higher quality. | Stick to ISO 100 for the crispest, cleanest image possible. |
| Aperture (f-stop) | It determines the depth of field and the brightness of the image. | Keep it between f-8 and f-11 for the best balance of light and detail. |
| Alignment | Ensures proportional representation of your artwork. | Align your camera with the painting’s center for an undistorted view. |
| Framing | Affects the visual impact and focus on your art. | Let your artwork fill the frame, but leave room for final cropping. |
Master these elements, and you’ll turn your social media portfolio into a compelling visual feast, with your acrylics singing through the pixels. So go forth, adjust those settings, and let’s turn the virtual world into your personal art gallery.
Embracing Natural Light for the Most Authentic Look
When it comes to social media photography for artists, nothing beats the soft, diffuse glow of natural light to convey the vibrant hues and subtle textures of your acrylic artworks. Capturing the true essence of your pieces in a photograph requires keen attention to lighting—fortunately, Mother Nature provides the best studio for acrylic painting photography on those overcast days, offering you perfect conditions to showcase your art in its purest form.
Capitalizing on Cloudy Days: The Photographer’s Favorite
Cloudy skies are the unsung heroes for photographers and artists alike. The clouds act as a giant softbox, diffusing sunlight and eliminating harsh shadows that can obscure the detail in your acrylic paintings. This natural filter creates a balanced light that honors each stroke of your brush without casting any distracting glares. So next time the weather looks gloomy, grab your camera; it’s the perfect time for an impromptu photoshoot.
Create Your Own Professional Lighting Without Breaking the Bank
Don’t fret if the sun isn’t cooperating with your photography schedule. You can simulate the softly lit conditions of a cloudy day in your own workspace. With a bit of ingenuity and some household items, you’ll be on your way to producing well-lit images that’ll grab the attention of your social media followers and potential buyers. Here’s a quick guide to creating an affordable yet effective lighting setup:
| Lighting Component | DIY Solution | Professional Equipment |
|---|---|---|
| Main light source | Window with diffused daylight | Softbox or studio strobe |
| Fill light | Reflective white foam core board | Reflectors or a second light source |
| Diffuser | White bed sheet or shower curtain | Commercial light diffuser |
| Backdrop | Neutral-toned wall or fabric | Seamless paper or muslin |
By positioning two lamps at 45-degree angles on either side of your artwork and diffusing their light with white sheets or plastic bags, you’ll minimize shadows and ensure even coverage across the canvas. With these simple adjustments, your DIY setup might just make expensive lighting kits seem like an extravagance rather than a necessity.
Remember, your goal is to capture the true color and texture of your acrylic paintings; no one knows your art better than you. So wield that camera with confidence and let the natural light—or your ingeniously crafted artificial setup—work its magic!
Achieving the Right Angle and Camera Settings for Acrylic Art
As you delve into the world of capturing your acrylic masterpieces, it’s critical to get technical to turn those clicks into captivating visuals. Picture this: You’re in your studio, surrounded by your colorful creations, and it’s time to make them pop and shine on the digital stage. It’s all about precision, from the angle of your shot to the meticulous settings on your camera. Shall we? Let’s unravel the mystery of the right camera settings to ensure your artwork is as stunning online as it is on your easel.
ISO Settings: The Foundation of a Crisp Image
Conjure the clearest and most detailed photos with just a twist of the ISO dial. Imagine ISO being like your painting’s best friend, subtly enhancing its presence without stealing the spotlight. An ISO of 100 is your go-to for reducing grain and ensuring your acrylic painting images are as sharp as a tack for social media.
The Aperture Sweet Spot for Artwork Photography
Tuneful like the mellow notes of a perfect chord, the f-stops from f-8 to f-11 are music to the eyes of artwork photographers. With an aperture within this range, you’re looking at a balance that gives your pieces enough light without drowning out the wondrous details. It’s all about the perfect depth of field, ensuring that the entirety of your artwork is in focus, letting its colors and textures do the talking.
- Finding the Right Angle: Your coffee might be slanted in the morning, but your camera shouldn’t be. Align your lens parallel to the artwork to keep perspectives true and avoid any warping.
- Tripod Use: Your three-legged friend isn’t just for show. It’s a stabilization maestro, so say goodbye to blurry disappointment.
- Shutter Release Magic: Use a timer or a remote shutter release to eliminate unnecessary movement, letting sharpness take the center stage.
Whether you’re new to the game or a seasoned pro at social media success for artists, these photography tips for acrylic artists will lift your digital presence, giving your audience a visual feast to remember. It’s not just about the brushstrokes on the canvas; it’s about the right angle, the precise settings, and that little extra love for details that transform your photography from mundane to monumental.
Post-Production: Editing Your Photos for the Perfect Finish
You’ve mastered the art of acrylic painting photography, but what happens after the camera has captured your masterpiece is equally important. Yes, we’re stepping into the digital darkroom, where post-production magic ensures every pixel complements your art. In the realm of acrylic painting photography tips, knowing your way around post-production photography editing tools is a game-changer. So, let’s dive into the world of editing, where subtlety is king and authenticity reigns supreme.
The Array of Editing Tools Available to Artists
Whether you’re monetizing your craftsmanship or simply aiming to stun your social network, the right editing tool is like a paintbrush for your pictures. Sophisticated software like Adobe Photoshop and Lightroom are the go-to for many professionals, offering an array of features to finesse your photos. But let’s not overlook the practical, budget-friendly options such as Photoshop Elements and GIMP.

Subtle Touches: Respecting the Authenticity of Your Artwork
Editing is not about altering; it’s about enhancing. As you tread the fine line between the original brushstrokes and their digital representation, remember the goal: to honor your artwork. Adjusting brightness, contrast, and color balance are just some of the post-production photography editing tactics at your disposal. But, always with a light touch, ensuring the spirit of your acrylic painting is lost neither in shadows nor overexposure.
Maximizing Your Art’s Potential on Social Platforms
Let’s face it, your art deserves the spotlight on every social media scroll. But how do you ensure your acrylic paintings pop on the screen? It’s not just about capturing an image; it’s about telling a story through angles that invite viewers into your art’s unique world. Social media success for artists is all about mastering the visual narrative. Think of your painting as a protagonist in its digital debut, enticing with every brushstroke and hue.
Utilizing Various Angles to Showcase Texture and Depth
Start your visual storytelling by giving your audience the full experience. A frontal snapshot is the essential hero shot, but it’s the supporting angles that often steal the show. Zoom out and let your audience appreciate the artwork in its environment, creating a sense of space and context. Then, zoom in close, really tight, to unveil the intricate texture and the voluptuous stroke of your palette knife. These variations offer a more engaged viewing and can heighten the interest in your work, igniting an appreciation for your technique that resonates with potential buyers scrolling for their next art obsession.
Packaging Your Paintings for Consistent Branding Across Media
You’ve nailed how to photograph your acrylic paintings for social media success, but the story doesn’t end there. Once your art captures hearts and investments, ensure the experience remains flawless. Cohesive packaging and clear labeling echo your brand’s quality, whispering professionalism and care. When your collector unboxes the treasure, they’ll meet the same excellence that radiated from your social media presence, reinforcing their choice to invest in your talent. This consistency is key in maintaining a solid brand identity that collectors will recognize and trust.
FAQ
What are the best tips for photographing my acrylic paintings?
Focus on lighting, capture the true colors, keep your camera lens parallel to the artwork, and avoid glare. Edit photos subtly to ensure they enhance but remain true to your artwork.
Why are high-quality images crucial for an artist’s first impression?
They present your artwork in the best light, showcasing your professionalism and talent, and are critical for exhibition and grant submissions.
How do I navigate digital submission requirements for exhibitions and grants?
Ensure your photographs meet specified criteria regarding resolution, dimensions, and file format, and present your artwork accurately and professionally.
How should I prepare my artwork for a photoshoot?
Remove it from frames, avoid photographing under glass, and hang it on a neutral-colored wall without distractions to ensure a clear shot.
What’s the ideal background for photographing my acrylic paintings?
A neutral-colored wall like white, black, or gray will ensure your paint colors and textures are depicted accurately.
Why does eye-level alignment matter when photographing art?
Hanging your painting at eye-level ensures the camera captures the artwork without distortion and reflects its true proportions.
What natural light conditions are best for photographing artwork?
Soft, diffused natural light during an overcast day often yields the best results, providing even light distribution without harsh shadows.
How can I create professional lighting for photographing my artwork at home?
Use a lighting kit with two lights at 45-degree angles to eliminate shadows, and diffuse the light with sheets or reflect it with foam boards for an affordable professional setup.
Which ISO and aperture settings should I use for photographing my acrylic paintings?
Set your ISO to 100 for crispness and choose an aperture between f-8 and f-11 to achieve the right depth of field and lighting balance.
What editing tools can artists use for photo post-production?
Photoshop and Lightroom are professional standards, but more budget-friendly options like Photoshop Elements and Gimp also exist.
How can I respect the authenticity of my artwork while editing photos?
Make minor adjustments to color balance, light, and shadows to enhance the image without altering the true appearance of your artwork.
How should I showcase the texture and depth of my paintings on social media?
Utilize a variety of angles including a frontal shot, a zoomed-out view, and close-ups to demonstrate the texture and three-dimensionality of your work.
Why is it important to package my paintings properly?
Proper packaging not only protects your artwork during shipping but also provides a consistent branding experience for the customer, from online presentation to physical delivery.
Source Links
- https://www.artworkarchive.com/blog/4-steps-to-photographing-your-art-like-a-professional
- https://katiejeannewood.com/how-i-photograph-my-paintings-for-etsy-and-social-media/
- https://www.artistsnetwork.com/art-mediums/oil-painting/how-to-photograph-a-painting-step-by-step/
This post contains affiliate links.