
This post contains affiliate links.
Imagine standing before a blank canvas, the bristles of your brush itching to dance across its surface with vibrant shades of acrylic. You’ve mustered the courage to traverse the world of portraiture, yearning to immortalize a human essence within the bounds of a frame. Let’s face it – diving into the beginner’s guide to painting people with acrylics can be as thrilling as it is intimidating. Yet, remember, every master was once a disaster. Rome wasn’t built in a day, and neither will your acrylic prowess be. But fear not! With this guide as your faithful companion, we’ll unravel the mystery of how to paint people with Acrylics, transforming that trepidation into triumph.
You may wonder how to blend skin tones without them drying into patchy puddles of disappointment or how to keep your strokes as fluid as your artistic vision. The golden secret? Patience, practice, and a smidge of playful tenacity. Whether your aim is to evoke the grandeur of Rembrandt’s strokes or simply to craft a heartfelt gift, these acrylic painting tips for beginners will catapult your endeavors from accidental smudges to pieces that provoke emotion and admiration.
Key Takeaways
- Embrace the quirks of acrylics: quick-drying can be a pro, not a con.
- Patiently layer your paints for rich, lifelike skin tones.
- Use time-tested techniques to conquer the challenge of portraiture.
- Discover your personal style while following the footsteps of the masters.
- Acknowledge that mistakes are part of the journey – they’re just layers under a masterpiece in progress.
- Practice and patience are your greatest allies on this artistic adventure.
Embracing the Basics of Acrylic Portrait Painting
So, you’ve decided to dive into the vivid world of acrylics, specifically targeting the noble art of portraiture. Buckle up, as your artistic journey is about to take an exciting turn with this acrylic portrait painting tutorial. No need to let the swift-drying nature of acrylics intimidate you. Indeed, they dry faster than an overcaffeinated sprinter, but that’s part of the allure! It’s all about getting the hang of it one brushstroke at a time, and before you know it, you’ll be creating portraits that capture not just features but souls.
Let’s start your step by step acrylic portrait painting adventure by prepping your toolkit. You’ll need brushes that can handle acrylic paint’s temperament (think synthetic or stiff-bristled), and of course, a kaleidoscope of bold acrylic colors. Why? Because unlike their oil-based cousins, acrylics don’t shy away from the spotlight—they revel in vibrancy.
- Begin with a simple sketch. Acrylics are not about second chances, so make sure your blueprint is worthy of being crowned the next Mona Lisa.
- Block those colors in. Think of it as creating a map of shadows and light right on your canvas; it’s like painting by numbers but with a dash more sophistication.
- Layer, layer, and layer some more. Each layer is like an episode in a web series; without the previous one, the story just wouldn’t be as rich.
- Pure, unblended color is your best friend for highlights. Remember, slap the color where the light naturally hits the face—nose, forehead, cheeks—with the artistic fervor of a master.
- Shadows can be the difference between flat and fab. Use darker tones to sculpt the face, but beware! Overblend, and you risk creating a mud pie instead of a masterpiece.
And before you panic about any mistakes—remember, every mishap is a silent tutor. Plus, acrylics are forgiving in their own way; just wait for it to dry and give it another go.
If words like ‘wet-on-wet’ or ‘dry brushing’ sound like a foreign language right now, don’t fret. Here’s a simple translation:
When you work wet-on-wet, you’re blending colors directly on the canvas for a seamless transition, like a gentle kiss of hues. Dry brushing, however, is like applying makeup with a beauty blender for that perfect contour.
Acrylic portrait painting is an art that dances on the edge of precision and free-spirited expression. It might take some time to find your rhythm, but once you do, your portraits will start telling stories that words never could.
Remember, every masterpiece starts with a single stroke (and maybe a few choice words when things don’t go as planned). So grab your brush, summon your inner da Vinci, and let the canvas be your stage.
By the end of this step by step acrylic portrait painting guide, you’ll not just have a portrait; you’ll hold a moment trapped in time, framed by your very own hands. Now, isn’t that worth the potential paint-stained shirts and turpentine-scented afternoons? We think so!
Mixing Acrylic Paints for Skin Tones
So, you’ve set your heart on painting faces with acrylics, a brave and rewarding endeavor indeed! The first palette you’ll wrangle with is not the one in your hand, but the color wheel itself. Accurate skin tones are the bread and butter of any portrait, and getting them just right means understanding how each color works with another. But don’t fret, it’s not algebra—it’s more like making a killer guacamole, knowing just how much of each ingredient you need.
Understanding the Color Wheel for Skin Tone Mixes
Before diving into the canvas, let’s take a moment to demystify the mystic circle that is the color wheel. It’s the compass that guides your journey through the labyrinth of acrylic painting techniques for portraits. We’re talking about warm and cool colors, those buddies and foes that make or break your mix. The right combination can give you anything from sun-kissed tan to the subtle shadows beneath the eyes. Remember, the color wheel is your trusty sidekick in the quest for that perfect, lifelike skin tone.
Creating a Natural Palette for Acrylic Portraits
Preparing your palette is like prepping a mise en place for an epicurean feast. To mix acrylic paints for skin tones that look as though they’ll speak to you, less is more. Start with the triumvirate of primary colors and expand your palette cautiously. Add white to brighten, brown to deepen, and a touch of red to warm up those cheeks. It’s akin to mixing spices right – it’s all about the balance to achieve that delectable hue that makes your portrait’s skin seem touchable.
| Color | Mixes Well With | Skin Tone Achieved |
|---|---|---|
| Yellow Ochre | Red + White (Titanium) | Light, Warm Undertones |
| Burnt Sienna | Ultramarine Blue + White | Medium, Cool Undertones |
| Raw Umber | Yellow + White | Dark, Warm Undertones |
| Cadmium Red | Green (to neutralize) + White | Rosy, Vibrant Cheeks |
Imagine your painting is a sumptuous feast for the eyes, and the skin tones you employ are the flavors that will either leave a pleasant taste or a grimace. Trust your eye, trust your gut, and know when to step back and savor what you’ve mixed. Have confidence in the power of your palette, and you’ll paint not just faces but stories and souls.
So, go ahead, gather your paints, steel your nerves—and remember, even the greats had to learn how to mix their first dab of flesh tone. Your canvas awaits, and those acrylic portraits won’t paint themselves. And when you finally get that skin tone just right, you’ll realize why painting faces with acrylics can be as satisfying as that final sprinkle of cilantro on your well-crafted dish. Bon appétit, artist!
Acrylic Painting Techniques for Capturing Facial Features
Ever looked at a portrait and felt like those eyes were actually watching you? Painting faces with acrylics is about creating that glint in the eye, the subtle pout in the lip, and the light that dances across the nose – all the little details that bring a portrait to life. Let’s dive into the rich world of acrylic painting techniques for portraits.

You’re not just slapping paint on a canvas; you’re coaxing personalities out of your palette.
Quick-drying acrylics could be your best friend or your greatest foe. But before you throw down your brush in despair, remember the secret weapons of texture and layering.
It’s all about the scumbling and glazing, my friends. Scumbling adds texture, giving skin that oh-so-realistic look. You’re playing with opaque layers here, so keep your touch light and your brush dry. Glazing, on the other hand, is where your inner alchemist shines. These transparent layers can transform your piece, adding depth and setting the mood like the dim lights in a jazz bar.
| Technique | Use When You Want To… | Tips |
|---|---|---|
| Scumbling | Add texture and depth without overmixing colors. | Use a dry, stiff-bristled brush and lightly drag across the surface. |
| Glazing | Create luminosity and depth with transparent layers of color | Thin your paint with a glazing medium and apply with a soft brush. |
| Dry Brushing | Catch the high points of your texture for dramatic lighting effects. | Wipe most of the paint off the brush and gently skimming across the texture. |
| Underpainting | Establish values and tones before going full color. | Pick a neutral tone and paint the entire image, focusing on light and shadow. |
Understanding how light falls across the face will elevate your portrait from flat to phwoar. Remember, every face you paint is like capturing sunlight in a jar – it’s all about how bright you make it shine. Now, take these acrylic painting techniques and make your portraits pop off that canvas like they’re coming up for a chat!
Mastering the Art of Blending with Acrylics
When you’re diving into the vibrant world of acrylics, blending can seem like predicting the weather in a tropical climate—quick changes and you need to adapt fast. But fear not! We’ve got the foolproof way to keep your portraits from looking like a meteorological mess. We’re about to crack the code on blending to make those faces as smooth as a jazz tune!
The Wet-on-Dry Technique for Sharp Details
Let’s get technical with the wet-on-dry technique. It’s not just a whimsical phrase; it’s your go-to when you want those facial features to pop like they’ve got an Instagram filter. When you lay down a swift brushstroke on a parched surface, voila, you have edges sharp enough to cut through the visual noise. Remember, patience is key. Give your layers a moment to dry, similar to letting a good wine breathe, before adding the next delicate detail.
The Wet-on-Wet Technique for Soft Transitions
Now, shift gears to the wet-on-wet method—like a cloud gently kissing the peak of a mountain, this technique is all about those soft, seamless transitions. Here’s where you let your colors mingle and dance on the canvas while they’re still fresh, creating a harmony of hues. It’s essential for crafting that subtle, just-flushed cheek or the tender shadow under a chin.
| Technique | Effect | Best Used For |
|---|---|---|
| Wet-on-Dry | Crisp, Clear Edges | Defining sharp lines and details |
| Wet-on-Wet | Smooth, Gradual Blends | Achieving realistic skin textures |
Armed with acrylic painting tips for beginners and our clever blending insights, you’re well on your way to crafting step by step acrylic portrait painting masterpieces. So, load up those brushes and start rendering those smooth transitions and sharp details like a pro!
How to paint people with Acrylics learning guide
Welcome, aspiring artists! If you’ve found yourself bitten by the creativity bug and are itching to immortalize captivating human subjects on canvas, then sharpen those brushes. You’re about to embark on an artistic adventure in portrait painting with acrylics.

Before we dive into strokes and shades, let’s talk about two critical decisions that will frame your work: selecting your subject and mastering the play of light and shadow. Your choices here are more than mere preliminary steps – they are the keystones of evocative and dynamic portraiture. So grab your palette, and let’s flesh out these foundational elements!
Choosing Your Subject and Pose for Impact
When deciding on a subject for your acrylic masterpiece, you’re not just looking for a pretty face. Seek out a rich narrative, a compelling emotion, or capture a moment in time. Think of how your subject’s pose can tell their story – is it a pensive glance away or a bold stare straight into your soul? Pose is power; with it, you convey the unspoken tales that give your portraits life.
Understanding Lighting and Shadows for Dynamic Portraits
Get this – lighting isn’t just there to illuminate your subject; it’s there to command drama, evoke emotions, and sculpt depth. Yes, dear artist, you wield the light like a conductor’s baton, guiding your viewer through each nuance of your creation. Study your light source, understand its language, and watch as shadows fall into place, quietly carving out muscle, bone, and character on your chosen subject.
With these insights, you are now prepped to start a journey not just of creating art but of telling stories with shadows, light, and a whole lot of acrylic charisma. It’s no longer just about getting the eyes right or mixing the perfect skin tone. It’s about crafting a visual saga that whispers directly from your canvas. So take these tips to your easel and get ready to make those brushstrokes count!
Step by Step Acrylic Portrait Painting: From Sketch to Finish
Embark on your acrylic portrait painting tutorial journey with vigor, my friend! Let’s demystify the process of step by step acrylic portrait painting and ensure your canvas is brimming with character and depth by the time your masterpiece is complete.
Step 1: Initiate your artistry with a precise sketch. Remember, just like a dependable GPS, your initial sketch points you in the right painting direction—no pressure!

Step 2: Proceed to establish your tonal values. Imagine you’re a DJ, and instead of beats, you’re mixing glazes to lay down the vibes—those foundational tones that set the mood.
Step 3: Begin the dance of hues, layer by delicate layer, observing the subtle shift of light and shadow that gives life to your subject’s features. Like a culinary maestro layering flavors, your brushstrokes add complexity and richness.
Mastering the art of acrylic portrait painting is akin to penning a novel; initially, you draft the rough outline—the sketch. Then, with each chapter—the layers—you develop your narrative, imbuing the portrait with depth and emotion until the final, refined details reveal the protagonist’s soul.
Step 4: The finale involves the painstaking process of refining and highlighting details—the sparke in the eye, the slight curve of a smile. These are the final flourishes on your canvas, rendering your portrait not just seen, but felt.
Now, let’s layout out our steps in a handy table, so you can get a visual feast of your action plan:
| Step | Action | Focus Point |
|---|---|---|
| 1 | Begin the Sketch | Accuracy in Likeness |
| 2 | Establish Tones with Glazes | Tonal Values |
| 3 | Layer Colors Gradually | Hues and Contours |
| 4 | Detail Refinement | Bringing the Subject to Life |
Alright, Picasso in the making, by following these steps not only do you avoid getting lost in the acrylic wilderness, but you also craft a visual narrative rich with emotion, realism, and perhaps, a dash of your unique style. Now, go forth and create with confidence and let your brushstrokes tell the story!
Acrylic Painting Tips for Beginner Portrait Artists
Dive into the colorful world of acrylics with a dash of moxie and a palette of possibilities. But before you do, let’s talk essentials and survival tips in the race against the quick-drying nature of this feisty medium!
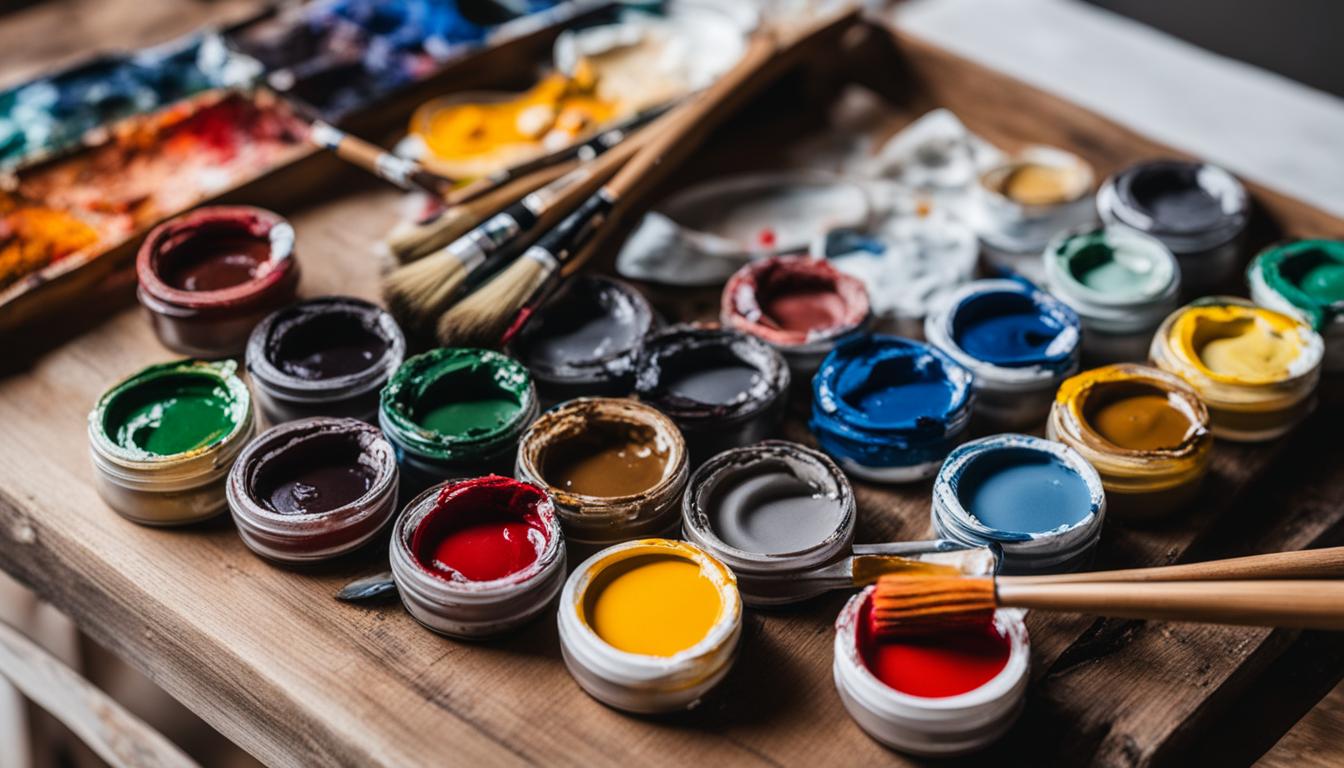
Tool and Material Essentials for Getting Started
Gearing up for your acrylic adventure? You’ll need more than just enthusiasm. Arm yourself with the right tools to transform that blank canvas into a masterpiece.
- Brushes: A variety of shapes and sizes will cater to all your artistic whims, whether it’s a broad stroke or finely detailed work.
- Acrylic Paint: Experiment with a spectrum of hues and don’t skimp on the quality. Your future self will thank you.
- Canvas: Stretched and primed, ready for that first intimate dance with your brush.
Preventative Measures to Keep Acrylic from Drying Too Fast
The clock’s ticking, but fear not! Outsmart the quick-dry dilemma with a couple of tricks up your sleeve.
- Stay-wet palettes are the oasis in the acrylic desert, keeping your paints hydrated and workable.
- Mix in a slow-drying medium and buy yourself some precious time, allowing for that perfect blend.
Here’s a tidy table to keep your essentials checked and your stress levels in check:
| Art Supply | Characteristic | Role in Acrylic Painting |
|---|---|---|
| Brushes | Various sizes and shapes | Precision and versatility in painting techniques |
| Acrylic Paint | High pigment concentration | Rich colors and excellent covering power |
| Canvas | Stretched and primed | Optimal surface for acrylic adhesion |
| Stay-Wet Palette | Moisture retaining design | Extends the workability of acrylic paints |
| Slow-Drying Medium | Viscosity enhancing additive | Increases blending time and eases application |
Now, with canvas primed and confidence armed, you’re ready to brace that canvas with all the flair of a beginner who’s bound for greatness in the world of acrylic portrait artistry! Remember, every master was once a disaster, so go ahead, make your mark!
Portrait Painting with Acrylics Tutorial: Achieving Realism
Let’s dive into the riveting universe of realism in portrait painting with acrylics, shall we? This tantalizing pursuit is akin to a culinary masterpiece; it requires just the right blend of spices—or in this case, painting techniques—to achieve a result that delights the senses and pulls viewers into the scene. Your artistic utensils are ready, so prepare yourself for an adventure in layering, texturing, and shading that transforms a flat canvas into a portal to another reality.
Realism isn’t just a style; it’s a pursuit that demands your attention to the intricate dance of light and shadow, where every brushstroke is a delicate step towards depth and lifelike quality. Don’t let the idea of complicacy deter you. Realism is within reach when you discern the subtle hues of skin tone, appreciate the delicate balance of value, and employ the technique of layered glazing. Adjust your easel, ready your palette, and let us embark on this journey towards achieving realism with acrylics.
The texture is the silent yet salient hero of realism. It gives character to the skin, richness to the fabric, and authenticity to each curl or strand of hair. Without texture, your portrait is merely a shallow depiction; with it, a story begging to be read. So, pick up your finest detail brush and prepare to introduce texture to your portrait in a symphony of fine artistry.
| Technique | Application | Result |
|---|---|---|
| Glazing | Thin layers to build color and depth | Richness and luminosity |
| Scumbling | Dry brush technique for textured surfaces | Feathered, soft transitions |
| Detailing | Precise strokes for features like eyelashes, lips | Sharpness and focus |
| Underpainting | Solid color base to set value scale | Stability of color integrity |
As you deftly move your brush across the canvas, remember to adjust for the lighting source, ensuring that it flatters the form and features of your subject. Does the lighting whisper gently across the face, or does it proclaim its presence boldly? Whether it’s a serene morning glow or the dramatic chiaroscuro effect, lighting has the final say in the narrative of your portrait.
“The true work of art is but a shadow of the divine perfection.” – Michelangelo
Envision Michelangelo, in your modern-day studio, encouraging you to caress the canvas with shadows that speak volumes more than the loudest of colors. Like the maestro himself, invite divinity into your work by mastering the play of light and shadow. Your artwork isn’t just a visual treat; you are creating a slice of life, a temporal freeze-frame that breathes through acrylic hues.
- Sketch with precision; remember, it’s the blueprint of your masterpiece.
- Embrace layered glazing, and watch as the depths and contours emerge.
- Experiment with texture for the skin – a realm of softness mixed with subtle strength.
In the world of fine art, your canvas is the window and your brush is the zenith from where realms are formed and realities are questioned. Realism isn’t just about replicating what you see; it’s about inviting your audience into the scene, to live within the frame. Through this portrait painting with acrylics tutorial, you’re not just creating; you’re breathing life into hues and lines, beckoning others to look deeper. Finish with a flourish and step back; for in your hands, you hold the magic to turn mere visions into vivacious realities.
Simplifying Complexities: Painting Hair and Clothes in Acrylic
Tackling a step by step acrylic portrait painting can be quite the adventure, especially when you hit the bushy or sleek strands of hair and trendy or timeless fabrics on clothing. Here’s the good news—you can translate these complexities into strokes of genius with the right approach. Before diving into our detailed guide, let’s consider a prime example to illustrate what’s possible with a thoughtful method.
Now, you’re not just painting hair; you’re sculpting texture with your brush. The same goes for those clothes; each fold is a chance to tell more of your subject’s story. But how, you ask? It’s simple—by layering, glazing, and being smart about your brushwork, the personality within those tresses and threads comes to life.
Techniques to Paint Textured Hair with Acrylics
First off, painting hair and clothes with acrylics isn’t about each strand; it’s about the flow and the form. Use a variety of brushes to create texture, and imagine painting the shadows and highlights of hair rather than the hair itself. A deft hand will give you that natural look. Let’s break it down further:
- Start with a dark undertone to establish depth
- Layer mid-tones to build the body of the hair
- Add highlights where the light naturally hits the hair
- Use fine brushes for details to create the illusion of individual strands
Adding Realism to Clothing in Portrait Paintings
When it comes to clothing, your mission is to capture the character of the fabric. Is it silk or denim? Each has its own sheen and texture. Observe how light interacts with the material and mimic these effects with your acrylics. Here’s the playbook for painting realistic clothes:
| Material Type | Light Source | Brushwork |
|---|---|---|
| Cotton | Soft, diffused | Smooth gradients with dry brush technique |
| Silk | Bright, focused | High contrast glazing for sheen |
| Leather | Sharp, angular | Stippling to create texture |
| Denim | Moderate, even | Layering to depict rugged texture |
Remember, your portrayal of hair and clothing can either make or break the overall realism of your portrait. Your brushes are your wands, ready to cast spells on canvas, transforming strokes into strands and dabs into denim. Embrace the challenge, step by step, and watch as the acrylic embraces the form, texture, and spirit of your subject.
Adjusting Acrylic Colors: From Palate to Canvas
When you’re perched in front of your easel, the vivid swirl of colors on your palette seems perfect—until they make their grand entrance onto the canvas. Here’s where you perform a delicate balancing act, adjusting acrylic colors for painting just as a culinary genius might season a gourmet dish. As acrylics dry, they undergo a chameleon-like transformation, often ending lighter than when they first kissed the canvas. Your mission? Anticipate these shifts and keep your hues true-to-life.
Imagine if you could predict the color shift as reliably as a meteorologist forecasts the weather. Ah, what a dream! But fret not; you’re about to learn the artistry behind keeping your colors consistent from palette to portrait.
Remember, the journey from palette to portrait is less about the path taken and more about the adjustment en route.
- Mix slightly darker tones in anticipation of the paint drying lighter.
- Test colors on a scrap piece of canvas to gauge drying shifts.
- Use a glazing liquid to fine-tune the shades after they’ve dried.
Every brushstroke you lay is a testament to your adaptability as an acrylic maestro. It’s a push-and-pull of hues, a tug-of-war between what your eyes see and what your canvas reveals. But with practice, your palate-to-canvas transitions will become as seamless as the evening slipping into the night.
Conclusion
As your journey with the brush unfolds, remember that portrait painting with acrylics is not just about replicating a face; it’s a dance between classical techniques and the bold versatility of modern acrylics. You’ve learned that textures, tones, and blending are your allies in a quest to pin down that elusive spark of life on canvas. By wrestling with light and shadow, you infuse your portraits with depth, your palette serving as the stage for this delicate interplay.
Indeed, the path of learning how to paint people with Acrylics is fraught with trials, but it’s also dotted with triumphs. Embrace each brushstroke, from the underpainting to the final highlights, as a conduit for your evolving expression. Practice carefully the acrylic painting techniques for portraits, finding solace in the knowledge that the fast-drying medium that once tested your patience now enables you to craft layers of unmatched richness and immediacy.
In the end, it’s your personal flair that will make your work sing. Whether you’re seeking to master the complexities of painting faces with acrylics or you’re continuing to refine your expertise through a step by step acrylic portrait painting process, the canvas is your oyster, and the portrait an opportunity to not just depict, but to discover. Now, go forth and channel these lessons to unveil the stories waiting to be told through your art.
FAQ
What makes acrylics suitable for beginner portrait artists?
Acrylics are highly forgiving, versatile, and dry rapidly, which allows for quick corrections and layering. Plus, their water solubility means simple clean-up, making them ideal for budding artists ready to dive into the color-saturated world of portrait painting without the fuss of oil paints or complex solvents. Embrace acrylics, and you might just discover your inner Picasso!
How can I prevent my acrylic paints from drying too quickly?
Battle against the speedy drying time of acrylics with a few nifty tricks! Employ a slow-drying medium to take things down a notch, or paint on a stay-wet palette to keep your pigments fresh and workable. You can also spritz a mist of water over your palette or work in a cooler environment. Skedaddle, you fast-drying fiends!
What basic materials do I need to start painting portraits with acrylics?
Ready your studio with the essentials: a smorgasbord of acrylic paints, a sturdy canvas, and a variety of brushes ranging from fine to flat. Don’t forget a palette for mixing colors (your kitchen plate might miss you, but it’s for a greater cause), and perhaps an easel to give your painting a proper stage. Let the creative rumpus begin!
Can you explain the wet-on-dry and wet-on-wet blending techniques for acrylics?
Sure! Think of wet-on-dry as the meticulous cousin who paints by applying wet paint over a dry layer for crisp details and controlled lines. On the flippier side, wet-on-wet is the free spirit that blends wet paint together while it’s still fresh on the canvas, allowing for smooth, dreamy transitions. Juxtapose them, and voila! You’ve got yourself the yin and yang of blending.
How do I mix acrylic paints to create realistic skin tones?
Conjuring lifelike skin tones is akin to alchemy. Start with your primary colors and add dollops of white or brown to lighten or darken the mix. Keep the color wheel as your loyal sidekick, focus on warm and cool undertones, and remember: the secret ingredient is always a pinch of patience. Experiment, tweak, and voila – you’ve bottled complexion perfection.
What’s the importance of lighting in acrylic portrait painting?
Lighting in portrait painting isn’t just important, it’s the dramatic maestro, the veritable spice mélange! It sculpts your subject, carves depth into the canvas, and dances around to create mood and atmosphere. Get those shadows and highlights right, and you’ll have a portrait that could leap off the canvas and share your breakfast.
What techniques should I use to paint hair and clothing in acrylics?
For hair, think texture, baby, texture! Use flicking brush strokes to mimic strands, and play with highlights to give it oh-la-la volume. As for clothing, observe how fabric folds capture light and shadows; layer your colors and glaze like a donut – until that fabric looks so real, someone could reach out and pluck a thread.
How do I choose a pose or subject for my portrait painting?
Take a stroll through the gallery of your mind and pick a subject that whispers a story to you. Consider the pose – an offbeat tilt of the head or a gaze that’s lost in thought can elevate your portrait from “meh” to “magnifique!” And remember, the eyes are the windows to the soul – so make sure they’re speaking the right language!
Why does my acrylic paint change color as it dries, and how do I deal with it?
Ah, the old ‘drying shift’ caper! When acrylics dry, they can darken slightly, which is like a plot twist in your color mixing novel. To outsmART this, practice makes perfect. Learn how your paints behave by creating a swatch library, start with lighter mixes, and adjust as needed when the acrylics show their true colors as they dry.
How can I achieve realism in my acrylic portraits?
Realism doesn’t show up by accident, my friend. Master the art of illusion with a hearty grasp on shading, a hawk-eye for details, and a romance with lighting. Build up anatomical accuracy layer by layer, keep those values in check, and polish those textures until your subject practically breathes. Realism is just a brushstroke away!
Source Links
- http://mattphilleo.com/how-to-paint-a-realistic-acrylic-portrait-in-5-steps/
- https://willkempartschool.com/is-it-possible-to-paint-realistic-skin-tone-with-acrylics/
- https://realisticacrylic.com/tutorials/
This post contains affiliate links.