
This post contains affiliate links.
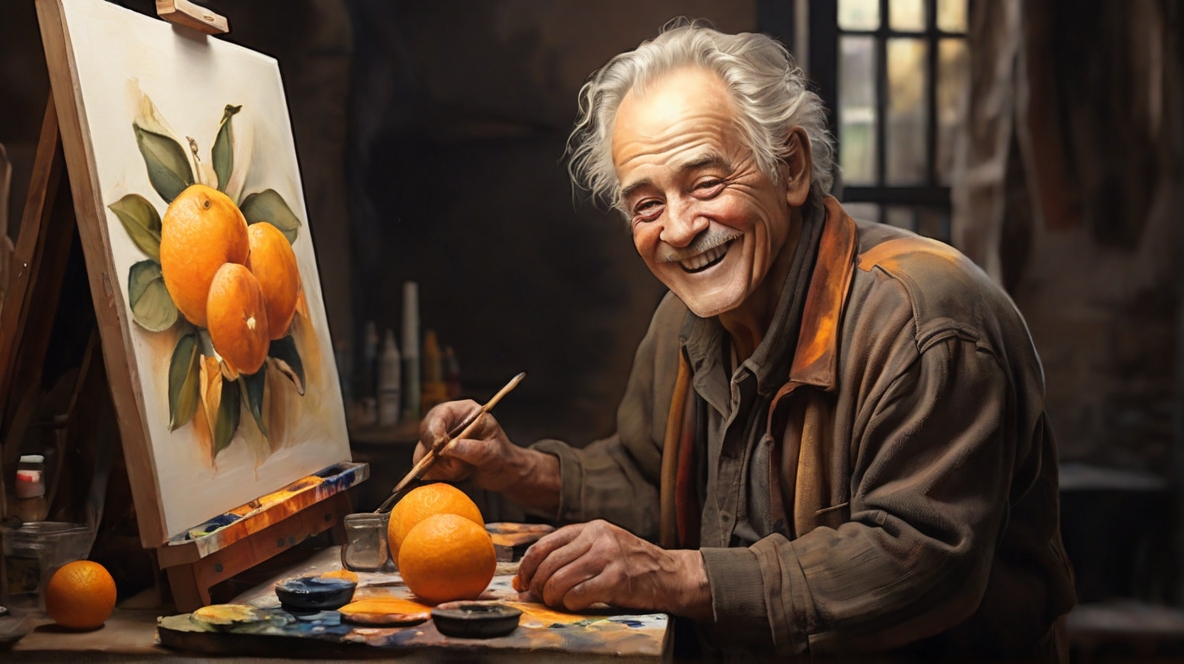
As I reflect on my sun-soaked jaunt through the bustling orchards of Florida, where the citrus air is as poignant and vivid as the hues that wash across its skies, I find myself yearning to translate that warmth onto canvas. Painting an orange, with its tantalizing sheen and dynamic shadow, becomes not just an artistic endeavor but a small tribute to those vibrant Floridian scenes.
Herein lies a step-by-step guide for painting an orange, crafted expressly for beginners eager to delve into the art world. With each brush stroke, I aspire to guide your hand as we unravel the secrets of color, texture, and light, in the pursuit of creating a still life that bursts forth with the same zest you’d find in a ripe, sunlit orange.
Embracing the beginning painter’s perspective, I warmly invite you all to join me. Armed with brushes and curiosity, come steep your senses in the joy of creation—and perhaps, once our pigments have settled and our palettes have been cleared, share your triumphs and discoveries using #AnnaMasonArt. Before you dive in, know this—my free video classes await to further hone your burgeoning skills. So, let’s embark on this orange painting tutorial together, and let every stroke and blend spill forth the juicy delight of this citrus marvel.
Key Takeaways How to Paint an Orange
- Discover the warmth and technique of how to paint a orange, capturing its vibrant essence.
- Begin your journey with a simple step-by-step guide for painting an orange, friendly to beginners.
- Explore my orange painting tutorial to bring the Floridian sunshine into your art.
- Share your artwork and partake in a growing community with #AnnaMasonArt.
- Enhance your painting abilities with my collection of free, accessible video classes.
- Embrace the beginner’s perspective, celebrating every learning milestone in your artistic path.
Introduction to Orange Painting for Beginners

Embracing the zest of Florida’s glowing sun, I found the perfect muse for my painting—a vibrant, sun-kissed orange. The idea of translating such brightness onto canvas is both exciting and, admittedly, a bit intimidating for beginners. Through my guide, I hope to share easy ways to paint an orange while taking beginners through a journey that culminates in the creation of a masterpiece dripping with nature’s own vibrancy.
Inspiration from Nature’s Vibrant Colors
The first brushstroke is inspired by the very essence of life—color. Raucous shades of citrus inspire not just a visual palette but an emotional one. As beginners in the journey to painting an orange for beginners, my advice is to look beyond the easel; see the orange not just as a subject but as an encapsulation of brightness and vitality.
Understanding the Complexity of Painting Oranges
It’s crucial to acknowledge that beneath the simplicity of an orange’s exterior lies a complex fusion of shades, textures, and reflections. As a novice, do not be deterred. What may appear as an intricate web of detail is, in fact, an opportunity. Equip yourself with the right techniques and tips, and watch as each stroke adds more depth and realism to your creation.
Beginners should take this from someone who has walked the same path: your journey will be as rich and rewarding as the colors you choose to bring it to life.
Choosing the Right Materials for Your Orange Painting
Embarking on the creative journey of orange painting techniques begins with selecting the ideal materials that will bring your artwork to life. As I dive into this tutorial on how to paint orange slices, let me guide you through the essential supplies that form the foundation of a stunning citrus masterpiece.
Selecting the Perfect Paints and Brushes
Pairing the right type of paint with the correct brushes can significantly influence your painting experience and outcome. For the juicy vibrancy of orange slices, I recommend heavy body acrylic paints for their rich texture and intense color. Acrylics are versatile and perfect for layering – a key aspect of capturing the depth and translucence of orange segments.
In selecting brushes, nylon variants offer flexibility and durability. They maintain a firm snap, ensuring your brushstrokes are sharp and precise. I often reach for a range of sizes, allowing me to toggle between broader strokes for general areas and finer brushes for those intricate details within the orange’s texture.
Preparing Your Painting Surface
I can’t emphasize enough how a well-prepared surface sets the stage for your painting endeavor. Let’s visualize the process on a small 4″x4″ panel, where a smooth, gesso-primed surface awaits your creation. This type of surface will grip the heavy body acrylics beautifully, ensuring that each stroke translates effectively onto your canvas.
A time-tested tip for painting an orange is to prime your panel with a warm yellow-brown mix beforehand. The neutral background not only complements the natural shades of your citrus subject but also enhances the definition of each brushstroke you lay down. Plus, it assists in making astute judgments in color and value contrasts as your painting progresses.
Maintaining the paint’s workability is crucial, and for this, slow-drying fluid mediums are your best friends. They allow for extended blending time, which is essential when seeking to capture the vibrant essence of an orange.
Be inspired to create an orange painting that’s not only a feast for the eyes but a reflection of thoughtfully chosen materials. Keep these tips for painting an orange at hand, and watch as your canvas morphs into a delicious slice of artistry.
Comprehending Color Theory for Orange Painting
As I dip my brush into a spectrum of colors, I am reminded that the art of painting an orange goes beyond mere imitation. It’s about weaving the principles of color theory into every stroke, creating a visual song that dances to the harmony of hues. To guide you through your journey in orange painting techniques, let me share my step-by-step guide for painting an orange, built upon the cornerstone of color theory.
The color wheel is not just a tool—it’s the painter’s compass. The secret to breathing life into your orange artwork lies in your understanding of primary, secondary, and tertiary colors. It’s a world where red, blue, and yellow don’t stand apart but blend to form the myriad shades that make our paintings come alive.
Primary colors are the roots from which the beauty of the orange fruit can be drawn. It’s a dialogue between the warm reds and the vibrant yellows that whisper the secrets of ripe, sun-kissed oranges on canvas.
Let’s delve into the vital segments of color theory:
- Primary Colors: Red, Blue, and Yellow – the unadulterated parents of all other colors.
- Secondary Colors: Green, Orange, and Purple – born from the union of the primaries.
- Tertiary Colors: The beautiful children of primary and secondary colors’ interactions, such as yellow-orange and red-orange, which give our painted oranges nuanced depth.
It’s not just about the colors we choose, but how we use them:
- Complementary Colors: Find the color across from another on the wheel to achieve dynamic contrast.
- Analogous Colors: Colors next to each other on the wheel offer a serene and comfortable feel.
- Triadic Colors: Using three evenly spaced colors on the wheel can create a vibrant and visually appealing painting.
Here’s a comprehensive view of the vital color pairings:
| Color Type | Example Pairing | Use in Orange Painting |
|---|---|---|
| Complementary | Blue and Orange | For shadows and depth |
| Analogous | Yellow, Yellow-Orange, Orange | For a gradient effect in the orange’s shading |
| Triadic | Orange, Purple, Green | To enhance the vibrancy and balance of the painting |
By mastering the art of color theory, you’ll find that your oranges aren’t just fruit on a canvas—they are a celebration of light, shadow, and hue, captivating the eyes and stirring the soul. Embrace the dance of colors, and let your brush lead the way to breathtaking orange portraits that shimmer with life.
How to Paint an Orange: A Beginner’s Guide
Embarking on an orange painting tutorial is a delightful journey into the world of art, especially with easy ways to paint an orange. In this section, I’ll guide you through the initial steps of capturing an orange’s essence with brush and paint.
Sketching Your Orange Composition
My approach to painting begins with observation and sketching. I look at the orange, examining how light plays off its surface and then gently sketch the contour onto my canvas. Here’s an essential tip: focus on the relationship between the orange and the space around it, sketching in various tones to depict depth from the outset.
Blocking in the Basic Colors
Once the composition is sketched, the exciting part begins. The foundation of any good painting is a strong base, and for our subject, mixing Cadmium Yellow with a touch of Cadmium Red strikes a vibrant, orange tone. Apply these colors boldly, using a larger brush to cover the basic shape. This is where you set the stage for the detailed work to follow, ensuring that each stroke captures the boundless energy of this citrus wonder.

It’s crucial to allow yourself the freedom to adjust as you go along. Here’s a comparison table of color mixes to begin with:
| Color | Quantity | Outcome |
|---|---|---|
| Cadmium Yellow | 2 parts | Lively Orange Base |
| Cadmium Red | 1 part |
Your painting is starting to come to life right before your eyes. Remember, the best part of learning how to paint is seeing your vision gradually turn into reality. Embrace the process, and let your brushstrokes tell the story of a sun-soaked orange.
Techniques for Achieving Realistic Textures and Details
As I move deeper into the heart of painting an orange, the real magic unfolds in the textures and tiny details that make it come alive. To capture the very essence of its juicy splendor, I apply a symphony of brushes and colors with precision. From the subtle ripples in the peel to the glistening sheen of moisture on each segment, every stroke is intentional and deliberate. It’s not just about learning how to paint a orange; it’s about translating the tactile experience onto your canvas.
Creating Juicy Effects with Paints
My method begins with a keen observation of the subject’s mid-tones—those moderate shades that lay the groundwork for capturing the full range of light and dimension. I then introduce both the soft whisper of highlights and the robust depth of shadows to create a sensory invitation so real, you’ll be tempted to reach out and take a bite. Painting an orange for beginners can seem intimidating, but with these techniques, even novices can produce work that pulsates with life.
Capturing the Essence of the Orange Peel
The peel’s texture is a telltale sign of an orange’s freshness and vitality, making it a critical component in our composition. I carefully layer thin glazes of color to emulate the distinct dimpled surface, allowing each to dry before applying the next. Occasionally, a tiny point of a fine brush might dance across the canvas, mimicking the light reflecting off an oil gland. This meticulous attention to detail culminates in a piece where the orange’s zestful spirit is truly honored.
Exploring the Use of Light and Shadow in Your Orange Painting
The interplay of light and shadow creates the essence of dimensionality in any painting. When I capture the luminescence of citrus, the glow seems to leap from the canvas, breathing life into these spherical wonders. Understanding and manipulating light is necessary to transform a flat image into a vibrant, tactile object that seems to occupy real space. Allow me to share with you my techniques and tips on orange painting techniques that emphasize the importance of light and shadow.
Understanding Light Source Implications
My every brushstroke considers the light source, which I often imagine coming from the upper right. It’s this imagined sunlight that dictates how the light cascades across the curves of my oranges, creating highlights that suggest fullness and roundness. The proper application of this concept results in a luminescence that can make your painting come alive with vibrancy.
Painting Shadows for Depth and Dimension
Shadows, on the other hand, are the silent narrators of form. They contour the depths, folding underneath the oranges, lifting them off the canvas. Utilizing a mix of purples and blues not only grounds the fruit but also harmonizes with the orange’s inherent warmth, enhancing depth with understated elegance. The nuanced contrast between light and dark is instrumental in conveying the three-dimensional feel of your fruit.
Below is an example of the color palette I apply to my canvases to achieve a harmonious balance between light and shadow:
| Light Areas | Shadow Areas |
|---|---|
| Cadmium Yellow Light | Dioxazine Purple |
| Cadmium Orange | Ultramarine Blue |
| White (for highlights) | Burnt Umber (to deepen shadows) |

Remember, the direction and length of the shadows you paint also contribute to the narrative of your artwork’s light source. They must be consistent to maintain the illusion of a single light source. The enjoyment I find in this dance of shadow and light is something I wish for you to experience in your orange painting journey. The intrigue of your work will deepen as your skill in managing these elements sharpens.
Adding Final Touches to Your Orange Painting
As I bring my canvas to the final stages, it’s crucial to focus on the fine details that will truly make my orange painting glow. Through meticulous refinement, I ensure that each brushstroke contributes to the visual symphony of vibrant colors and textures that replicate the essence of a newly picked orange. I lean into my expertise to provide invaluable tips for painting an orange, guiding you through a step-by-step guide for painting an orange that resonates with lifelike vibrancy and zest.
Refining Edges and Highlights
After the foundational colors and shapes are firmly in place, it’s time to refine the edges and amplify the highlights that give our orange its three-dimensional allure. The edge of each segment, where the most intense light hits, must be cared for with delicate brushstrokes. I layer on the brightness with a robust, fine-tipped brush, taking care not to overdo the white—preserving the natural look is key. Adding strokes of brilliance guides the eye and imparts a luminous quality to the painting’s central subject.
Assessing Color Vibrancy and Contrast

My artistic judgement comes into play as I continuously assess and adjust the color vibrancy and contrast. The dynamic between light and dark, warm and cool tones, defines the spherical form of the orange. I’m careful to contrast the shadows softly against the vibrant citrus hues, ensuring a harmonious balance that mimics nature’s design. Let’s break down some essential considerations:
- Shadow Depth: Avoid monochrome shadows; infuse them with subtleties of purples or greens to complement the orange.
- Surface Texture: Utilize varied brushstrokes to represent the porous texture of the peel, giving the fruit a tactile appearance.
- Highlight Brightness: Modulate the highlights carefully—too bright can appear artificial, whilst too dull may look flat.
| Element | Characteristics | Techniques |
|---|---|---|
| Peel Texture | Porous, uneven | Dry-brush for raised areas, glazing for recessed shadows |
| Segments | Translucent, juicy | Gentle gradient transitions, emphasizing the white central veins |
| Leaves (if included) | Rich greens with veins | Sharp, fine lines for veins with a darker green |
In every dappling of paint, I reminisce about that enchanting Florida sunshine that first inspired my citrus muse. It’s through this reflection and a diligent, step-by-step approach that magic unfurls across the canvas, revealing an orange that’s not only a feast for the eyes but speaks, as if freshly plucked, of nature’s ever-abundant bounty.
Conclusion
As we reach the culmination of our orange painting tutorial, I reflect on the journey we’ve embarked upon together. From the initial lay down of vibrant hues to the intricate dance of light and shadow, painting an orange for beginners has been as much about learning the strokes and colors as it has been about personal growth and creative development. My hope is that these lessons have not only taught you the technical aspects of painting but have also inspired a deeper appreciation for the delicate beauty that rests within the grasp of our paintbrushes.
Reflecting on the Orange Painting Journey
Throughout each phase of our artwork, we encountered challenges and celebrated small victories. Whether it was mastering the curvature of the orange’s silhouette or achieving the perfect gradient of citrusy tones, every step was a moment of learning and self-improvement. With our brushes as our allies, we embraced the complexity of textures and nuances, an endeavor that undoubtedly has enriched our palette of skills.
Sharing Your Artwork and Seeking Feedback
I encourage you to share your masterpiece, using the tag #AnnaMasonArt on social media, to engage with a supportive community that thrives on collective growth and constructive feedback. By opening ourselves up to the perspectives of others, we not only gain invaluable insights but also forge connections that can lead to new creative heights. Remember, every artist’s path is unique, and your expression through the medium of paint is a testament to your individuality and passion for art.
FAQ
What materials do I need for painting an orange?
You will need heavy body acrylic paints, a small panel pre-primed with a smooth gesso surface, nylon brushes, and a slow-drying fluid medium.
How do I start my orange painting?
Begin by sketching the shape of the orange, defining the composition, and then blocking in the basic colors. Start with a vibrant base of Cadmium Yellow mixed with Cadmium Red.
What is important to know about color theory when painting oranges?
Understanding the color wheel is crucial. Study primary, secondary, and tertiary colors, and learn about complementary, analogous, and triadic colors for a harmonious and balanced composition.
How can I create a realistic texture for my orange painting?
Focus on the middle values of the orange first, then add lighter and darker tones to create depth. Use contrasting colors for the background and shadows to make the orange pop.
Where should the light source come from in my painting?
Ideally, have the light source coming from the upper right to create natural highlights on the top edges of the orange and cast shadows beneath each slice.
How do I paint the shadows and highlights on an orange?
Use a mix of purple for the shadows to complement the oranges, and carefully apply lighter values for highlights to mimic the effect of light hitting the fruit.
When do I add final touches to my orange painting?
Once you’ve laid down the main colors and details, you can refine the edges, highlights, and assess color vibrancy and contrast to bring the painting to completion.
How can sharing my artwork help me improve?
Sharing your artwork through social media and using hashtags like #AnnaMasonArt can connect you with a community of artists and provide feedback that will enhance your skills.
Source Links
- https://thevirtualinstructor.com/blog/painting-orange-slices-with-acrylics
- https://www.naturestudio.com/paint-juicy-orange-slice/
- https://floartstudio.com/beginners-guide-to-painting-with-colors/
This post contains affiliate links.