
This post contains affiliate links.
Have you ever stood before a landscape so breathtaking that you wished you could capture its essence forever? If sheer beauty could be bottled, surely it’d contain a mix of ultramarine skies and verdant hills. Now, imagine transforming that yearning into a stroke of artistry—this is where the magic of acrylic painting sweeps in. Whether you’re dabbling at the easel for the first time or refining your craft, each layer you apply is a step toward mastering the canvas.
Your adventure in color and imagination is about to unfold in this acrylic painting tutorial. Forget the myth that you need to be born with a brush in hand; beginner painting techniques are here to navigate your course. Picture yourself gripping the bristles of potential, and with this step-by-step guide to your first acrylic landscape painting, watch as your vision manifests one hue at a time. Let the Old Masters inspire; let modern simplicity guide.
Key Takeaways
- Embrace the thrill of creating your first acrylic landscape with an easy-to-follow tutorial.
- Uncover the simplicity behind the sophistication of painting with beginner-friendly techniques.
- Feel empowered as you progress through a structured, step-by-step painting guide.
- Leverage the experience of contemporary artists to enhance your personal painting journey.
- Discover how accessible and fulfilling crafting a landscape painting can be.
Gathering Your Painting Supplies
Before you dive into the vibrant world of acrylics, let’s talk shop—painting shop, that is. You wouldn’t bake a cake without flour, so why start an acrylic painting without the essential painting supplies for beginners? Setting yourself up with the right gear is your first step in the acrylic painting step by step tutorial you’ve been itching to begin. So let’s embark on this journey together, ensuring you have everything you need to create your very first masterpiece in landscape painting for beginners.
Choosing the Right Canvas
Like a culinary feast starts with a clean plate, your acrylic odyssey begins with a pristine canvas. Set your sights on a quality 10 x 10-inch pre-primed canvas. Winsor & Newton has been a heavyweight champ in the canvas ring, so you can bet on them for the most stable foundation for your artistic exploits.
Picking the Perfect Brushes
No, we’re not talking about your hair. In the realm of brushes, let me introduce you to the Size 6 Isabey Isacryl acrylic brush, a trusty filbert that’ll lay those strokes down as smooth as butter. And for those round and robust strokes, the Size 10 Isabey memory brush is your go-to battalion. Both are revered by the greenest of greenhorns and the most seasoned professionals.
Selecting Your Acrylic Paints
Now, it’s time to talk color—and not just any hues but the kind that make your canvas sing. Prioritizing artist quality paints, particularly for your key colors like the ever-essential Titanium White, is crucial. This isn’t just fluff; it’s about superior coverage and blendability that’ll have you mastering easy acrylic painting tips like a pro.
Additional Tools for Your Artistic Arsenal
It’s not all about paint and canvas. The devil is in the details, or should I say, the tools. A reliable 3B pencil for laying down your visions, the indispensable kitchen roll for messes—because let’s face it, making art is messy—a jam jar for giving those brushes a well-deserved bath, and don’t forget the trusty fork or dipper for mixing up those paint potions.
| Supply | Description | Purpose |
|---|---|---|
| Pre-primed Canvas | 10 x 10 inch, Winsor & Newton brand | The starting point for any masterpiece; high-quality to withstand multiple layers of paint |
| Isabey Isacryl Brush (Size 6) | Filbert Acrylic Brush | Ideal for smooth blending and versatile strokes |
| Isabey Memory Brush (Size 10) | Round Acrylic Brush | Perfect for robust and round strokes, adding texture and detail |
| Titanium White Acrylic Paint | Artist Quality | Essential for coverage and creating lighter shades |
| Additional Tools | Pencil, Kitchen Roll, Jam Jar, Fork/Dipper | For sketching, cleaning, and mixing—equally as important as the paint itself |
There you have it, your very own personalized painting Pandora’s box. Go ahead and let loose—the world (or at least the canvas) is your oyster. Begin with confidence, knowing you’ve got the essential painting supplies for beginners and bear in mind these easy acrylic painting tips to make your first landscape painting experience nothing short of triumphant.
Setting the Scene: Preparing Your Workspace
Before you make your first foray into landscape painting for beginners, let’s chat about crafting your personal creative oasis. Think of your workspace as a stage where your art is the star of the show. First thing’s first: ensure your space is spick and span—your creative mind flourishes in a tidy area. You’ll want to avoid spending half your painting time searching for that elusive tube of Cobalt Blue, won’t you?
Good lighting isn’t just to show off your masterpiece; it’s crucial for catching the nuances in color as you paint. You’re aiming to bring the outdoors in, so let there be light! Whether it’s a well-placed lamp or a spot by the window, getting this right is one of those easy acrylic painting tips that can make a big difference.
Organization is your new best friend. Arrange those brushes, paints, and other tools within arm’s reach on a flat surface. There’s nothing more frustrating than a runaway brush when you’re mid-masterstroke. Behold the power of a clean and ordered setup—it’s almost as satisfying as nailing that tricky shadow on your first go.
An easel will not only add a professional vibe to your workspace but will also provide the sturdy support your canvas needs. Trust me, it beats hunching over a table and discovering new back muscles you never knew existed. Now, grab an inspiration photograph—your guide in this artistic expedition—and place it where you can easily glance at it.
Remember, preparing your canvas is like prepping a Thanksgiving turkey—it’s got to be done right. Apply a loving coat of gesso to create a surface smoother than a jazz solo. This primes the canvas to hold onto the pigment better, ensuring your strokes are as impactful as you envisioned.
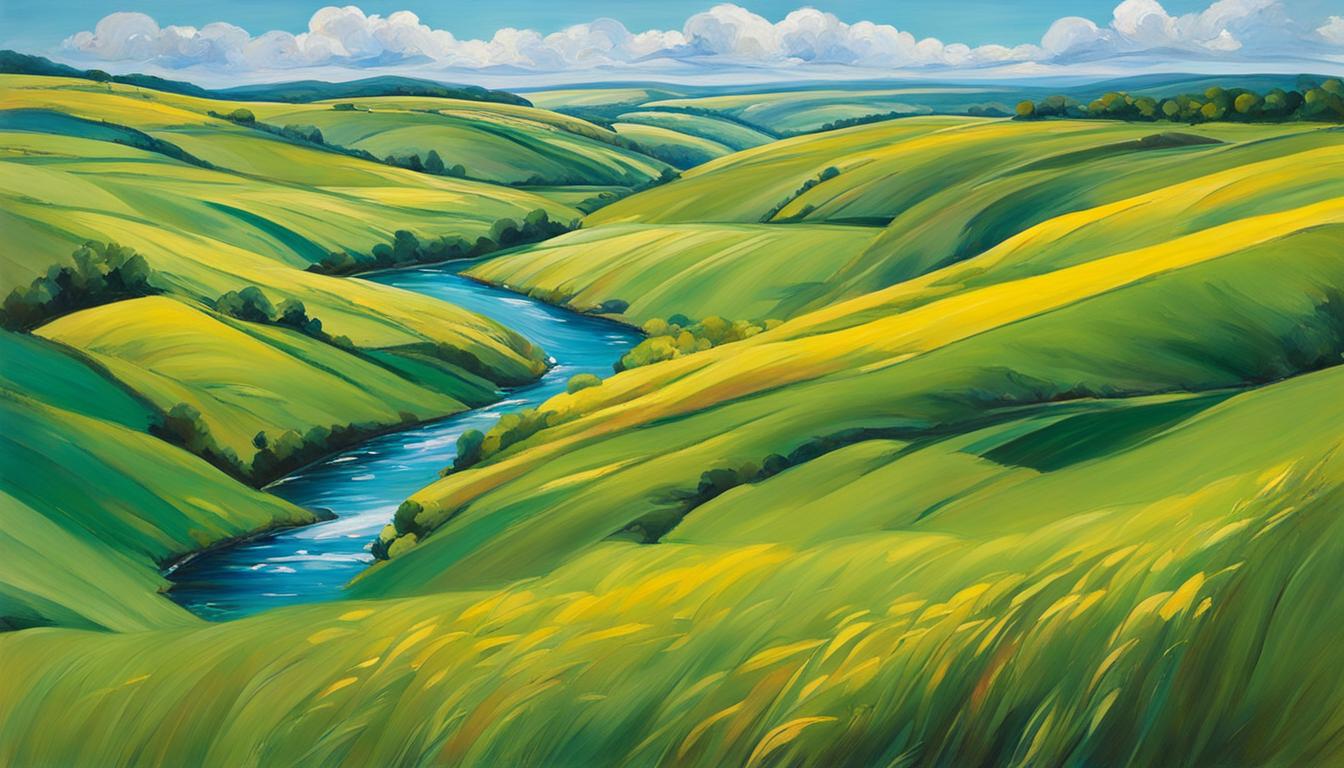
With your workspace set and your materials at the ready, you’re poised for painting success. And just because we can, let’s add a visual twist, shall we?

With these steps, your workspace is no longer just a part of your home—it’s an incubator for creativity. Get ready to paint not just a scene, but a story. Fire up those brushes, it’s time to make some art!
Step-by-Step Guide to Your First Acrylic Landscape Painting
Embarking on your artistic voyage into the land of colors and brushes? Let’s roll! But not just any roll – an acrylic roll. Let’s dive into our acrylic painting step by step tutorial and transform that intimidating blank canvas into a marvelous landscape that whispers tales of your budding talent.
Roll up your sleeves because it’s time to add the first note on the symphony of your canvas – the underpainting. Trust me, it’s easier than making your morning toast, and way more satisfying!
Applying the Underpainting
Imagine starting with a secret code, a background that will sing through the final layers of paint, giving your landscape that depth it craves. Grab your white and a smidgeon of Burnt Umber, and let’s create an underpainting that could make the canvas leap for joy – or at the very least set the stage for greatness.
Sketching the Basic Composition
You wouldn’t build a house without a blueprint, would you? Sketching is your painting’s blueprint. With a 3B pencil, sketch your landscape’s bones where the mountains meet the sky, laying down your grand vision.
Blocking in Your Colors
This isn’t Tetris, but we are indeed ‘blocking’ in colors on your layout. This step-by-step guide to your first acrylic landscape painting recommends starting with the big boys – the sky, the grass, the larger-than-life sections. Here’s where Will Kemp’s wisdom rings true; set those darks and lights early to guide you through the rest. Like a beacon in the night, let them steer your art ship to the harbor of success!
| Stage | Description | Tips |
|---|---|---|
| Underpainting | Setting a tonal foundation with whites and earth tones. | Let loose and don’t overthink it, this layer’s bound to get covered up. |
| Sketching | Outlining the primary elements of your landscape. | Keep it light and simple; adjustments are part of the process. |
| Blocking Colors | Painting the larger shapes with general colors. | Start with the furthest point in your painting, typically the sky. |
Who said easy acrylic painting tips can’t lead to stunning results? With brush in hand and heart full of passion, you’re not just ready, you’re prepared to make a masterpiece. Onward to the canvas, brave artist!
The Role of Color in Your Landscape
As you delve into the art of landscape painting, it’s not just about slapping paint onto a canvas; it’s about wielding color as your primary tool of expression. Let’s break down how understanding color theory is not just helpful but essential to creating a convincing landscape that pulls the viewer into your vibrant, painted world.
Understanding Color Theory
Think of color as your painting’s secret language, with rules and vocabularies that communicate mood, depth, and life. Easy acrylic painting tips often begin with the color wheel – a trusty guide that helps you discern complementary from analogous colors. It’s the Rosetta Stone for every artist, but don’t sweat it; you’ll get the hang of it quicker than you can say “Permanent Alizarin Crimson!”
Mixing the Perfect Palette
Like a chef prepping their mise en place, mixing the perfect palette sets you up for success before the first stroke. Here’s the scoop: You don’t need the entire spectrum of a rainbow––a few select essentials can lead to infinite hues. The right blend of colors can speak volumes about lighting, atmosphere, and form without uttering a single word.
Working with Light and Shadow
Playing with light and shadow is less of a random jam session and more of an intentional symphony within your painting. Beginner painting techniques emphasize: it’s not just about the light; it’s the shadows that shape the narrative of your light. Imagine sunlight piercing through an oak tree; it’s the shadows that define the sunlight, just as much as the light itself.
A key tip: Get your hands dirty, or rather, get them painted! You’ll only truly understand the dynamic dance of light and shadow by practicing and experimenting. Don’t just dip your toes in; dive into those hues!

Below is a table that paints a clearer picture—quite literally—of how primary and secondary colors mix to create the landscape shades you’re after:
| Primary Color | Secondary Color | Mixed Result | Use Case in Landscape |
|---|---|---|---|
| Blue | Yellow | Green | Verdant hills |
| Red | Yellow | Orange | Warm sunset |
| Red | Blue | Purple | Distant mountains |
Keep in mind, this is a playful experiment, not a rigid math formula. Sometimes the greatest discoveries lurk in a “mistake” or a spontaneous blend. With these easy acrylic painting tips and beginner painting techniques, your palette is both your canvas and your domain—rule it wisely and color will be your most loyal subject in the landscape kingdom!
Creating Texture and Depth in Your Painting
As you delve into the fascinating world of landscape painting for beginners, let’s get down and dirty with the nitty-gritty of texture and depth. Now, this isn’t your grandma’s knitting pattern! We’re talking about the kind of texture that could make you feel the wind’s whisper or the rugged mountains’ call.
First off, grab those filbert brushes because it’s time to finesse those gentle edges that blur into the sunset. And when it’s time to dot those dainty daisies, wield your round brush like a knight’s sword—precision is key. Remember, folks, easy acrylic painting tips are your friends, not just random suggestions!
Now, let’s talk shop about layering. Think of your painting as the world’s most delightful onion, with each layer contributing to a tapestry of texture. Below is a table that captures the essence of adding textural goodness to your acrylic palette:
| Layering Sequence | Texture Effect | Tool of the Trade |
|---|---|---|
| Base Layer | Misty Backgrounds | Wide Brush |
| Mid Layer | Rippling Waters | Palette Knife |
| Top Layer | Rugged Tree Bark | Fan Brush |
Creating the illusion of depth is no small feat—it’s like convincing your pet goldfish that there’s a whole ocean in their bowl. The color value is your magic spell here. Lighter tones beckon the eye forward, while darker shades are the shy kids at the dance, hanging back by the punch bowl. This contrast carves out the distance and turns a flat canvas into a dimensional daydream.
- To make something pop, splash on those lighter tones.
- Want to push it back? Dark tones are your jam!
- And finally, nothing says “look at me” better than a stroke of pure white. Use it sparingly and where the sun kisses the land the most.
Arm yourself with these insights, and your next landscape painting will have friends and strangers alike squinting at your canvas, wondering if they can step right into your painted world. And if they try, just remind them it’s not a real portal—safety first!
Mastering the Acrylic Medium: Tips and Techniques
As you embark on your step-by-step guide to your first acrylic landscape painting, it’s essential to get cozy with the medium itself. Remember, acrylic paints are not just colorful goo—they are your partners in creation, offering both song and dance to the rhythm of your brushstrokes. Let’s unlock the secrets of acrylics together, discovering how to bend their quick-drying quirks to your artful will.

Blending Acrylics for a Smooth Transition
Ever dreamt of skies so smooth they make marshmallows jealous? Achieving that flawless gradient when the blues and oranges of dusk kiss each other requires a deft hand at blending. Acrylics dry faster than the latest gossip spreads, so use a slightly damp brush and work speedily to merge your hues where they meet, before the acrylic decides to set in stone—or, rather, on canvas.
Layering to Achieve Depth
Imagine you’re an enigmatic chef. Each layer of paint is an ingredient adding complexity to your dish—er, canvas. Begin with broader, darker strokes for shadows and add progressively lighter hues to cook up that irresistible depth. This beginner painting technique works wonders in giving your landscape paintings a three-dimensional pop that pulls viewers into your visual escapade.
Drying Time and Working with Acrylics
Acrylic paint dries like lightning, a feature that’s a double-edged sword for artists. To best utilize this trait, plan your steps. Work on distant mountains before those delinquent clouds, or you might find yourself racing against the clock. Start with layers that cover large areas, then briefly pause for drying—perhaps a good time for a coffee break? Then resume to add fine details that bring your landscape to life.
Pro tip: Keep a hairdryer at arm’s length. A quick blast can speed up drying times between layers, ensuring you maintain momentum without your paint drying out prematurely.
With these insights, your proficiency with acrylics will soar, turning challenges into triumphs as you navigate your introduction to this versatile and rewarding medium. So wield your brushes with confidence and let your creativity loose on the canvas!
Bringing Your Landscape to Life with Details
As you dive into the nuanced world of a landscape painting for beginners, it’s time for the grand reveal of intricacies that elevate your canvas from a simple sketch to an artistic masterpiece. The devil, as they say, is in the details—and what a delightful devil it is! With a fine-tip brush in hand, akin to a wizard’s wand, you’re about to cast spells of texture, tone, and tenacity, giving your ethereal landscapes flesh and bone.
“Just as a poet’s careful choice of words breathes life into verse, your meticulous attention to the delicate stitches in nature’s tapestry is what will make onlookers sigh and pine for the places you’ve birthed into being.” – A sentimental musings of an artist.
Let’s dissect this acrylic painting tutorial for the final touch, shall we? Allow the light to be your guide as it dances over mountain peaks and dips into the valleys, creating a dialogue of shadows and brightness that turns a flat image into a realistic scenery begging to be explored.
But before you whisk away, take a gander at your creative road map—a detailed table that lays out the quintessential aspects of your landscape’s allure:
| Detail | Technique | Effect on Viewer |
|---|---|---|
| Texture of foliage | Stippling with a fine brush | Creates a tactile, living quality |
| Ripples in water | Gentle horizontal strokes | Implies motion and fluidity |
| Rock formations intricacies | Dry brush dabbing | Adds rugged realism and depth |
| Glints of sunlight | Light dabs of Titanium White | Brings a sparkle of life and light |
Now equipped with such potent knowledge, go forth and conquer your canvas. Reality is in the palm of your hand—or, shall I say, at the tip of your brush. And remember, while you’re capturing these snapshots of ideal beauty, it’s the pursuit you enliven with every stroke, every color, every detail that builds the bridge from the ordinary to the spectacular.
- Sharpen those fine-tip brushes, they’re your detail-drawing dueling swords.
- Observe how the light plays tag with the land; invite it to your painting.
- Look for what makes each tree unique, each stone an ancient storyteller.
- And always believe in the power of a highlight to transform the mundane to the magical.
So, as this acrylic painting tutorial commences this section, go and add your own tale to the landscape, making the observers wonder, for just a second, if they might just step into your painting and explore the world anew.
The Importance of Contrast and Composition
Let’s talk about turning your canvas from “just another landscape” to a “stop-and-stare” masterpiece. It begins with understanding the dynamics of contrast and composition—the two C’s that can make or break your visual narrative. Think of them as the rhythm and harmony in the symphony of your artwork. As a beginner delving into the realms of beginner painting techniques, it’s time you wield these tools like a maestro!
Establishing Focal Points
Imagine a landscape painting as a party. Now, who’s the life of the party? The focal point, of course! It’s where guests’ eyes land the second they walk in. Use this to your advantage. Is it the glistening sun setting behind the mountain or the quaint little cottage by the lake? That’s your superstar. Determine your focal point and let everything else in your composition support it—guest stars to your lead.
Using Contrast to Create Visual Interest
Don’t be afraid of a little drama. In the world of acrylic painting step by step tutorials, ‘contrast’ is the buzzword for visual allure. Combine whispers of light colors with the shouts of darks to tell a story of shadows and highlights. Floodlit peaks versus cloaked valleys; it’s these oppositions that snag viewer interest and keep eyeballs glued to your panorama.
Balancing Your Composition
The balancing act in painting is somewhat akin to tightrope walking. Lean too much on one side and the entire scene feels amiss. Sprinkle elements throughout your painting to keep the eye moving and the scene engaging. Remember, a step-by-step guide to your first acrylic landscape painting isn’t complete without strategizing the visual weight across your canvas—variety is the spice of life, and evidently, of art too.
| Technique | Details | Impact on Composition |
|---|---|---|
| Focal Points | Identify and emphasize the main subject | Draws attention, creates a narrative |
| Contrast | Use of light and dark hues | Adds depth, dramatizes the scene |
| Balance | Distribute visual elements evenly | Creates harmony and visual flow |
Using these nuggets of wisdom, your acrylic canvas will not just be a painting; it’ll recount a tale, the kind you won’t tire telling. So go ahead, you’re now ready to juxtapose, highlight, and enchant. Your landscape awaits its story!
Finishing Touches: Adding Highlights and Refinements
As you’re nearing the end of your acrylic painting tutorial, it’s time to sprinkle a little magic with those finishing touches. This isn’t just about putting paint on a canvas—it’s where your painting starts to sing. Think of it this way: you’ve been composing a symphony, and now you’re setting up for that final crescendo. High notes, in the form of highlights, will dance across the tips of your landscape where the sun kisses the most.
We’re talking about those spots where light seems to touch down just to dazzle our eyes—the apex of mountains, the curves along a tranquil riverbank, or the very tips of leaves on your foreground trees. Approach this with a delicate hand; use your easy acrylic painting tips to lay down the brightest brights sparingly, since a little goes a long way.
Now, it’s time to refine like never before. Grab your smallest brush, steady your hand, and zoom in on those details that need a touch more definition. Revisit your shadows—those darks are just as important as the lights for contrast. They’re the unsung heroes that give your lights their moment in the spotlight. Check your edges; clarity is key for ensuring each element in your painting has its own place and space.
Remember, subtly is your friend here. The goal isn’t to overwhelm your painting with sparkle and sharp lines, but to enhance what’s already there. This is where you take a step back after every few strokes, squint your eyes slightly, and trust your instincts. Does your painting feel complete? If yes, you’ve just nailed the art of adding finishing touches!
Protecting Your Acrylic Painting: Sealants and Varnish
Behold, you’ve just put the final strokes on your masterpiece, and it’s time to ensure that your acrylic landscape stays as vibrant as the day it was painted. Your step-by-step guide to your first acrylic landscape painting wouldn’t be complete without covering the fortification phase. Let’s dive into the world of sealants and varnishes, which act as the unsung heroes, safeguarding your artwork against the relentless march of time.
Choosing the Right Sealant
The secret to picking the perfect protective partner for your painting lies in knowing your sealants. You wouldn’t bring an umbrella to a snowstorm, likewise, choosing mate Polycrylic over a glossy finish can make a world of difference. This water-based varnish will snuggle up to the colors, enhancing them without altering their hue, all the while reflecting minimal glare. It’s the guardian angel that your landscape painting for beginners deserves.
Application Techniques for a Lasting Finish
Even the mightiest shield is ineffective if not wielded properly. The same goes for your varnish. When applying this liquid armor to your painting, do so with a sense of elegance. Utilize a wide, soft-bristled brush to glide over the surface effortlessly. The technique is simple: start from one end and proceed to the other, maintaining a persistent pace to avoid any unsightly brushstrokes or air bubbles—your mission: an even, lustrous coat that stands the test of time.
| Sealant Type | Finish | Drying Time | Application Notes |
|---|---|---|---|
| Matte Polycrylic | Non-glare, subtle sheen | Quick-drying, typically under an hour | Works well for softer, muted palettes |
| High-gloss Varnish | Dramatic, shiny look | Slow-drying, benefits from overnight setting | Accentuates color vibrancy and contrast |
| Satin Polycrylic | Happy medium, semi-gloss | Quick-drying, redo layers within hours | Universal appeal, works with various palettes |
With your painting now sporting the finest coat of armor, you can rest easy knowing that your work is preserved. Remember, this isn’t just preventative care; it’s the final touch that whispers to the world, “I’m complete, and I’m here to stay.” Whether you’re a seasoned landscape painter or this is your first soiree into the medium, proper protection is the signature of a true artist—and your first acrylic landscape painting demands nothing less.
Presentation and Framing: Showcasing Your Finished Work
Now that you’ve mastered the step-by-step guide to your first acrylic landscape painting, you’ve reached a definitive moment—the grand reveal. But wait! Before you unveil your masterpiece, consider the final touch that can turn “nice” into “gallery-ready”: framing. Think of it as the tuxedo to your painting’s James Bond; it’s not just a frame—it’s a statement of completion.
Just like a perfect frame complements a wedding photo, your choice in framing is key to enhancing the allure of your artwork.
In this crucial stage of your acrylic painting tutorial, let’s dive into the art of presentation. You wouldn’t present a diamond on a paper plate, so don’t skimp on framing your landscape! It’s time to transform your artwork from a creative endeavor into a conversation starter.
Let’s walk through framing options that best mirror your unique style:
| Framing Style | Artistic Impact | Setting Mood |
|---|---|---|
| Canvas Floating Frame | Modern and Edgy | Light and Airy for Contemporary Spaces |
| Traditional Wood Frame | Classic Elegance | Warmth and Richness for Homey Interiors |
| Minimalist Metal Frame | Clean Lines | Sleek and Understated for a Modern Look |
| Ornate Vintage Frame | Lavish and Grand | Old-World Charm for a Dramatic Effect |
Remember, your painting should be the star of the show, so choose a frame that doesn’t steal the spotlight but enhances it. And here’s an insider tip: the location where you display your painting can be just as important as the frame itself. A well-placed work of art can elevate the ambiance of a room or become a beacon of inspiration.
- Pick a spot with natural lighting to bring out the vibrancy of your colors.
- Give your painting some space—don’t clutter it with too many competing visuals.
- Height matters—hang it at eye level so it can be admired comfortably.
Remember, your artwork tells a story, and the framing is its voice. So make sure it speaks volumes! With the right frame and presentation, you’ll have a piece that isn’t just displayed—it’s celebrated.
Conclusion
With every streak and hue you’ve brushed onto the canvas, you’ve not only created an acrylic landscape, you’ve traversed a path of immense personal growth. As you step back to observe the lush valleys, towering mountains, and serene skies that emerged from your palette, absorb the achievement. Each decision made, from the selection of Winsor & Newton canvas to the final stroke of Titanium White, signifies a chapter in your ever-evolving story as an artist. This isn’t just paint on canvas; it’s a display of your dedication and a testament to the beginner painting techniques you’ve now mastered.
Reflecting on Your Painting Journey
Your venture began with basic supplies and perhaps a flicker of doubt. But armed with a step-by-step acrylic painting tutorial, you dove into the world of colors and contrasts. With every layer, you witnessed your skills blossom, growing more confident and bold in your expressions. The journey wasn’t just about following instructions; it was about making each stroke a conversation between your vision and the canvas. Now, as you analyze the depth you crafted and the textures you coaxed into reality, take pride in the knowledge that you gave it life.
Planning Your Next Artistic Adventure
The easel awaits, ready for your next creation. You’ve laid the groundwork with this landscape, but what worlds will you build next? Perhaps the rolling waves of an ocean at dusk or the rustic charm of a countryside barn? Whichever vista sparks your imagination, approach it with the same anticipation and enthusiasm. Remember, each acrylic painting tutorial you explore and each technique you test, edges you closer to an artistry that is uniquely yours. So, my fellow artist, let this not be an end but a gateway to an endless expanse of creativity. Your brush, an extension of your ambition, is ready to dance across countless canvases to come.
FAQ
What are the essentials I need to start acrylic landscape painting?
You’ll need a pre-primed canvas, preferably a 10 x 10-inch Winsor & Newton. For brushes, get your hands on a Size 6 Isabey Isacryl acrylic brush and a Size 10 round brush. Quality paints are a must – don’t skimp on Titanium White. And remember those miscellany items: a 3B pencil, kitchen roll, a jam jar for cleaning, and a small dipper for diluting paint.
Can you give me a step-by-step guide to creating my first acrylic landscape painting?
Sure thing! Start with an underpainting of white mixed with a pinch of Burnt Umber. Sketch that composition, then move on to blocking in colors, starting broad and then honing in on those pesky details. Dive into a bit of color theory and mix that palette like the maestro you are. Bring in the texture and depth—think Bob Ross without the perm. Make sure you embrace the quick-dry nature of acrylics with smooth blending and strategic layering. Nuggets of detail will make your landscape truly yours. Seal it with a varnish for that everlasting look before you frame and showcase to the world!
How do I pick the right canvas and brushes for my painting?
When it comes to canvases, quality matters – a Winsor & Newton canvas is a solid choice. Brushes? Go for variety – a filbert brush for softer edges and a round brush for those defined lines. The Size 6 Isabey Isacryl and the Size 10 round brush are your starters.
What role does color theory play in acrylic landscape painting?
Color theory is your BFF in landscape painting. It guides you in choosing and mixing colors, establishing the mood, and creating that lifelike feel in your landscape. Pick a simple palette with primary and earth tones and pay attention to hues and values for those light and shadow effects.
How can I achieve depth and texture in my landscape painting?
You can create illusions of depth through color value – lights come forward, darks recede. Texture is achieved by layering paint and using your brushes to mimic nature’s rough and smooth surfaces. Experiment with your filbert and round brushes to convey the right feel and look.
What are some beginner-friendly tips for working with the quick-drying nature of acrylics?
Keep calm and embrace the quick dry! Use it to your advantage for layering. When blending, work fast, or add a slow-drying medium to extend your window of workability. Always anticipate the slight color darkening after drying when you plan your palette.
How do I decide on the composition and focal points of my painting?
Composition and focal points are what make your painting sing. Look for natural lines that guide the eye and areas of high contrast to draw attention. Don’t be afraid to adjust elements to improve the balance and flow. Think of your composition as the stage where your color and texture performers will shine.
Once my landscape painting is finished, how do I protect it?
Protecting your masterpiece is key. Grab a water-based varnish like matte Polycrylic to safeguard those colors without altering their vibrancy. Apply it evenly with the right tools. This step is like sunscreen for your painting—non-negotiable.
What should I consider when framing and presenting my finished painting?
The frame is the final touch that can add that extra bit of flair to your work. Consider the style of the painting when choosing a frame. When hanging, find a spot that does it justice in terms of lighting and space. Remember, presentation can make or break the viewer’s experience.
Source Links
- https://samuelearp.com/blog/how-to-paint-a-landscape-in-acrylics/
- https://www.jennasuedesign.com/how-to-beginner-landscape-acrylic-painting/
- https://willkempartschool.com/acrylic-landscape-painting-techniques-lessons-for-an-absolute-beginner-part-1/
This post contains affiliate links.