
This post contains affiliate links.
There you stand, palette in hand, as the blank canvas before you beckons—a silent challenge to capture the world not just in hue, but in its full dimensional glory. Recall a moment when sunlight danced through the leaves, casting a mosaic of light and shadow at your feet—a transient beauty that you long to embody in your art. With acrylic painting techniques at your fingertips and the ambition to master light and shadow in art, you’re poised to turn that silent challenge into a symphony of colors and contrasts. Let the luminance of your vision shine through the acrylic medium, where every stroke holds the promise of dimension, depth, and drama.
Cold hues whisper of shadows, while warm tones sing of light; it’s this secret language of acrylics that renders the flat surface a stage for the eye’s ballet. Your canvas isn’t just a fabric—it’s a playground for experimentation. And as you tease out the curvature of an apple with your brush, infusing it with life and volume using expert acrylic painting tips, remember this: You’re not just painting an object; you’re sculpting with light itself.
Key Takeaways
- Embrace the challenge of a blank canvas and transform it using light and shadow dynamics.
- Acrylic painting isn’t just about color, but about creating depth and drama on a two-dimensional surface.
- Learn the language of hues—where shadows speak in cool whispers and light sings boldly in warm tones.
- Techniques in light and shadow are about sculpting with light, shaping form, and defining volume with acrylic paints.
- Experimentation with acrylics empowers you as an artist to create works that resonate with realism and emotion.
- Your journey with acrylics is as much about mastering technical skills as it is about expressing your unique artistic vision.
- Utilizing tips learned will elevate your paintings from sketches to sophisticated works of art that engage the senses.
The Fundamental Concepts of Light and Shadow in Painting
When you’re trying to capture light in acrylics, think of yourself as a maestro, with each stroke creating a symphony on canvas. It’s like you’re whispering to each ray of light, guiding it gently onto your piece, bending and blending until it breathes life into your paintings. Remember, it’s about more than just slathering on a sunny yellow here or a moody blue there; it’s about mastering the delicate dance between light and dark. Let’s explore the impactful way Paul Cezanne used this dynamic in “Still Life with Seven Apples”. He knew that the essence of creating depth with acrylics is understanding ‘light logic.’
Every highlight and shadow you summon on your canvas is a step towards manifesting realism and volume in your art. Like actors on a stage, light and shadow play critical roles in transforming the two-dimensional into a three-dimensional spectacle.
Imagine working under a single, hard light source—you’ll notice your shadows are crispier than your favorite breakfast cereal. They are sharp, defined, no frills or fluff. That’s because light has a one-track mind, traveling in uninterrupted, straight lines rather than taking scenic detours. This behavior lays the groundwork for creating the mesmerizing illusion of depth. Master this, and you’ll be giving Cezanne a run for his money.
- Light Behavior: Direct and candid, light travels in a straight shot, cutting through space and casting shadows that tell more than any story.
- Shadow Casting: The stage is set, and the sharpness of your shadows adds an unmistakable realism that renders the viewer speechless.
- Forming Depth: As an artist, you’re in the driver’s seat. Your understanding of shadows and light builds the bridges and sinks the valleys in your painting’s landscape.
It’s about finesse and a touch of science. Get your fundamentals down pact, and your journey into the realms of acrylics—a world where light and shadow are the ultimate sculptors—will be full of discovery and, dare I say, enlightenment. Or should we say, ‘enlight’-your-‘paintment’?
| Concept | Role in Painting | Impact on Viewer |
|---|---|---|
| Light Source | Dictates the direction and clarity of shadows | Guides the eye, creating focus and attention |
| Straight-Light Principle | Shapes how light travels and shadows are formed | Invokes the illusion of three-dimensionality |
| Shadow Clarity | Defines the edges and detail in the shadows | Adds depth and a sense of the tangible |
Now that we’ve shone a light on the basics, grab your brush, summon your inner Cezanne, and start creating depth with acrylics. After all, it’s not just about painting the fruit bowl—it’s about making someone want to reach out and grab an apple.
The Importance of Choosing the Right Materials for Acrylic Painting
When you dive into the world of acrylics, the vast sea of options can be overwhelming. But hey, that’s why you’re here, right? To navigate these choices like the savvy artist you are. Remember, the paints, canvases, and brushes you select are not just tools; they’re your partners in crime as you master the art of manipulating light and shadow.

Understanding Acrylic Paint Properties
Each brand of acrylic paints comes loaded with its unique characteristics. For example, Golden Heavy Body Paints boast a buttery texture, splendid for those bold, impasto techniques you love. In contrast, Winsor & Newton offers a smoother flow, ideal for detailing those sneaky shadows and popping highlights. Teaming up with the right brand can elevate your acrylic blending techniques and empower your painting to whisper a thousand words in every brushstroke.
Picking the Perfect Canvas and Ground Colors
The canvas is your playground, and choosing one is akin to picking real estate — location, location, location! A stretched linen canvas whispers luxury and sets a glorious stage for your work, letting your shadows and highlights waltz across it. But let’s not forget the importance of ground colors. Starting with an invigorating mix of Yellow Ochre and Cadmium Yellow Light can breathe life into your composition right from the start, offering a luminous harmony that’s music to the eyes.
Tools of the Trade: Brushes and Palette Knives
You wouldn’t butter your bread with a spoon, right? So, why would you go about detailing without the finesse of the right brush? The key to those flawless acrylic blending techniques lies in the bristles. A round brush for those pesky details, a flat brush to cover the vast ocean of your canvas, and, of course, a filbert brush to kiss the curves just right. Add a cranked handle palette knife to the mix, and you’re ready to spread those shades and tones like the boss of shadows and highlights you are.
| Tool | Use | Technique |
|---|---|---|
| Round Brush | Detailing and fine lines | Perfect for enhancing the details of light and shadow |
| Flat Brush | Broad strokes | Great for laying down blocks of color and building shadows |
| Filbert Brush | Blending | Ideal for soft transitions in highlights and shadows |
| Palette Knife | Texturing and mixing | Creates dynamic textures and marbled effects |
Mastering Acrylic Painting Techniques for Shadow and Light
Think of your canvas as a stage where light and shadow will perform. In the world of acrylic painting tutorials, you’ve got to know your cues and marks to direct this play. Let’s sort out the backstage preparations first: applying a colored ground. This initial layer sets a tonal mood for your upcoming masterpiece by providing a mid-tone against which your shadows and lights will pop.
Next, you’re on to sketching the outline, your roadmap for the journey through light and shadow. When you block in shapes, you define the zones—where will the light meander and where will the shadow loom? Mastering light and shadow in art is about contrast, but it’s also about transition. The line separating light from dark shouldn’t always be a hard one; sometimes, it’s as soft as the fur of a sleeping kitten.
Bring forth the darkest darks with your acrylics to carve out the shadows. Shadow lines need finesse; they’re not just about the absence of light but are integral in shaping the form. Work your magic with halftones to navigate through the mid-ranges, connecting the realms of light and dark.
But wait, what about the glint in the eye, the sheen on the apple, the sparkle on metal? Here come the highlights, the show-stoppers, dancing in with lighter tones. To give them a warm embrace, glazing your piece with hues like Burnt Sienna and Cadmium Red adds intensity and emotion, stirring a sensation of sunlight kissing a surface or the warmth of a lamplight gracing a cheek.
- Apply your colored ground to establish the tonal base.
- Sketch out the form, dividing areas into light and shadow.
- Use darker acrylics to define shadows and enhance depth.
- Apply halftones to create smooth transitions between shades.
- Highlight your highlights, adding layers to create luminosity.
- Glaze with warmth for an extra touch of atmosphere and realism.
Each step you take in this acrylic painting tutorial is a deliberate stride towards depicting a believable interplay of light and shadow. Turn these technicalities into second nature, and soon, you’ll be painting with confidence that could rival the sun in its glory days.
Creating Depth with Acrylics: A Step-by-Step Approach
Embarking on the journey of acrylic painting can often feel like you’re a sorcerer apprentice – a mix of excitement and trepidation as you wield your brush like a magic wand. But fear not! With these step-by-step acrylic painting tips, you’ll be creating depth with your canvas in no time, turning flat images into lifelike scenes that seem to jump right off the frame. Let’s dive into these methods that will elevate your artistic prowess.
Establishing the Underpainting and Tonal Ground
Imagine your canvas is your stage, and before the actors can perform, it needs to be set. This is where your underpainting comes into play. By applying a tonal ground that’s vibrant yet subdued, you prep your canvas beautifully for the layers to come. Think of it like the mise-en-scène of your painting – necessary for the full effect. A classic move is to start with a warm yellow or perhaps a burnt sienna, allowing the subsequent layers to sing with vibrancy and warmth.
Constructing Shadows with Glazing Techniques
Let’s talk about glazing techniques – it’s not just for donuts. When creating depth with acrylics, glazing is your go-to. Using thin layers of a transparent or semi-transparent acrylic color mix, you can magically construct shadows that add volume and a sense of realness to your work. Pay attention to where the light naturally falls, and where the shadows lurk, transitioning softly between them. These are the subtleties that will give your art that ‘pop’.
Layering Highlights for Dynamic Impact
Now, for the grand finale in your depth-creating odyssey: highlights. Approach them like a chef finishing a dish with a sprinkle of salt. Layering highlights with lighter paints (often kissed with a touch of white) allows you to define the edges where the light dances and plays, bringing your subject to luminous life. It’s not just about adding white spots randomly; it’s about understanding how light works and using it to your advantage.
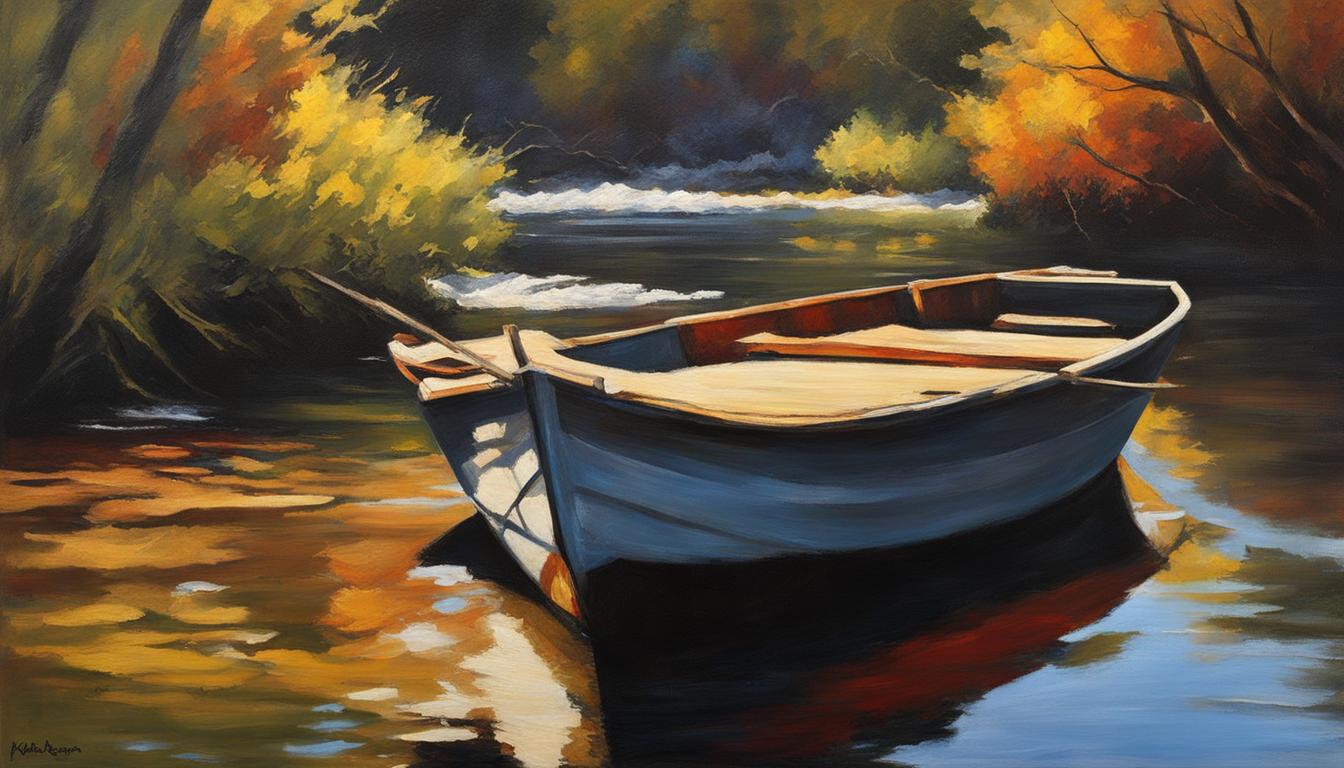
Voilà! Behold the power of layering and texture as displayed in this masterpiece. Notice how the terminator—the transition between light and shadow—is handled with grace and skill, thanks to the adept use of glazing techniques. With these methods, you turn the ordinary into the extraordinary. Now, go forth and use these tips to make those acrylics sing on your canvas!
The Play of Light and Shadow Using Acrylic Paints
When you delve into the play of light and shadow using acrylic paints, you’re embarking on a visual sonata, where your canvas is the orchestra and your brushes, the conductors. Each movement of the bristles, every choice of pigment, weaves together to form a symphony of shadows and highlights in painting that can make any subject spring to life with dramatic effect.
The secret, dear artist, lies in knowing the rules of this ethereal dance between light and shadow. Imagine you could freeze the sunlight as it cascades through a window, studying the luminous pathways it carves across a subject. This frozen moment is what you strive to mimic using your acrylic arsenal. Understanding how light wraps around objects, where it boldly announces its presence and where it subtly retreats into darkness, is critical.

Let’s look at form shadows first – they are the softer, more nuanced siblings in the shadow family, hugging the contours of your subject quietly. Core shadows, on the other hand, are the intense, dark areas where light is blocked entirely. And then, you have the cast shadows – the drama queens of the shadow world, boldly stretching across your canvas, declaring where the light cannot reach.
And how do you bring these shadows to life? With the magic of your palette. Whether it’s the warm, mellow glow of reflected light or the striking sharpness of a strong light source, your task is to replicate these effects convincingly. Wondering how to effectively represent the stunning interplay? Use this table to guide your acrylic project:
| Type of Shadow | Characteristics | Acrylic Techniques |
|---|---|---|
| Form Shadow | Soft, diffuse, contours shapes | Blending, soft gradations, layering translucent colors |
| Core Shadow | Bold, dark, marks the absence of light | Using deep tones, playing with paint opacity |
| Cast Shadow | Defined, shapes depend on light angle | Sharp edges, glazing, contrast adjustments |
Remember, your mastery over the shadows and highlights in painting isn’t just about representing shapes but also setting the mood, creating ambiance, and evoking emotions. So go ahead, harness the glorious duality of light and shade with your acrylics, and watch as your artwork tells a story that’s as deep as the shadows it casts.
Color Mixing Secrets for Vibrant Shadows and Luminous Highlights
Unlock the potential of your palette and revolutionize the way you perceive shadows in your acrylic masterpieces. The secret ingredient to adding life and dimension to your paintings? Skillful color mixing and acrylic blending techniques. You’re about to discover how to elevate your art and capture the essence of vibrancy and luminosity that sets apart the pros.
Exploring Color Temperature in Shadow Work
When you’re crafting the subtle nuances of shade, it’s not about just adding black to darken a tone. No, the real magic happens when you dabble in the coolness of blues or the calmness of purples. These cooler shades help convey the chill of shadows, making your painting whisper tales of unseen sunlight and enhancing the overall feel of depth.
Using Complementary Colors for Naturalistic Shadows
Now, take a step into the natural world with your brush. Go ahead, mix in some complementary colors for those shadows. Brush in a hint of dark green beneath that red apple, or a soft violet for a yellow sunflower’s elusive dark side. The results? Vibrant shadows that dance with life rather than lay flat upon your canvas.

But it’s not just the shadows. Oh no. It’s also about hitting the high notes with luminous highlights. Let’s get scientific for a moment—mix in a tad of the original color’s complement with white. Yes! See that? It’s a highlight that sings with vibrancy, bringing out the sun-kissed glory of your artistic vision.
| Original Color | Shadow Mix | Highlight Mix |
|---|---|---|
| Cadmium Red Medium | Pthalo Green + Red (Mix to a rich brown) | Cadmium Red Medium + White + Complementary Green (Tiny touch) |
| Ultramarine Blue | Burnt Sienna + Blue (Mix to a deep, warm blue) | Ultramarine Blue + White + Complementary Orange (Sprinkle) |
| Cadmium Yellow Light | Dioxazine Purple + Yellow (Mix to a muted olive) | Cadmium Yellow Light + White + Complementary Purple (Whisper) |
Your paintings should tell a story, one where acrylic blending techniques set the stage, and your mastery of color mixing brings the plot to life. So go ahead, try this: work with temperature and play with complements. Weave in those vibrant shadows and cast those luminous highlights. And just like that, you elevate your art from simply painted scenes to whispered narratives of light and dark.
Capturing Light in Acrylics: Insights from the Masters
Like a time traveler grabbing souvenirs from each era, capturing light in acrylics takes you through the ages with lessons from the greats. Let’s channel the spirit of Cezanne, shall we? You see, unlike those masters, you’ve got an ace up your sleeve. They had to rely on oils that took ages to dry, but you, dear artist, can wield the fast-drying superpower of acrylics to lay down layer upon layer, mimicking their genius.

Cezanne didn’t just slap paint onto a canvas and call it a still life. He was meticulous, strategic, and, frankly, a bit obsessed with illuminating the ordinary fruit bowl. You’ve got to appreciate that kind of dedication. Every stroke and color choice was a deliberate step toward capturing the essence of daylight draping over apples and oranges. It’s time for you to dissect these acrylic painting techniques from the masters and apply them to your contemporary canvas.
- Study the color choices — Cezanne wasn’t playing with a full palette. He knew the right shades could make or break the illusion of light.
- Brushwork matters — Each stroke builds up texture, gives life to shadow, and breathes light into a painting.
- Tone is your mood setter — It’s like the background music in a movie scene; it sets the emotional undertones for your light play.
And like a maestro conducting an orchestra, you manipulate your acrylics to create harmony on the canvas. If the light in your painting sings, it’s because you’ve learned from the best.
| Master’s Technique | Your Acrylic Interpretation |
|---|---|
| Color as Light | Fast-Drying Glazes for Depth |
| Deliberate Brushstrokes | Texture with Palette Knives and Brushes |
| Tonal Value Mastery | Sponging and Dry Brushing Techniques |
Consider this: Cezanne was a fan of light. Not too much, mind you, but just enough to make his apples look like they were sun-kissed by the gods themselves. And if you, picking up your trusty brushes, decide to capture that same light-drenched look, you’ll be joining the ranks of those who do more than paint; they illuminate.
Acrylic Painting Tutorials: Learning from Realistic Applications
Imagine yourself in the studio, your palette bursts with an array of colors, and before you, a canvas waits to capture the intricate play of light and shadow. You’re about to dive into a world where acrylic painting tutorials, still life studies, and the technique of painting en plein air are not just methods but gateways to mastering acrylics. So, take a deep breath, because your journey towards painting mastery is about to get a lot more colorful.
Still Life Studies: From Sketch to Full Render
You start indoors, away from nature’s elements, focusing on a controlled setup—a still life. Every object is a study of form and a challenge to your perception. You’ll move from a simple sketch to a full render that brims with life. As you paint, you’ll witness how still life studies become a sandbox for experimenting with light and shadow, all while staying grounded in the principles of acrylics.
Interpreting Outdoor Light: Painting En Plein Air
Then you step outside, your canvas ready to catch the ever-changing outdoor light. Your senses sharpen as you paint en plein air, tackling the sun’s relentless dance across the sky. Observe as the colors shift from moment to moment, learn to capture snapshots of the perfect light, and see your palette evolve with the day. With every brushstroke against the canvas, you interpret the landscape’s harmony of lights and darks, translating nature’s exacting beauty into a language of vibrant strokes and subtle hues.
The world of acrylic painting is vast and rich with opportunity for growth. These tutorials are not just lessons; they’re experiences that imbue your art with depth and realism. You’ve got the tools, the paints, and now, the know-how. Happy painting, artist. Unleash the full spectrum of your creativity and bask in the acrylic hues of success.
Conclusion
The quest to master light and shadow in art through the versatile medium of acrylics is akin to embarking on a grand exploration, where each technique discovered and each insight gained is a treasure in itself. As you’ve navigated from the rudiments of “light logic” to the subtle art of color mixing, you’ve armed yourself with invaluable acrylic painting tips that pave the path toward not just reproducing what you see, but also understanding the delicate interplay of light that brings art to life.
Yet, the beauty of art lies in the challenge—there is no final destination. To create depth and realism in your art is to constantly innovate and adapt. Whether you are meticulously sketching out the contours of a still life or boldly interpreting the shifting lights of an outdoor scene, each stroke is a step further in your journey. Let the processes of the masters inspire you, but also dare to innovate and infuse your work with personal flair.
Remember, each canvas is a new beginning, a fresh opportunity to capture the ephemeral beauty of light that dances across forms and textures. Continue to push your boundaries, embrace each learning experience, and, above all, keep your brushes dancing to the rhythm of shadows and highlights. This is not just the art of painting; it’s the art of seeing the world – and translating its boundless wonder onto your canvas.
FAQ
What are some essential acrylic painting techniques for mastering light and shadow?
Essential techniques include applying a tonal ground, understanding light logic such as the terminator line, glazing for shadow depth, and strategically layering highlights for dynamic impact. Remember, the devil’s in the details, so keep those brushstrokes as controlled as a tightrope walker!
How does capturing light in acrylics contribute to creating depth in a painting?
Capturing light in acrylics, my dear Watson, is like the essential clues to a mystery. It defines forms, creates the illusion of volume, highlights textures, and sets the mood. It’s all about making flat surfaces come alive with the drama of a Broadway show!
What should I consider when selecting materials for my acrylic painting?
Consider the paint’s properties, your canvas choice, and whether you’re going for a heavyweight bout or a lightweight match – that is, heavy or light body acrylics. Ground colors set the stage, and tools like your brushes and palette knives are the cast members of your masterpiece production.
Can you explain the role of color temperature in creating realistic shadows with acrylics?
Like a good chili, color temperature can make or break your painting’s flavor. Cool tones usually end up chilling in the shadows, while warm tones like to bask in the light. This contrast gives your work the zest it needs to feel alive and kicking!
How can studying masters like Cezanne help in mastering light and shadow with acrylics?
Old Cezanne and his band of merry masters show us the ropes of playing with light and shadow. Their use of color, tone, and strategic brushwork serves as a map to the treasure of lifelike lighting. It’s like having Yoda guiding your palette – invaluable.
Why is it useful to do still life studies and en plein air painting for learning light and shadow in acrylic painting?
Still life and en plein air are the gyms for artists. These exercises flex your observational muscles, forcing you to tangle with the wild beast of natural light and its shifty ways. Plus, it’s a great excuse to spend more time outdoors – just call it ‘fieldwork’!
What is glazing and how does it help construct shadows in acrylic painting?
Glazing is the secret sauce. It’s a thin, transparent layer of color applied over dry paint that can deepen shadows like a good contour on a makeup tutorial. It creates depth and volume so convincing, you might just try to pick an apple off your canvas.
How do I create luminous highlights and vibrant shadows without making them look artificial?
Avoid the siren call of pure white and black. Instead, play chemist with your colors, mixing in tones that reflect the natural nuances of light and shadow. Think of your vibrant shadows as a complex cocktail and your luminous highlights as the sparkle that catches the eye.
Source Links
- https://www.eckersleys.com.au/inspiration/5-tips-for-capturing-light-and-shadow-in-a-painting/
- https://willkempartschool.com/how-to-acrylic-paint-light-and-shade-part-3/
- https://willkempartschool.com/a-beginners-guide-to-shadow-light-part-1-drawing/
This post contains affiliate links.