
This post contains affiliate links.
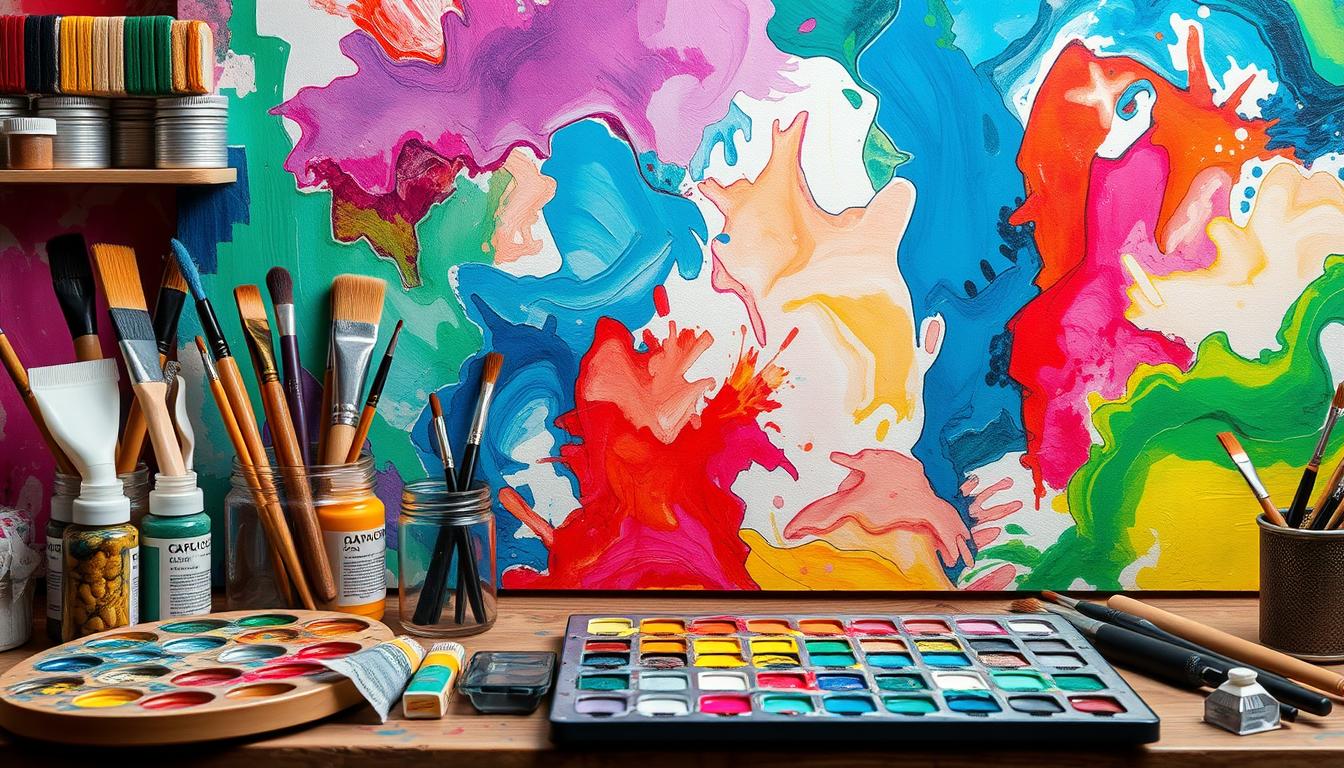
The canvas is my canvas for self-expression. It’s where I pour my heart into vibrant hues and textures. Acrylic painting lets me create bold, dynamic works that evoke emotion and tell stories. Layering and blending are key to unlocking acrylic painting’s creative possibilities.
In this article, we’ll explore mastering layering techniques in acrylic painting. We’ll look at glazing and impasto, among others. This guide is for both seasoned artists and beginners. It will help you take your artwork to new levels.
Key Takeaways
- Acrylic painting offers a versatile medium for creating depth, texture, and character in artworks.
- Mastering blending and layering techniques, such as dry brushing, glazing, and sgraffito, can enhance the visual impact of your paintings.
- Gradual layering allows for intricate details, highlights, and shadows, while techniques like impasto create a three-dimensional effect.
- Experimenting with these techniques can help you develop your unique artistic style and vision.
- High-quality artist-grade acrylic paints, like those from Nova Color, are recommended for practicing advanced layering techniques.
Understanding Blending and Layering
Mastering acrylic painting means knowing blending and layering well. Blending mixes colors smoothly on the canvas. Layering stacks paint coats strategically. These skills help artists add depth, texture, and color to their work.
Blending
Blending merges colors on the canvas for smooth transitions. It’s key for natural colors, shadows, and balanced art. But, acrylics dry fast, making blending tricky. Still, with practice, artists can achieve stunning color shifts.
Layering
Layering in acrylic painting stacks thin paint coats. Each layer can add a new color, texture, or depth. This technique lets artists build complex scenes and effects. It’s a way to add mystery and light to their art.
Learning blending and layering opens up new creative paths. Artists can make paintings that grab your attention with their rich colors and textures.
“Blending and layering are like the yin and yang of acrylic painting, each complementing the other to create a harmonious and visually captivating work of art.”
Tools and Materials for Layering in Acrylic Painting
Mastering layering in acrylic painting needs the right tools and materials. Acrylic paints dry fast, letting artists create vibrant, textured art in layers. It’s key to have a variety of acrylic paints, brushes, and mediums to get the desired look.
For brushes, mix filbert, round, and flat shapes for blending and layering. Choose high-quality brushes that can handle the layering process. A good palette is also vital for mixing colors, making layer transitions smooth.
Don’t forget acrylic mediums in your toolkit. They slow down paint drying, making blending and layering easier. Try different mediums like glazing or retarders to match your artistic style.
The canvas or surface is also crucial. Use heavyweight watercolor paper or stretched canvases for layered acrylic painting. Try different surfaces to find the one that fits your style and desired effects.
Layering in acrylic painting is all about experimenting and following a checklist. Ask yourself, “What feeling does it give me?” and “Is there a clear focal point or composition?” as you add layers. Acrylic paints are versatile, allowing you to mix in other media like water-soluble crayons or ink for unique results.
With the right tools and materials, you’ll master layering in acrylic painting. Enjoy the quick-drying nature of the medium and the endless possibilities for exploring paint effects and “happy accidents.”
Wet-on-Wet Blending Technique
Discover the magic of wet-on-wet blending in acrylic painting. This method involves adding fresh paint to wet areas of the canvas. It lets colors blend smoothly, creating stunning effects.
Try blending colors when the base layer is still wet. This unlocks a world of vibrant interactions. The paints mix beautifully, making compositions that catch the eye. It’s perfect for capturing the beauty of clouds, mist, and highlights.
For the best results, use paints that dry slowly, like Golden Open Acrylics. These paints give you time to play with colors. Let your creativity flow, and enjoy the process of creating beautiful gradients and color interactions.
Mastering wet-on-wet blending is all about trying new things and being open to surprises. Dive in, have fun, and let your canvas come alive. This will help you create unique and striking art.
Dry Brushing for Texture and Details
Discover the magic of dry brushing for your acrylic painting. This method lets you add subtle textures and details. It brings your artwork to life.
Achieving Varied Effects
Dry brushing uses a brush almost dry, with a bit of paint. Changing the brush pressure and direction gives you many effects. You can get soft edges or rough, weathered looks. Try different brushes and paints to see what you can do.
This technique is great for adding fine details, highlights, or more texture. It’s perfect for sculptures, models, or miniatures. It lets you build up layers of paint for depth and dimension.

“Dry brushing is a game-changer for achieving that perfect textured and detailed finish in your acrylic paintings.”
Explore the many uses of dry brushing. Learn to master it and take your acrylic painting to new heights.
Glazing: Adding Depth and Luminosity
Glazing is a technique that adds depth and light to acrylic paintings. It involves applying thin, clear layers of color over dried paint. This creates a stained-glass effect, making your artwork rich and deep.
Glazing makes certain colors in your painting pop. By layering glazes, you can make colors more vibrant. This technique can also add a soft, ethereal quality to your work.
To get good at glazing, try different acrylic paints. Choose colors that are transparent or semi-transparent. Use soft brushes to apply the layers smoothly.
When glazing, be patient. Let each layer dry before adding the next. This way, the colors blend well, adding depth and light to your painting.
“Glazing is like casting a spell on your painting, infusing it with a magical, luminous quality that draws the viewer in.”
So, use glazing to make your acrylic paintings shine. They will have depth and vibrancy that will amaze everyone.
Scumbling for Ethereal Effects
In acrylic painting, scumbling is a unique way to make your art feel dreamy and ethereal. It’s a dry brushing method where you layer a light color over a darker one. This creates a soft, atmospheric look that adds depth and mystery to your art.
The secret to great scumbling is to brush very lightly. This lets the darker layer show through the lighter strokes. It’s ideal for creating ethereal backgrounds or adding a magical touch to your subjects. It also brings a sense of atmospheric effects that takes the viewer on a journey of wonder.
Learning scumbling can help you blend colors smoothly and blur edges. This makes your acrylic paintings feel dreamy and elevated. Try different colors and brush strokes to find what works best for you and your art.
| Technique | Effect | Best Suited For |
|---|---|---|
| Scumbling | Soft, ethereal, atmospheric | Dreamlike backgrounds, adding a touch of magic, creating a sense of depth and dimension |
| Wet-on-Wet Blending | Smooth gradations, soft transitions | Blending colors seamlessly, enhancing dimension |
| Dry Brushing | Textured, dry-looking finish | Adding texture and dimension, creating interesting effects |
| Glazing | Depth, luminosity | Building up layers of transparent color, creating a sense of depth |
Adding scumbling to your acrylic painting skills opens up a world of possibilities. It brings ethereal and dreamlike qualities to your art. Your viewers will be amazed by the captivating atmospheric effects in your work.
Feathering Technique for Seamless Transitions
Learning feathering is key for acrylic painters wanting smooth color changes. This method blends color edges softly, making them blend without lines. It helps create soft gradients, shadows, and skin tones that look real.
Precision and Control
Feathering needs a sharp eye and steady hand. It’s about controlling paint well and knowing how colors mix. With practice, artists can get good at moving paint smoothly between colors.
- Use a soft, clean brush for fine feathering.
- Paint in thin layers, blending edges for gradients.
- Try different strokes like circles or stippling for unique looks.
- Play with paint thickness and drying time for better seamless transitions.
Mastering feathering can make acrylic paintings look deeper and more real. It’s a skill that lets artists blend colors easily, leading to amazing results.
“The true essence of painting lies in the seamless transition of colors, where the boundaries between hues become indistinguishable, and the canvas comes alive with a sense of depth and atmosphere.”
layering techniques in acrylic painting
Blending and layering are key for acrylic artists. They open up a world of creative options. Artists can achieve smooth transitions and complex depth and texture. By learning these techniques and trying out different tools, your paintings can reach new levels.
Acrylic paint dries fast, so artists must work quickly. It’s good to spray your painting with water every 10-15 minutes. Use fine brushes for detailed work.
Don’t mix shades to keep color harmony. Let your artwork dry for a day before varnishing and framing. Adding water makes strokes lighter and clearer. Clean your brushes well to avoid color mixing.
Start with a base layer and add more until you reach your goal. The number of layers depends on your vision. There’s no set rule.
Start your artistic journey, mix colors, and blend and layer. With practice, you’ll master acrylic techniques. Your artwork will amaze and inspire.

“Layering in acrylic painting is like building a symphony of colors and textures, creating a captivating visual experience for the viewer.”
| Layering Technique | Purpose | Recommended Brushes |
|---|---|---|
| Direct Layering | Creating depth and dimension | Pointed and detailed round brushes |
| Wet-on-Wet Layering | Blending colors and achieving seamless transitions | Flat and filbert brushes |
| Dry Brush Layering | Capturing texture and adding details | Stiff bristle brushes |
| Scumbling Layering | Creating ethereal, hazy effects | Soft, fluffy brushes |
Palette Knife Layering for Bold Textures
Palette knives are a secret tool for artists wanting to add depth and texture to their acrylic paintings. These tools let you move paint in ways brushes can’t, making bold strokes and detailed textures. With the palette knife, you can create stunning textures, blend colors smoothly, and even show layers beneath for a unique look.
Palette knives come in many shapes and sizes, each with its own benefits. Trying out different knives is important because there’s no one right way to use them. You can use the knife to mix colors on the canvas or apply thick layers for a textured look.
The palette knife is also great for techniques like sgraffito and textured collage. You can scratch paint to show layers beneath or sculpt materials like modeling paste for a sculptural feel.
| Pros of Palette Knife | Cons of Palette Knife |
|---|---|
| Easy to clean | Less accuracy compared to a brush |
| Great for creating thick textures and sharp lines | Limited versatility |
| Complements brush strokes | |
| Allows painting on wet layers without blending |
The palette knife is becoming more popular among artists for its ability to create unique textures. It’s great for adding details, highlighting textures, and creating sharp lines. It’s a key tool for any acrylic painter wanting to explore new techniques.
“The palette knife is a game-changer for artists who want to add depth, dimension, and character to their acrylic paintings. It’s a versatile tool that opens up a world of creative possibilities.”
Planning and Preparation
To make stunning acrylic paintings, planning and preparation are crucial. First, decide on your color palette and the transitions you want. This will help you stay organized and bring your vision to life.
Quick Drying Times
Acrylic paints dry fast, so work quickly, especially with wet-on-wet blending. Their quick drying lets you blend colors smoothly, as the paint stays workable for a short time.
Here are some tips to make the most of this fast-drying paint:
- Moisten your palette every 10-15 minutes to prevent the paints from drying out prematurely.
- Use a spray bottle filled with water to keep your palette hydrated during the painting process.
- Apply a small amount of paint, around 5 mm in volume, leaving a few centimeters between colors to avoid unintentional mixing.
- Start with large brushes for laying down the initial outlines and then switch to smaller brushes for detailed work.
- Let the layered acrylic artwork dry for a day before sealing it with acrylic varnish and framing it.
By planning ahead and preparing your workspace well, you can fully use the quick drying of acrylic paints. This will help you create beautiful, organized artworks.
| Preparation Tip | Benefit |
|---|---|
| Moisten palette every 10-15 minutes | Prevents acrylic paints from drying out prematurely |
| Use a spray bottle to hydrate palette | Keeps paints workable during the painting process |
| Apply small paint amounts (5 mm) | Allows for better control and prevents unintentional mixing |
| Start with large brushes, then switch to smaller ones | Enables efficient layering and detailed work |
| Let artwork dry for a day before sealing | Ensures proper curing of the acrylic paint layers |
Exploring Textural Layering Effects
Texture is powerful in acrylic paintings, adding depth and a tactile quality. Textural layering offers more than just smooth blending. It opens up a world of possibilities to make your artwork stand out.
Try different brushstrokes and layering methods to create unique effects. Use wet-on-wet blending, dry brushing, and impasto to add textural elements. Glazing and scumbling can bring depth and light to your layers.
When working with textural layering, precision is key. Techniques like feathering and palette knife work let you shape your canvas. You can create ridges, grooves, and depth that engage the viewer’s senses.
| Textural Technique | Desired Effect |
|---|---|
| Wet-on-Wet Blending | Seamless transitions and soft, hazy edges |
| Dry Brushing | Rough, uneven surfaces and a sense of texture |
| Impasto | Thick, sculptural paint application for added dimension |
| Glazing | Transparent layers that enhance depth and luminosity |
| Scumbling | Soft, hazy effects that create an ethereal atmosphere |
| Feathering | Seamless transitions and precise control over edges |
| Palette Knife | Bold, sculpted textures and a sense of depth |
Start your journey with textural layering to add depth and dimension to your acrylic paintings. Experiment and explore to unleash your creativity fully.
“Texture is the language of the senses. It’s how we experience the world through our fingertips.”
Conclusion
Blending and layering are key acrylic painting techniques. They open up a world of creative possibilities. By learning these methods and trying out different tools and materials, artists can add depth, dimension, and visual richness to their acrylic paintings.
These techniques are vital for making your art stand out. Whether you’re adding layers for texture or blending colors for smooth transitions, they’re crucial. They help take your art to the next level.
Start your artistic adventure by mixing colors and practicing blending and layering. Acrylics dry fast and are very versatile. This makes them perfect for creating stunning and thought-provoking art.
With each layer and brushstroke, you’ll find new ways to be creative. You’ll explore the limits of what’s possible with acrylic painting. It’s a journey of endless discovery and growth.
By improving your blending and layering skills, you’ll unlock a world of artistic potential. You’ll create pieces that amaze and inspire others. So, pick up your brushes and let your imagination run wild.
FAQ
What are the key layering techniques in acrylic painting?
How does blending help in acrylic painting?
What is the purpose of layering in acrylic painting?
What materials are essential for blending and layering in acrylic painting?
How does wet-on-wet blending work in acrylic painting?
What are the benefits of dry brushing in acrylic painting?
How does glazing enhance acrylic paintings?
What is the purpose of scumbling in acrylic painting?
How does feathering technique work in acrylic painting?
How can palette knives be used for layering in acrylic painting?
This post contains affiliate links.