
This post contains affiliate links.
Have you ever watched the sunset bleed its hues across the canvas of the sky, wishing you could capture that kind of magic in your acrylic work? Suppose you’ve found yourself armed with a brush, facing down a palette of colors, only to have them dry into a stubborn patchwork rather than that seamless blend you envisioned. In that case, you’re not alone. Acrylic paints, while gloriously versatile, can sometimes feel like frenemies with their rapid drying times. Fear not, because we’re here to slice through the complexity of mastering color blending in acrylics and serve you the real tips on blending colors effectively in acrylic painting.
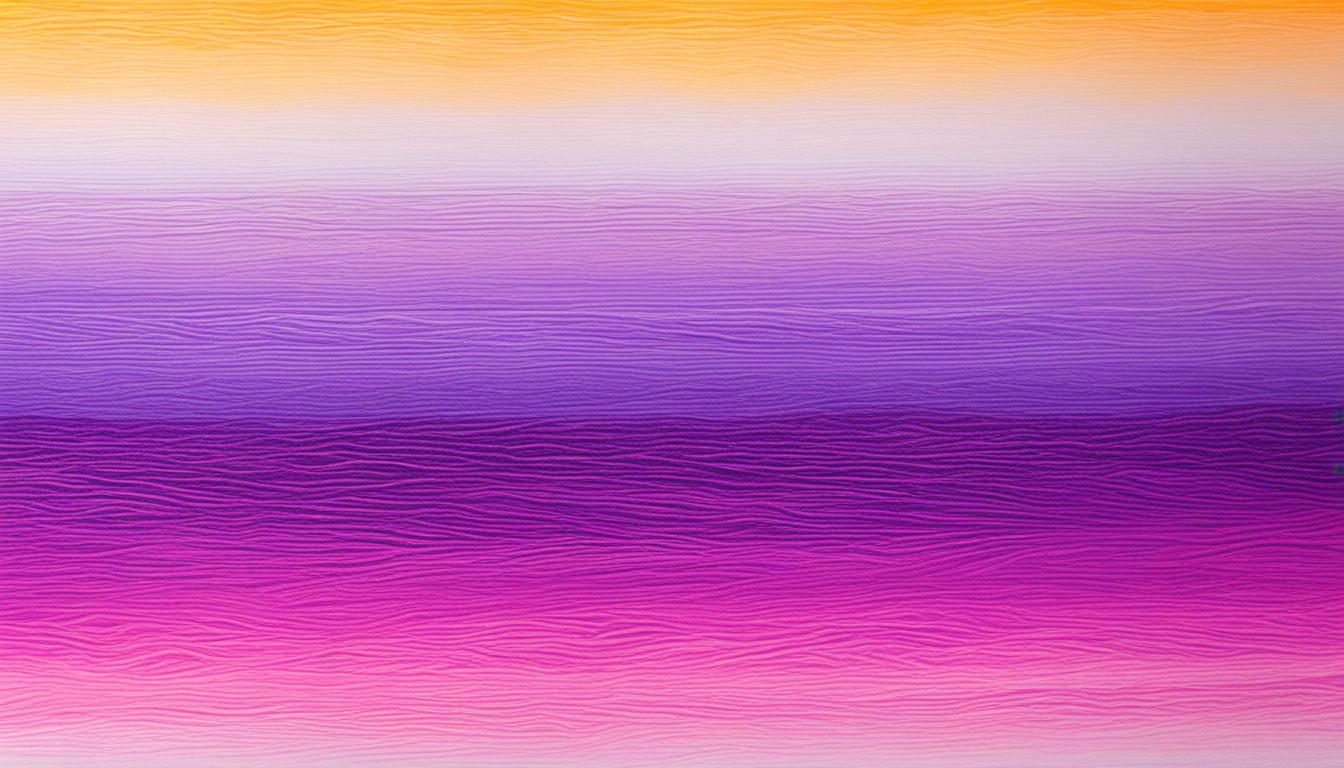
Master Acrylic Color Blending
It’s time to transform frustration into finesse. With a bit of knowledge and a handful of those ever-so-useful acrylic painting techniques, you’ll merge shades as smoothly as a DJ blending beats. So, take a deep breath, prepare to dirty some brushes, and let’s dive into color theory’s deep end—where bold pigments don’t intimidate, and fast drying times can’t thwart your artistic spirit. But first, a visual appetizer to whet your creative appetite.
Key Takeaways
- Understand the behavior of acrylic paints and their propensity for quick drying to better manage your blending process.
- Learn to manipulate drying times using retarders and wetting agents for more controlled and effective color transitions.
- Gather the essential tools—from quality brushes to the right palette knife—to set the stage for successful blending.
- Embrace the importance of practice and experimentation to develop your unique blending style and techniques in acrylics.
- Remember, mastering color blends in your acrylic paintings is about patience, adaptability, and a touch of audacity.
Unveiling the Basics of Acrylic Paint Blending
As you embark on the colorful journey of acrylic painting, you’ll quickly notice one truth—acrylics are notorious for their rapid drying times. But don’t let this deter you; with the right tools and techniques, you can twist this challenge to your creative advantage. Let’s deep dive into the essentials to transform your acrylic blending from fleeting to fascinating, ensuring you’re well-armed for the challenge ahead.
The Challenge of Acrylic’s Fast-Drying Nature
Facing the rapidity of acrylic paints drying on your palette can feel like a sprint against time. Just when you’re about to achieve the perfect hue—poof! It starts setting. But, fear not! With additives such as retarders, you can slow down the process, giving you time to meticulously blend your colors without the clock ticking quite so loudly in the background.
Essential Supplies for Effective Color Mixing in Acrylics
Before you can create artwork that makes eyes pop and hearts skip a beat, you’ll need to stock up on some key supplies. Think of these as the superheroes of your artistic arsenal. Without them, creating that vibrant masterpiece is going to be an uphill battle. Here’s what your toolkit should include:
- Acrylic paints – A spectrum awaits with hues like Cadmium Red Medium Hue and Cobalt Blue.
- Quality brushes – The trusty sidekicks for every brushstroke.
- Canvas pad – Your canvas pad partitioned with masking tape is the playground for your color experiments.
- A palette knife, water jar, retarder, wetting agent, spritz bottle, and a trusty rag – each a critical ingredient in the potion for perfect blending.
With these supplies, you’re all geared up to confront the renowned quick-dry nature of acrylics and emerge victoriously with colors that defy the sands of time.
Understanding the Role of Open Acrylics
If you’re aiming to tango longer with blending without the music stopping unceremoniously, Open Acrylics are your dance partners. These specialized paints take their sweet time in drying, leading you through a waltz of blending without the rush.
| Supply | Role in Blending | Usage Tip |
|---|---|---|
| Retarder | Increases Open Time | Add in small amounts |
| Wetting Agent | Improves Flow | Use for thin layers |
| Spritz Bottle | Keeps Paint Workable | Light misting is key |
| Palette Knife | Create Sharp Blends | Wipe clean between mixes |
| High-Quality Brushes | Seamless Color Transition | Maintain a slightly damp brush |
Now that the cast is set, and you’ve had a behind-the-scenes look, it’s time to step on stage. Color mixing in acrylics can indeed test your resolve, but with the right blending allies by your side, you’re equipped to create a plethora of hues that tell your story with finesse.
Tips for Blending Colors Effectively in Acrylic Painting
Hey there, artist in the making! If you’re aiming to unlock the best ways to mix colors in acrylic painting, then strap in; it’s going to be an eye-opening, brush-swooshing ride! Acrylics wait for no one, thanks to their fast-drying antics, so here’s the insider track: blend swiftly and smartly.
Ever wondered how to keep your colors from treating your canvas like a speed-dating event? Try flirting with a stay-wet palette or slow-drying mediums; these will keep your paints from drying up faster than your last batch of cookies. Remember though, it’s not just about keeping things wet; you’ve also got to understand the mysterious dance of color bias to avoid creating an uninvited murky mess.
Let’s talk tools—your weapons of creation! A soft flat brush is your trusty sidekick. Dip it in some paint, not too much, not too little, and lay down those broad strokes like you’re the boss. Picture those colors blending together in a slow, sunset-like romance, and you’re orchestrating their every move. Of course, keep those paper napkins handy, because nobody likes a watery fiasco ruining that perfect blend.
And about that water—I see you, ready to douse your palette like it’s on fire. Easy there, Picasso. Too much spray and you’re sailing towards a waterfall of woes. Just a gentle mist, a caress if you will, and you’re golden.
Brace yourself; I’m about to drop a table of wisdom on you:
| Technique | When to Use | Why It’s Awesome |
|---|---|---|
| Wet-on-Dry | For crisp edges and control | It’s the disciplinarian approach—you tell your paint exactly where to go. |
| Wet-on-Wet | Smooth gradients and transitions | Let your colors mingle and make friends in the most harmonious way. |
| Layering | Adding depth and complexity | Because your painting deserves to have a rich story, layer by layer. |
| Glazing | When you want a subtle tint | A whisper of color can sing volumes on your canvas. |
There you have it, your roadmap to acrylic blending techniques that’ll make even the Mona Lisa want a retouch. Now go, wield that brush with confidence, blend those colors with poise, and let every stroke be a step towards your masterpiece!

Secrets to Achieving Soft and Blurred Edges
Embarking on the journey to blend colors in acrylics is akin to learning a new dance—the steps might seem complex at first, but once you get the rhythm, you’re set for the dance floor. You’ve got your acrylics laid out, ready to pirouette into your next masterpiece, but achieving that soft, dreamy edge is where the real artistry comes in. In this tango with your canvas, let’s waltz through the secrets to creating those blurred lines that leave viewers captivated.
Using Water as a Beginner’s Blending Companion
Now, water isn’t just for keeping you hydrated while you paint—think of it as your blending sidekick. But before you dive in, remember, much like seasoning a dish, too much can spoil the broth, or in this case, the vibrancy of your acrylics. A gentle dip of your brush into water, or a graceful mist from your mini-spritzer, can thin out heavy-bodied paints just enough for them to waltz across your canvas with ease. But beware, novice painter, for over-dilution is the dreaded two-left-feet of the blending dance—it leads to lackluster colors and a clingy affair with your canvas.
The Art of Pre-wetting Painting Surfaces
When looking to master the art of blending acrylic paints like a pro, pre-wetting your canvas is like laying down a slick dancefloor before you boogie—it’s essential for a smooth performance. With a spritz bottle in hand, shower your painting surface lightly like morning dew. This will set the stage for colors to meet, greet, and dance together without inhibition, blending together like long-lost soulmates reuniting in a passionate embrace. Remember, the wet-on-wet technique is the fox-trot of painting methods, and it demands a surface that’s ready for some serious footwork—or brushwork, in your case.
So there you have it, you’re not just wielding a paintbrush, you’re conducting an orchestra of hues, commanding them to somersault into one another, leaving behind a poetic trail of muted edges. This, my friend, is where your acrylic blend begins to sing.
Advanced Acrylic Painting Techniques with Mediums and Additives
When you’re ready to elevate your artwork, the traditional acrylic paint blending tips might not suffice. You need to blend acrylic paints like a pro, which is where mediums and additives step in. They’re not just optional extras—they’re the secret sauce to rich, smooth blends that can make your colors sing.
How Retarders Extend Working Time for Color Blending
Patience may be a virtue, but let’s face it, you don’t always have the luxury of time when acrylics begin to set. Enter retarders. These handy additives slow down the paint’s drying time, giving you a more forgiving window to finesse those color transitions. They’re like hitting pause on the drying clock, ensuring your blend doesn’t become a race against time.
Wetting Agents: Enhancing the Flow and Finish of Acrylics
Another member of the blending elite is the wetting agent. Picture this: your paint flows effortlessly across the canvas, blending seamlessly without losing an ounce of vibrancy or finish. That’s the magic of wetting agents. They reduce the surface tension, making the paint more pliable and ready to perform under your expert touch.
| Medium/Additive | Function | Benefits | Usage Tips |
|---|---|---|---|
| Retarder | Extends drying time | Allows for precise blending, soft transitions | Follow the product’s mixing ratio to avoid over-dilution |
| Wetting Agent | Improves flow and consistency | Gives a smooth application for glazes and washes | Use sparingly to avoid making the paint too fluid |
Remember, you’re the artist, the controller of color, and with these mediums, you’re now equipped to blend those pigments to perfection. Don’t just take these tips at face value—put them to the test, and your acrylic game will be blending on a whole new level.
Blending Acrylic Paints Like a Pro: Practical Techniques
Imagine you’re a maestro, and your palette is the symphony of colors at your command. Your mission, should you choose to accept it, is to master the art of acrylic blending, transforming any canvas into a masterpiece. Let’s dig into the secrets of achieving that smooth, transitional effect that will leave spectators awestruck.
Creating Smooth Color Transitions on the Palette
It all begins with the methodical dance of blending right on the palette. You pick two hues, say, a fiery Cadmium Red Medium Hue and a serene Cobalt Blue, and gently nudge them together. Not too abrupt, yet with enough conviction to produce a range of shades that promises an effortless flow of color on your canvas. But how do you ensure that the transition is as smooth as jazz?
The key to mastering color blending in acrylics is to keep the edges soft, allowing each color to graduate into the next without any hard lines screaming for attention.
And remember, just as you wouldn’t rush a good wine, don’t rush the blending. Take your time, allow the colors to get to know each other on the palette, merging and coalescing into a visual haiku of shades. This is where the magic happens.
The Dynamics of Color Gradients and Their Impact
Now, let’s channel your inner Michelangelo and bring that gradient to life on your canvas. Whether you’re a fan of the Bruton Stroube studios’ lush visuals or enthralled by the vibrancy found in National Geographic’s spreads, the dynamic impact of a well-executed gradient cannot be overstated. It’s the subtlety of transition, much like the soft light of dawn creeping into the day, that infuses depth and life into your work.
Embrace the technique of wetting the surface, creating a receptive playground for your colors to frolic freely. Utilize flat or slanted brushes, nothing too bristly or stiff, to apply soothing strokes of color. As you skillfully sweep the brush back and forth, a soft blush of gradient comes to life, reminiscent of the moods captured in the paintings of the Hudson River School artists. Your canvas begins to tell a story, one soft blend at a time.

These acrylic blending techniques you’re mastering aren’t just about making pretty swirls of paint. They’re about adding nuance and dimension, contributing to a narrative that only you, the artist, can tell. Every gentle shift from one color to the next is a silent verse in the poem of your painting. As you stand back and gaze upon your creation, a sense of accomplishment floods in. You’ve not just painted; you’ve whispered stories in hues and saturation.
And there you have it, the essence of blending in the acrylic realm. With patience, practice, and a bit of audacious experimentation, you’ll watch as every new canvas evolves from a blank page to a silent sonnet of colors, serenading all who wander into their presence.
Color Mixing Mastery: Brush Selection and Use
Embark on your color mixing journey in acrylic painting with the esteemed Verbena brush set. Not just any tool, the 1½” Flat or 1” Slant brush is pivotal for those looking to achieve seamless blends. Imagine each stroke on the canvas as a melodic transition of hues, harmonizing without a hitch.
When it comes to tips for blending colors effectively in acrylic painting, the best kept secret is a perfectly prepped brush.
Your flat brush should kiss the water, just enough to dampen, before you welcome the paint. It’s a delicate balance – too much water and you’re swimming in drips, too little and the paint retreats from the surface, denying a proper coat.

Between colors, consider your brush a sacred vessel – cleanse it to honor the pure, vibrant hues that acrylics promise. Think of it as a refreshing pause for your brush and your artistic process. Whether you aim for the gentle touch of a whisper or the emphasis of a shout, your brush choice can elevate your color mixing in acrylics to new heights.
- Flat brushes for smooth, expansive blends.
- Slant brushes when angles and precision call.
- Clean water and a vigilant eye for pristine color quality.
Remember, your invaluable sidekick in this chromatic adventure is the trusty, often overlooked, water jar. Keep it at the helm, be it for rinses or perfecting paint viscosity, and watch your acrylic color blending transcend.
Navigating the Drying Times: Speed and Precision in Acrylic Blending
As you delve into the world of acrylic painting techniques, you’ll soon discover that the clock is always ticking. Acrylic paints are notorious for their rapid drying time, which can either be a blessing or a hurdle, depending on how swiftly you utilize your brush. If you’ve ever felt like a contestant in a high-stakes art race, you know that mastering how to blend colors in acrylics means embracing the need for speed combined with the utmost finesse.

Blending with Acrylics – A Race Against Time
Your blending game needs to be fast, yes, but hurried streaks leading to a cacophony of unwanted hues will not do! The mantra here is quick but controlled movements, where every stroke plays a part in the symphony of shades you aim to create. Like conducting an orchestra with brushes, you’ve got to keep the pace without missing a beat or, in this case, letting the paints dry out. However, fear not. Modern artistry comes equipped with tools that turn back the clock, or at least slow it down.
Maintaining Wetness in Acrylics for Seamless Merging
Are you ready to fathom the depths of blending without the impending doom of drying paints? Behold the wizardry of retarders and wetting agents. These magic potions give you the gift of time. With these at your side, you can leisurely explore the gradient highways and byways without the stress of your acrylics turning into an arid landscape. And let’s not overlook the humble spray bottle—a quick mist and your canvas transforms back into a blend-friendly haven.
| Blending Technique | Tools or Additives Used | Benefit |
|---|---|---|
| Wet-on-dry | None required | Control and precision |
| Wet-on-wet | Spray bottle | Allows merging of colors |
| Layering | Retarders | Extends drying time |
| Glazing | Wetting agents | Improves flow, reduces surface tension |
You, artist-extraordinaire, can now wield your brushes and mediums like an alchemist, turning your canvas into a tapestry of perfectly blended pigments. Just remember, while the sands of time may seem like your adversary in the realm of acrylic painting techniques, with these tips and tricks up your sleeve, you’ll never have to bow down to the tyranny of the drying times again!
Exploring Textural Possibilities through Blending
When you delve into the world of acrylic painting techniques, the canvas becomes a playground for your imagination. The versatility of acrylics opens up a universe where texture and form intertwine seamlessly. Especially with acrylic blending techniques, the rush of adding a tactile dimension to your work can be as thrilling as watching colors collide and coalesce. Let’s peel back the layers and dive into the techniques that transform simple strokes into textured tales.
Dry Brush Techniques for Textured Blends
A dry brush in your hand can be like a magic wand on your palette. Apply just a whisper of paint to a dry brush and sweep it across the surface. Watch as it skates over the peaks, leaving the valleys of your canvas untouched, and allows the layers beneath to play peek-a-boo. This technique adds subtlety and invites the viewer to a game of visual touch-and-go with your piece, creating an intimate connection that’s felt as much as it is seen.
Palette Knife Blending for Bold, Expressive Strokes
For the times you wish to make a bolder statement, let the palette knife be your instrument of choice. This isn’t about the gentle touch—it’s about the dance of applying pressure and angle to squeeze, smear, and sculpt your vision into existence. A palette knife doesn’t just spread color; it carves pathways of textures, creating ridges and trails that light can play upon. The result is a dynamic, rich layer that adds a dimension of movement and depth to your work that brushes alone could never achieve.
Remember, the dance of blending is about rhythm and intuition. It’s about finding the harmony between the medium’s malleable moments and your creative impulses. Take these techniques, wield them with your unique flair, and watch the textures unfold, as the acrylics obey the command of your strokes, bringing your artistic vision to tangible life.
Conclusion
In the realm of acrylic painting, the act of blending is not just a technique; it’s a form of artistry that elevates your canvas and bespeaks your mastery. By arming yourself with tips for blending colors effectively in acrylic painting, you step into a world where each brushstroke is an opportunity for innovation. Remember, it’s not just about the colors you choose; it’s the harmony you create between them.
As you’ve journeyed through the nuances of blending acrylic paints like a pro, you’ve uncovered the value of patience, the impact of persistence, and the arsenal of mediums at your disposal. Whether wrestling with the swift nature of acrylics or dancing with retarders to extend your painting’s fleeting moments, each canvas brings you closer to the seamless blends that define masterpieces.
Your rise to acrylic blending proficiency lies in your willingness to experiment. Stride forward with boldness and make each mix, each gradient, an exploration. Continue to exercise creativity with every dollop of paint, and watch as your skills reach new pinnacles of professionalism. You’ve got this!
FAQ
What makes acrylic paint fast-drying and how can I counteract that for blending?
Acrylics are water-based and dry quickly due to the evaporation of water. To counteract this, you can use slow-drying paints like Open Acrylics or add retarders to extend the drying time, making blending more manageable.
Can you list the essential supplies needed for blending colors in acrylics?
Sure thing! You’ll need a range of acrylic paints (think Cadmium Red Medium Hue and Cobalt Blue), quality brushes, a canvas pad, a palette knife for mixing, water jar, spray bottle, retarder, wetting agent, and a trusty rag for cleanups.
How do I use water to blend acrylic paints, especially as a beginner?
Dip your brush in water or use a mini-spritzer to moisten the palette for thinning your paints. Just be careful not to turn your masterpiece into a runny, faded memory by overdoing it!
What’s the role of wetting agents in blending acrylic paints?
Wetting agents reduce the surface tension of the paint, improving flow and finish. They’re like the VIP tickets, granting your paint smoother access across the canvas.
How can I create smooth color transitions on my palette?
It’s all about the pre-game! Mix two colors in a gradient on the palette before hitting the canvas. This sets the stage for that seamless, professional blend when you apply it to your work.
What type of brush should I use for effective color blending in acrylics?
Flat or slanted brushes will be your best pals here, like the 1½” Flat or 1” Slant. They spread the love (aka paint) equally, helping you kiss goodbye to those pesky brush strokes.
How do I maintain wetness in acrylic paints for blending?
Keep your paints from turning into the Mojave Desert by spritzing them with water or using a stay-wet palette. This helps maintain the correct level of moisture for blending without the paint peacing out too quickly.
What are some textural blending techniques I can try with acrylics?
Go wild with a dry brush to create a feather-light texture, or grab a palette knife and act like a culinary genius spreading frosting for bold strokes and texture that’s sure to pop.
Source Links
- https://www.zenartsupplies.co/blogs/toolkit/how-to-blend-acrylic-paint
- https://artsuppliesaustralia.com.au/blogs/posts/blending-acrylic-paint-essential-steps
- https://www.pinotspalette.com/brandon/blog/creative-life/pinotspalettebrandon-blending-beauty-elevating-your-acrylic-art-with-masterful-color-transitions
This post contains affiliate links.