
This post contains affiliate links.
Are you intrigued by the vibrant world of acrylic painting but unsure where to begin? Fear not, budding artist! This beginner-friendly guide will equip you with the knowledge and easy acrylic painting techniques to embark on your creative journey.
Acrylic paints are a versatile medium that can be used on various surfaces, from canvas and paper to wood, ceramics, fabric, and glass. What sets acrylics apart is their ease of use – you can apply them directly from the bottle or tube, making them an ideal choice for beginners.
Not only are acrylics user-friendly, but they also offer the advantage of easy cleanup and lack strong odors or fumes commonly associated with oil paints. Plus, you can combine them with other materials like pastels or watercolors for mixed media projects, unleashing your creative potential.
Perhaps the most appealing aspect of acrylic paints is their affordability, making them accessible to artists of all levels. With these easy acrylic paint ideas and tips, you’ll be well on your way to creating captivating artworks that showcase your unique style.
Key Takeaways
- Acrylics are a versatile medium suitable for various surfaces.
- They are easy to use and clean up, making them beginner-friendly.
- Acrylics can be combined with other materials for mixed media projects.
- They are an affordable option for artists of all levels.
- This guide provides easy acrylic painting techniques and tips for beginners.
What is Acrylic Painting?
Acrylic painting is an incredibly versatile artistic medium that offers a world of creative possibilities for both beginners and experienced artists alike. Unlike traditional oil paints, acrylic paints can be applied to a wide variety of surfaces, ranging from canvas and paper to wood, ceramics, fabric, and even glass.
Versatility of Acrylic Paints
One of the most appealing aspects of acrylic painting is its versatility. These paints can be used straight from the bottle or tube, eliminating the need for complex mixing or preparation. Additionally, they can be combined with other materials like pastels or watercolors, opening up endless opportunities for mixed media projects.
Benefits of Acrylics for Beginners
For those just starting their artistic journey, acrylic painting for beginners is an excellent choice. These paints are incredibly user-friendly, making them an ideal medium for newcomers. Unlike oil paints, acrylics do not emit strong odors or fumes, ensuring a more comfortable working environment. Furthermore, they are easy to clean up, reducing frustration and mess.
Perhaps one of the most compelling advantages of acrylic painting supplies is their affordability. With a wide range of budget-friendly options available, aspiring artists can explore their creativity without breaking the bank.
| Acrylic Paint Characteristics | Benefits for Beginners |
|---|---|
| Versatile | Can be used on various surfaces |
| Easy to use | Straight from the bottle/tube |
| Odorless | Comfortable working environment |
| Affordable | Accessible to a wide range of individuals |
| Combinable | Can be used with other materials for mixed media |
Whether you’re looking to explore easy acrylic paint ideas or dive into more complex techniques, acrylic painting offers a world of possibilities. With its user-friendly nature and affordability, it’s an excellent choice for beginners embarking on their artistic journey.
Prepping Your Canvas for Acrylic Painting
Before you unleash your creativity onto the canvas with vibrant simple canvas painting techniques, the key to a successful acrylic painting lies in proper surface preparation. This crucial step ensures that your acrylic paints adhere beautifully, allowing you to bring your vision to life with stunning results.
Using Gesso Primer
Gesso, a white paint-like mixture, serves as the perfect primer for your canvas, preventing the acrylic paint from absorbing too deeply and providing a slightly textured surface or “tooth” to grip the paint. While many pre-stretched canvases come pre-primed, some beginner acrylic tutorials recommend adding an extra layer or two of gesso for enhanced texture and better paint adhesion.

The number of gesso coats you apply depends on your desired finish. For a smoother surface, dilute the gesso with water before applying a thin layer. Conversely, thicker applications create a more textured surface, perfect for acrylic painting techniques that involve palette knife work or impasto. Popular choices like the Maimeri Oil Primer or the Princeton Gesso Brush make the priming process a breeze.
Creating an Underpainting
Once your canvas is primed, consider creating an underpainting – a tinted base layer that establishes the overall color palette and composition. By mixing acrylic paint colors with gesso, you can achieve a subtle, harmonious undertone instead of starting with a stark white surface. This acrylic painting tip allows you to experiment with different hues and techniques, ultimately enhancing the depth and richness of your final artwork.
Remember, patience is key when priming and underpainting. After applying the gesso or underpainting layer, it’s essential to let the canvas dry completely, typically for at least 24 hours, before proceeding to the next step. This waiting period ensures optimal adhesion and longevity of your acrylic painting lessons.
| Surface | Preparation | Recommended Products |
|---|---|---|
| Pre-stretched Canvas | Apply 1-2 coats of gesso primer | Maimeri Oil Primer, Princeton Gesso Brush |
| Canvas Panels | Triple-primed, ready to use | Strathmore 300 Series Stretched Canvas |
| Underpainting | Mix acrylic paint with gesso | Catalyst Wedge for application |
By taking the time to prepare your canvas properly, you’ll be well on your way to creating stunning acrylic paintings that showcase your artistic talents and unique style. Embrace the joy of beginner acrylic tutorials and let your creativity flow!
Layering Techniques with Acrylics
Acrylic painting often involves layering due to the quick-drying nature of the medium, allowing artists to build depth and texture in their works. As you explore acrylic art techniques, mastering layering will open new creative possibilities and enable you to create more dynamic compositions.
Opaque vs Translucent Paint Layers
Understanding the opacity or translucency of paint colors is crucial for determining the layering order and allowing underlying layers to show through. Opaque paints, such as titanium white or cadmium red, completely cover the layer beneath, while translucent paints like phthalocyanine blue or quinacridone rose allow the lower layer to be visible to some degree. This knowledge is essential for beginner acrylic tutorials as you learn to control the interplay between layers.
Exploring Paint Texture and Depth
Layering is not just about color – it also adds depth and interesting texture to canvas paintings. Each layer contributes to the overall story and dimension of the artwork, creating a sense of history and richness. Some artists prefer working in three stages with their layered paintings: loose base layers, more structured middle layers, and final details. In the early stages, they find value in playful marks that create energy and interesting effects.
The middle stage involves thoughtful composition and value considerations, sometimes requiring many layers to achieve the desired outcome. In the final stage, adjustments are often made to ensure all aspects align with the artist’s vision and desired effect. The choice of painting surface is crucial when working with heavy layers, with sturdy surfaces like stretched canvases or panels being recommended.
Additionally, acrylic paint is versatile and can be mixed with other media such as water-soluble crayons, ink, paint pens, or collage elements for added interest in the layers of the painting. Experimenting with these acrylic painting tips and techniques can help you develop a unique style and add depth to your artworks.
| Stage | Layering Approach | Considerations |
|---|---|---|
| Base Layers | Loose, playful marks | Create energy and interesting effects |
| Middle Layers | Structured, thoughtful composition | Multiple layers for desired outcome |
| Final Details | Adjustments and refinements | Align with artistic vision and effect |
As you explore acrylic painting lessons and techniques, remember that layering is a powerful tool for adding depth, texture, and richness to your artworks. Embrace the process and have fun experimenting with different approaches to create dynamic and captivating compositions.
Color Mixing Essentials
Mastering the art of color mixing is a fundamental aspect of acrylic painting for beginners. It not only expands your creative possibilities but also allows you to achieve the desired hues and shades for your acrylic art techniques.
Using a Color Wheel
The color wheel serves as an invaluable guide for understanding acrylic painting tips on color harmonies and combinations. By exploring the relationships between primary, secondary, and tertiary colors, you can learn how to mix a wide range of hues effectively.
Premixed vs Primary Colors
While premixed colors offer convenience, embracing the easy acrylic painting approach of mixing your own colors from primary reds, yellows, and blues allows you to develop a deeper understanding of color theory and create custom shades tailored to your artistic vision.

Alla Prima (Wet-on-Wet) Technique
The Alla Prima, or wet-on-wet, technique involves applying layers of wet paint directly onto the canvas, enabling you to blend and mix colors seamlessly on the surface. This approach encourages spontaneity and adds depth and vibrancy to your acrylic painting for beginners projects.
| Color | Description | Recommended for Beginners |
|---|---|---|
| Cadmium-Free Yellow Deep and Light | Vibrant, warm yellow tones | Yes |
| Cadmium Red-Medium | Rich, classic red hue | Yes |
| Quinacridone Magenta | Intense, bluish-red shade | Yes |
| Ultramarine Blue (red shade) | Deep, reddish-blue tone | Yes |
| Pthalo Blue (green shade) | Vibrant, green-tinted blue | Yes |
| Mars Black and Titanium White | Essential for tinting and shading | Yes |
The table above highlights the recommended essential colors for acrylic painting tips when starting your journey as a beginner. These versatile hues allow you to mix virtually any color on the color wheel, ensuring a diverse palette for your easy acrylic painting endeavors.
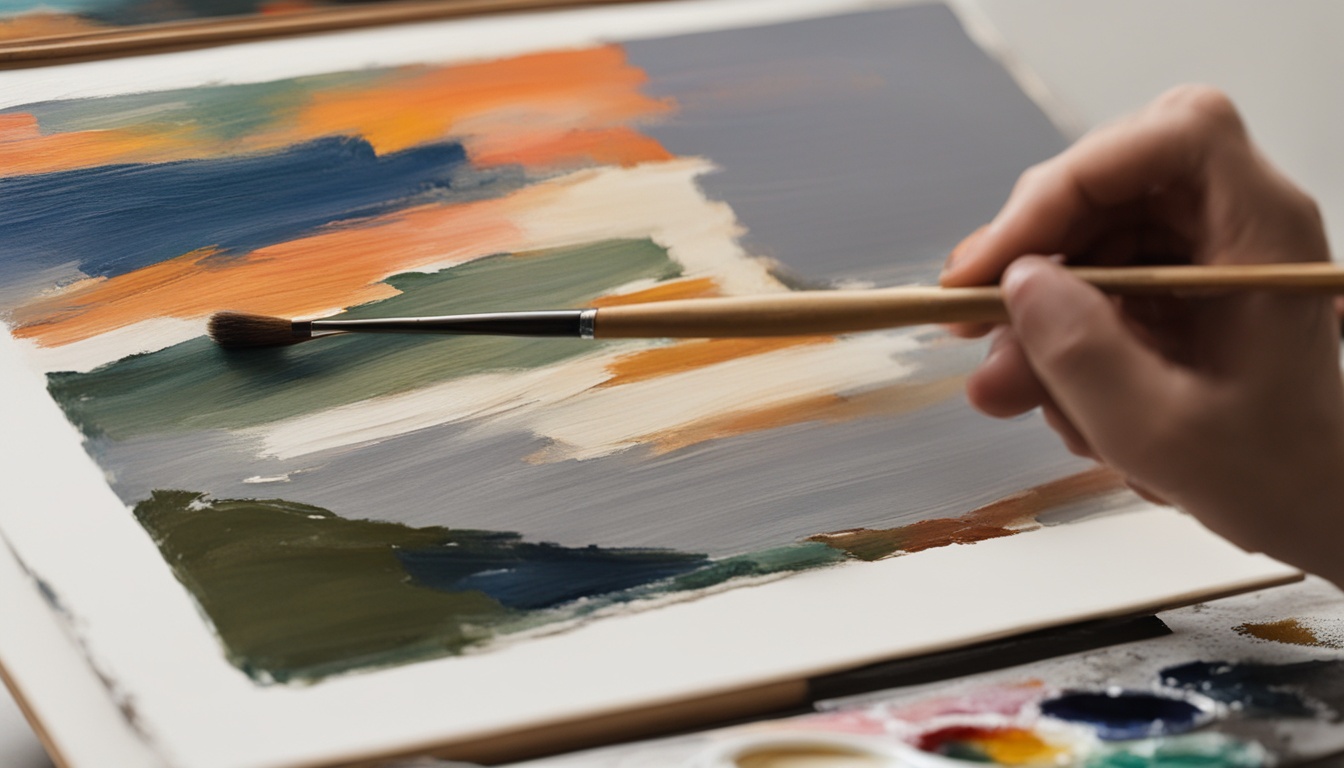
Brushwork Techniques
Unleashing your creativity with a paintbrush is one of the most gratifying aspects of easy acrylic painting. From whimsical strokes to intricate details, acrylic art techniques offer a world of possibilities for beginner acrylic tutorials. By mastering acrylic painting tips, you can transform blank canvases into vibrant masterpieces bursting with life.
One of the most versatile acrylic painting tips is the art of dry brushing. This technique involves applying thin, sometimes translucent layers of paint with a dry brush, showcasing brushstrokes and creating mesmerizing textures reminiscent of fur, hair, or woodgrain. On the other hand, wet brushing on a dry canvas allows for smoother, more even paint application, perfect for creating seamless color transitions and blending.
For those seeking to push the boundaries of their acrylic art techniques, the wet-on-wet or Alla Prima method enables you to blend and mix colors directly on the canvas, resulting in captivating, organic hues. Alternatively, stippling and pointillism employ the brush tip to create a series of dots or circles, gradually building up color intensity and creating an impressionistic effect that will leave you mesmerized.
As you embark on your beginner acrylic tutorials, remember that experimentation is key. Don’t be afraid to embrace unconventional acrylic painting projects, such as using palette knives or odd-shaped brushes like zig-zag edged or V-shaped tools to create unique textures and effects. Techniques like double loading, where you mix two colors without blending them together, or triple loading, combining three colors on the brush tip, can add depth and complexity to your artworks.
The true beauty of acrylic painting lies in its versatility. With each brushstroke, you have the power to create, to express, and to leave an indelible mark on the canvas that showcases your unique artistic vision.
Whether you’re a seasoned painter or just starting your acrylic painting journey, embracing these brushwork techniques will open up a world of possibilities. So, grab your brushes, let your creativity flow, and embark on a transformative artistic adventure filled with vibrant hues, captivating textures, and unforgettable acrylic painting projects.
Paintbrush Techniques for Beginners
As a beginner in acrylic painting, exploring different brushwork techniques can unlock a world of creative possibilities and help you develop your unique artistic style. One of the most popular and widely shared posts, with over 91.4K shares, delves into an array of acrylic art techniques using various types of brushes.

The post introduces a range of brushes, including Basecoat or Wash brushes, Flat or Bright brushes, Angle brushes, Round or Liner brushes, Fan brushes, and Filbert brushes. It even encourages experimentation with everyday objects as unconventional brushes. Renowned brands like Royal And Langnickel, Princeton Velvetouch Touch Brushes, and Creative Mark FX Special Effects Paint Brush Set are showcased for their high-quality brushes.
Dry Brushing
One of the beginner acrylic tutorials featured in the post is dry brushing, a technique that involves applying thin, sometimes transparent layers of paint with a dry brush. This method allows you to showcase brushstrokes and create textures reminiscent of fur, hair, grass, or woodgrain, adding depth and interest to your paintings.
Wet Brushing
In contrast, wet brushing on a dry canvas is a technique that enables smoother, more even paint application. This approach is ideal for acrylic painting tips that require precision and control, allowing you to achieve clean lines and vivid color blending.
Stippling and Pointillism
For those seeking a more impressionistic effect, the post explores stippling and pointillism techniques. These methods involve using the brush tip to create a series of dots or circles, gradually building up color intensity and creating a vibrant, textured surface. Acrylic painting projects that employ these techniques often result in captivating and distinctive artworks.
| Brush Technique | Description | Recommended Brushes |
|---|---|---|
| Dry Brushing | Applying thin, transparent layers with a dry brush to create textures | Flat, Angle, or Fan brushes |
| Wet Brushing | Smooth, even paint application on a dry canvas | Round, Liner, or Filbert brushes |
| Stippling and Pointillism | Building up color intensity with a series of dots or circles | Round or Liner brushes |
The post also covers more advanced techniques like Cross-hatching, Double and Triple Loading, Blending, and using a Fan Brush for special effects. With such a comprehensive guide, beginner acrylic tutorials have never been more accessible, empowering you to explore the vast realm of acrylic painting and develop your artistic skills.
Palette Knife and Impasto Techniques
One of the most exciting acrylic art techniques to explore as a beginner is the impasto method, which involves applying thick, concentrated paint using a palette knife. Instead of creating brushstrokes, the paint is applied in dabs and globs, often using heavy body paint or mixed with a gel medium to maintain the desired texture until dry. While not a precise technique, it allows for unique textures, movement, and depth in the acrylic painting composition.
The impasto technique is like sculpting with paint, adding dimension and life to your canvas.
To get started with impasto painting, you’ll need a few essential supplies:
- Palette knives (the RGM 45 is a popular choice)
- Heavy body acrylic paints
- Gel medium (optional)
- A rigid support surface like a wood panel or primed canvas
The impasto method is versatile and can be used for both abstract and representational works. By strategically applying thick paint with a palette knife, you can create textural elements that mimic the appearance of objects like flowers, trees, or even the brushwork of traditional oil paintings.
As with any acrylic painting technique, there’s no one-size-fits-all approach. Experiment with different palette knife shapes, paint consistencies, and application methods to find your unique style. Remember, the beauty of impasto lies in its spontaneity and organic quality.
| Material | Price |
|---|---|
| 16 oz Primary Yellow Heavy Texture | $18 |
| 32 oz Titanium White Heavy Texture | $19 |
| 2 oz India Yellow Acrylic Colors | $7 |
| 2 oz Ultramarine Blue Acrylic Colors | $9 |
| 2 oz Alizarin Crimson Acrylic Colors | $11 |
| 16 oz White Base Coat | $17 |
| 23 Spade Palette Knife | $7 |
| Two 16-inch Paint Piping Bags (pack of 50) | $9 |
| 12x12x1.5 inch Wood Panel | $13 |
| 1-inch Panel Brush | $3 |
Glazing and Translucent Effects
Glazing is an acrylic art technique that adds depth and luminosity to your paintings. By mixing a glazing medium with acrylic painting tips, you can create translucent, stained glass-like layers that enhance the colors beneath without obscuring them. This technique has roots in classical oil painting and allows you to achieve a glowing, unified effect that solid paint cannot replicate.
The process involves creating super thin, transparent or semi-transparent layers of paint over your existing painting. These act like colored stained glass, enriching and unifying the underlying layers. Acrylics are ideal for acrylic painting lessons on glazing due to their quick-drying nature, allowing you to build up multiple glazes rapidly.
Glazing with warm colors is known to work best, as demonstrated by artists like Rembrandt who used multiple glazing layers for their portraits.
To glaze effectively, you’ll need:
- Specific brushes like Flat ‘Brights’ Golden Synthetic (#10) and nylon brushes with soft bristles for a smooth, even stain-like effect
- Acrylic paint brands known for their transparency, like Golden Acrylics and Winsor & Newton Professional Acrylics
- An acrylic glazing medium like Acrylic Glazing Liquid Gloss to increase paint transparency without losing fluidity
Different acrylic colors have varying levels of transparency and opacity, which is crucial when learning to glaze. By understanding these properties, you can strategically layer glazes for maximum vibrancy and depth in your acrylic art techniques.
| Paint Color | Opacity | Transparency |
|---|---|---|
| Cadmium Red | High | Low |
| Alizarin Crimson | Low | High |
| Phthalo Blue | High | Low |
| Quinacridone Gold | Medium | Medium |
Experimental Techniques
Acrylic painting offers a world of possibilities for easy acrylic paint ideas beyond traditional brushwork. Embracing an experimental mindset can lead to captivating acrylic painting projects that showcase your creativity. Three exciting techniques to explore are acrylic pouring, paint lifting and removal, and splattering and dripping.
Acrylic Pouring
The acrylic pouring technique involves thinning down your paints with a pouring medium and letting gravity do the work. Simply pour, tilt, or swirl the thinned paint onto your canvas to create mesmerizing abstract patterns, swirls, and textures. This acrylic painting lesson is perfect for beginners as it doesn’t require extensive brushwork, and the end results are always unique and visually stunning.
Paint Lifting and Removal
Don’t be afraid to remove or lift paint from your canvas! With tools like paper towels, rags, or sponges, you can create soft backgrounds, cloud effects, or textured patches by lifting or erasing still-wet paint. This acrylic painting tip adds depth and interest to your work, and the resulting negative spaces can be just as captivating as the painted areas.
Splattering and Dripping
Embrace the joyful chaos of splattering and dripping paint onto your canvas. Whether you fling it, pour it, or let it drip from above, this technique creates natural-looking splashes, explosions, and a sense of movement. Experiment with different paint consistencies and techniques to achieve unique patterns and textures. This playful acrylic painting lesson is sure to unleash your inner spontaneity and add an extra layer of excitement to your work.
| Technique | Description | Benefits |
|---|---|---|
| Acrylic Pouring | Thinning paints and pouring, tilting, or swirling onto canvas | Creates abstract patterns, swirls, and textures. Easy for beginners. |
| Paint Lifting and Removal | Using tools to lift or erase still-wet paint from the canvas | Adds depth, interest, and negative space to the painting. |
| Splattering and Dripping | Flinging, pouring, or dripping paint onto the canvas | Creates a sense of movement, natural-looking splashes, and explosions. |
So, whether you’re a seasoned artist or a beginner, don’t be afraid to step outside the box and experiment with these exciting acrylic painting tips. Embrace the unexpected and let your creativity flow, because sometimes the most beautiful works of art are born from a willingness to try something new.
Conclusion
As a beginner in the world of acrylic painting, you have an exciting journey ahead, full of opportunities to express your creativity through vibrant colors and captivating textures. From simple canvas painting to experimental techniques like pouring and splattering, the versatility of acrylic art techniques offers endless possibilities for your artistic explorations.
Whether you’re layering techniques, mixing colors, or experimenting with brushwork, each step will reveal new insights and help you develop your unique style. As you delve into beginner acrylic tutorials, you’ll find that acrylic painting tips and lessons can guide you in mastering techniques like glazing, palette knife work, and creating translucent effects.
With the right acrylic painting supplies and a willingness to practice, you’ll soon be creating captivating acrylic painting projects that showcase your personal artistic vision. So embrace the journey, have fun with easy acrylic paint ideas, and let your inner artist shine through the vibrant world of acrylic painting for beginners.
FAQ
What surfaces can I use for acrylic painting?
Why are acrylics a good choice for beginners?
Do I need to prepare a canvas before painting with acrylics?
What is the difference between opaque and translucent acrylic paints?
How can I mix colors effectively with acrylics?
What are some common brushwork techniques for acrylics?
How can I create texture and dimension with acrylics?
What are some experimental techniques I can try with acrylics?
This post contains affiliate links.