This post contains affiliate links.
Have you ever let your creative spirit run free? Acrylic painting invites you to do just that. It’s a space where imagination knows no limits. You’re encouraged to explore and create, no matter if you’re just starting or revisiting an old passion. An easy acrylic painting tutorial can refresh and fulfill you.
Acrylic paints stand out for their versatility. They work on many surfaces like canvas, paper, and wood. What’s more, beginners find them user-friendly. You can easily work with vivid colors, mix them for new shades, and clean everything up with soap and water.
We all value our time, and acrylics are great because they dry fast. This lets you layer colors quickly and add texture without waiting too long. Follow this step-by-step guide, and you’ll learn to create beautiful art. Picture turning a blank canvas into a captivating story, one brush at a time.
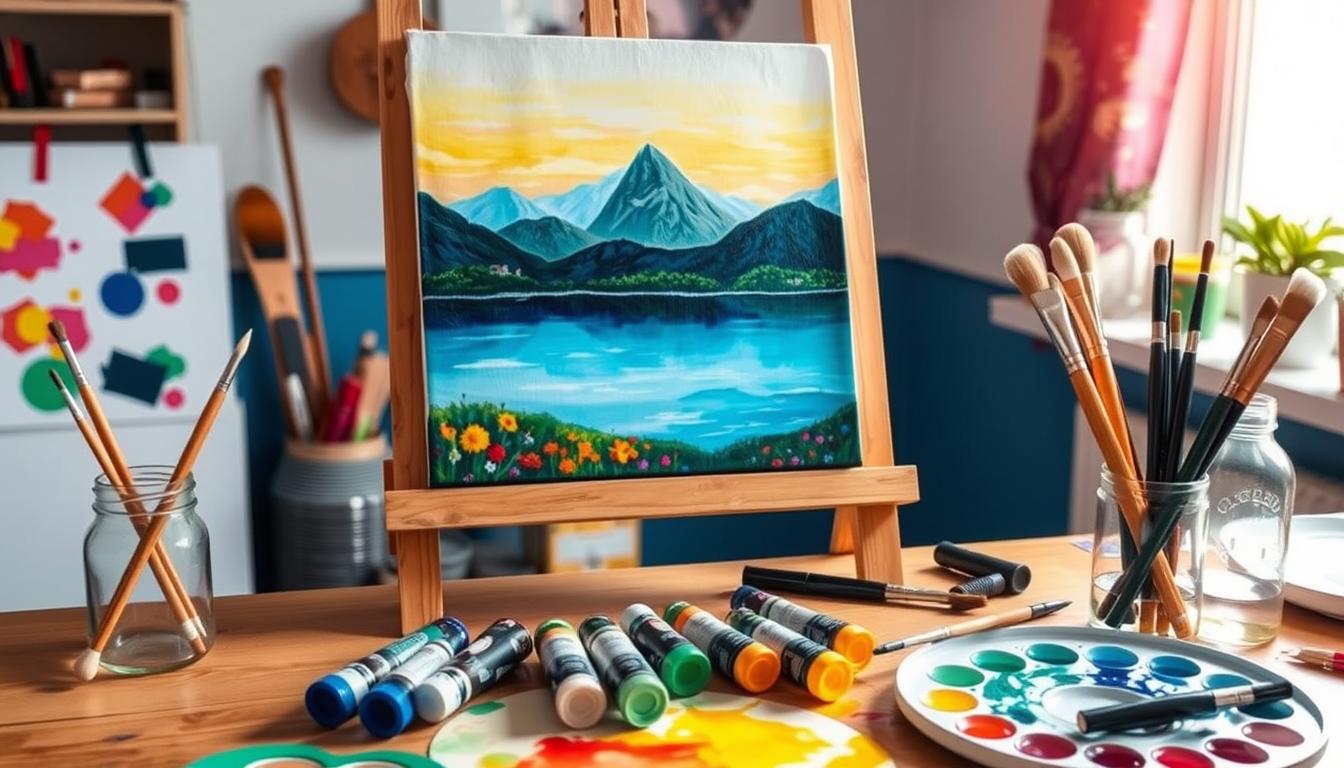
To start our artistic journey, let’s look at this inspiring picture:
Key Takeaways
- Acrylic painting is versatile, suitable for various surfaces and both new and experienced artists.
- Its quick drying time enhances painting efficiency, ideal for acrylic beginners.
- With simple setup and cleanup, acrylic paints are great for artists at any level.
- This tutorial provides a clear, step-by-step guide for those new to acrylic painting.
- Embarking on acrylic painting can awaken your creativity and offer immense artistic satisfaction.
Introduction to Acrylic Painting
Acrylic painting offers endless possibilities for artists of all levels. Its quick-drying and alterable nature provide boundless creative freedom. Whether you’re new to painting or looking to try new mediums, acrylics are perfect for exploring your artistic side. In this beginners guide, we’ll explore what makes acrylics special. We’ll look at their key features, setting the stage for an in-depth tutorial.
Acrylics stand out for their flexibility. They let artists create effects similar to both watercolors and oils. This feature is especially helpful for beginners, as it allows room to experiment. Artists love acrylics for their bright colors, ease of use, and quick drying times. Feliks teaches color theory and blending with primary colors, while Kevin Hill shares basic acrylic blending techniques.
In addition to their basic qualities, acrylic paints can be combined with different mediums. This can change their texture and finish. Thick and thin acrylic mediums help artists add unique touches to their work, whether they are just starting out or have years of experience. Whether you’re following Ashley Krieger’s thorough tutorials or Joony Art’s interactive videos on painting trees, there’s a wealth of resources for learning and creativity.
- Feliks’ tutorials: Color theory and blending techniques using primary colors.
- Kevin Hill’s tutorials: Basic blending and brush stroke techniques.
- Ashley Krieger’s tutorials: A comprehensive approach covering basics to advanced techniques.
- Joony Art’s lessons: Painting trees with cool and warm colors utilizing highlights and shadows.
This series aims to lay a solid foundation for creating stunning art pieces. It covers the essentials: materials, tools, and various techniques. Each tutorial is designed to support you through your painting journey, step by step.
Materials Needed for Your Acrylic Painting
Starting an acrylic painting project needs careful choice of materials. You need the right paint colors and brushes. Having everything you need is crucial for creating your art. Here, we explain what’s necessary for a ready workspace.
Essential Paint Colors
Choosing the right paint colors is your first task. Begin with the basics: red, yellow, and blue. Also, don’t forget white and black. Having colors like burnt umber and cadmium red medium is useful too.
A 48-piece Liquitex BASICS paint set is great for starters. It gives you many color options and lasts through several projects. This set is both handy and budget-friendly.
Brush Types and Uses
The success of your painting relies on your brushes. Different brushes achieve various effects. It’s good to have a range of brushes. Here are some you might need:
- 3/4″ wash brush
- 12 bright brush (1/4″ width)
- 4 round brush
- 8 round brush
- Tiny spotter brush for details
- Filbert brush for blending
- Fan brush for texture
- Angle brush for sharp lines
- Mop brush for smooth finishes
Quality brushes, like Isabey Isacryl and Kolinsky Sable, improve your painting experience.
Other Tools and Accessories
You also need other items besides paints and brushes. Here’s what else is important:
- Canvas sizes like 11″ x 14″ or 12″ x 16″, and sometimes 16″ x 20″. Use gesso on your canvas to make the paint stick and pop.
- Palettes can be simple like paper plates or more professional ones.
- Water jars for cleaning brushes.
- Mediums like Floetrol for special painting techniques.
- Easels, even budget ones from Hobby Lobby, adjust for different painting angles.
- Sketching pencils for initial outlines.
Choosing top-quality paints like Liquitex, Golden, and Winsor & Newton is smart. They make your art last longer and look brighter. Proper setup with these tools leads to success and enjoyment in painting.
Preparing Your Canvas
Getting your canvas ready is key to great acrylic painting outcomes. It makes sure the paint sits well, boosting how long your art lasts and its appearance.
Priming Your Canvas with Gesso
Start by applying gesso to the canvas. Gesso goes deep into the canvas, making a smooth area that holds paint well. This step helps your art last longer and uses less paint. When using gesso, put on at least one layer, even if the canvas already has some. This is because the ones from the factory may not cover everything well. Use a big brush for thin, even layers, and wait about 24 hours before painting to get the best results.
- Apply gesso in thin, even layers.
- Allow each coat to dry well before the next.
- Choose quality brands like Maimeri for a smooth finish.
Kelly Baskin suggests Maimeri Oil Primer for oil painting, which works here too. Many artists prime their canvas for certain looks and to make their work last longer.
Applying a Colored Ground
After priming, adding a colored ground can improve your painting. This means putting a layer of color on the white canvas. It sets the mood of the piece and makes it look better. It also makes painting quicker and helps bring the composition together. Mixing Raw Umber with white gives a good base, perfect for many types of paintings.
- Mix paint with water to the right thickness.
- Spread it evenly over the canvas with big brush strokes.
- Let the ground dry fully before painting on it.
Golden paints are my go-to for a colored ground because of their vibrant colors and thickness. Golden’s fluid acrylics are ready to use and give strong colors and binder, ideal for this step. Mixing your color beforehand in a sealed container can make things faster and keep your color the same on all canvases.
Using a colored ground can add depth and mood to your work, making painting easier and more fun.
These first steps in preparing your canvas not only lay the groundwork for your piece. They also spark creativity and confidence as you dive into more complex techniques.
Basic Acrylic Painting Techniques
Learning basic acrylic painting techniques will make your art stand out. By trying different methods, you can give your paintings special touches.
Dry Brushing
Dry brushing helps create fine details like hair or grass. You use little paint on a dry brush and gently move it over the canvas. It adds texture and soft highlights, bringing details to life.
Wet on Wet Method
The wet on wet method allows for easy blending. Add layers of wet paint onto a wet surface for smooth color transitions. It’s great for skies, water, and blending colors softly.

Stippling
Stippling uses dots to make patterns and shading. With small, even dots of paint, you create texture. It’s useful for details in portraits or landscapes.
Impasto Technique
With the impasto technique, you apply paint thickly, using a knife or brush. This creates texture. It’s perfect for adding drama and depth to your paintings.
Try these acrylic painting methods to unlock new artistic possibilities. Each one adds something special to your artwork. Experiment to find the full potential of acrylic paints.
Step by Step Acrylic Painting Tutorial
Starting with a method can make your acrylic painting experience better. This guide will show you how to create a beautiful painting. It covers everything from your first sketch to adding final touches.
Step 1: Sketching the Outline
Begin by sketching for acrylic painting using a light pencil. Draw the main parts of your picture on a 9×12 inch canvas board. This sketch acts as a roadmap for your entire painting.
Step 2: Blocking in the Colors
Next, start blocking in the colors. Use suggested colors like Golden Alizarin Crimson and Golden Burnt Sienna. This step creates the basic color blocks and forms your painting’s foundation.
Step 3: Adding Details and Highlights
With the base colors down, add details and highlights in painting. Use shades like Golden Titanium White to bring depth to your piece. It’s time to focus on shading and small, detailed elements.
Step 4: Final Touches
In this final step, tweak your painting as needed. Enhance shadows or smooth out parts. Use tools like The Art Sherpa brushes for precise finishing touches. This ensures your artwork looks polished and complete.
Layering and Blending Techniques
Improving your skills in layering in painting and mixing colors in acrylics can make your art stand out. It’s about knowing how paints cover, using the right glazing medium, and mixing colors well. These tips will help you add richness and life to your paintings.
Opaque vs Translucent Paints
Understanding opaque and translucent paints is key. Opaque paints hide what’s underneath and add strong color. Translucent paints let the layer below show, adding depth and a glow that makes your painting pop. They’re great for smooth color changes and brightness.
Using Glazing Medium
Adding a glazing medium to your paint can change the game. It makes acrylics smoother and keeps the colors bright and pure. Plus, it adds a touch of see-through beauty without overdoing it.
Try different amounts of medium to find the perfect mix of see-through and color strength.
Color Mixing Tips
Mixing colors right is a must. Knowing the color wheel and being willing to experiment are important. Here are some ideas to make it easier:
- Begin with red, yellow, and blue. Mix them in small amounts to learn how they combine.
- A palette knife can help you mix colors smoothly.
- Make color swatches. They’re great for reference later on.
- Try mixing opaque and translucent paints to compare the effects.
- Adding a bit of the opposite color can fine-tune the mix’s warmth or coolness.
Getting the hang of layering in painting, using glazing medium, and being a pro at color mixing in acrylics will take your art to the next level. Here’s a table comparing some popular acrylic brands and how they perform in these areas:
| Brand | Opacity Range | Recommended Uses |
|---|---|---|
| Golden Heavy Body Paints | Opaque to Translucent | Versatile for layering and fine detail |
| Winsor & Newton Artist Acrylics | Opaque | Good for base coats and bold lines |
| Liquitex | Translucent | Best for glazing and smooth shading |
| Daler Rowney Artist Quality Acrylics | Opaque to Translucent | Excellent for creative layering effects |
Exploring Acrylic Pouring
Acrylic pouring is a fun and vibrant art technique. It’s part of fluid acrylic painting which creates amazing, abstract artwork. Artists mix acrylic paint with a pouring medium, like Floetrol. They sometimes add silicone oil to make the paint flow better and create cool effects on the canvas.
The Flip Cup Dirty Pour is a fantastic method where artists mix several colors in one cup. Then, they flip it onto the canvas, revealing a bright and unexpected design. The Dutch Pour, or “Blowout,” uses a hairdryer or breath to spread the paint. This creates soft, airy designs and interesting spaces without paint.
The Traveling Open Cup technique is exciting, too. Paint is layered in an open cup and slowly released on the canvas. It makes cool cells and flows. A different base color can make it even more complex. The Centered Open Cup Pour involves lifting a cup several times over the same spot. It’s great for making symmetrical designs and more cells.
Olga Soby’s Dancing Flow series puts a twist on the Dutch pour with finger swipes and special designs. The Multicolor Base Technique adds depth by using different colors on a varied base. The Chain Pulling technique uses a chain to make detailed patterns like fluid art butterflies.
The Funnel Technique creates playful designs similar to the open cup. Feather Painting can create a beautiful feather look by merging colors from two cups. The versatile Swipe Technique is used for creating cells, often with silicone oil. Lastly, the Ring Pour Technique makes lovely rings and space-like shapes. A “Paint Kiss” variant brings extra contrast by joining color streams.
Trying different recipes, paint consistencies, and colors is key to mastering these techniques. It’s also important to learn about safety and how to handle materials properly. Experts offer detailed guides on these topics.
| Technique | Description | Unique Elements |
|---|---|---|
| Flip Cup Dirty Pour | Multiple paint colors poured into one cup and flipped onto the canvas | Spontaneous and vibrant designs |
| Dutch Pour | Blowing paint with a blow-dryer or breath to create delicate designs | Wispy patterns and negative space |
| Traveling Open Cup | Layering colors inside an open cup, slowly releasing them | Beautiful cells and flowing designs |
| Chain Pulling | Dragging a chain through fluid paint | Intricate patterns like fluid butterflies |
| Ring Pour | Creating rings and space-like forms | Cosmic and beautiful patterns |
Acrylic Painting Tips and Tricks for Beginners
Starting with acrylic painting is exciting, especially with the right skills and tools. Here, you’ll find helpful acrylic painting tips and tricks to help beginners create beautiful art.

Choosing the Right Brushes
For choosing painting brushes in acrylics, pick synthetic and bristle brushes. They work better with acrylic paints and give more control. Below is your quick guide:
| Brush Type | Recommended Use |
|---|---|
| Flat Brush | Bold strokes and filling wide spaces. |
| Round Brush | Detailed work and thin to thick lines. |
| Liner Brush | For small details and fine lines. |
Maintaining Your Painting Tools
How long your tools last is all about how you care for them. It’s key to clean them right after painting. Use soap and water to wash your brushes. Storing brushes properly matters too—keep their bristles up to stay in shape. By maintaining painting tools, your tools will work well for longer.
Common Mistakes to Avoid
Many beginners fall into the same traps. One mistake is not using enough paint, which makes art look dull. Use plenty of paint for vibrant results. Avoid thinning paint too much with water; use a proper medium instead. Also, mix your colors well to avoid odd shades. Avoiding these mistakes helps you improve steadily.
Acrylic painting tips and tricks are key for beginners. They build confidence and skill in new artists.
Creative Acrylic Painting Ideas and Projects
Trying different acrylic painting ideas can light up your creative spark. Projects such as abstract brushstrokes work as a calm art form. They help you relax and be mindful. By choosing lively and strong colors, artists share their deep feelings and ideas.
Floral doodles bring back the happiness of being a kid. This theme is popular because it reminds us of the past. Butterflies, which stand for change, push us to grow and explore in art. Painting plants, especially ones we keep at home, is very trendy. It makes any art piece feel fresh.
Painting bright hearts is a way to show love and happiness in your work. Sharing your art on Instagram connects you with other artists. Websites like The Art Sherpa let you paint along with others. This improves your skills and you get comments in real-time.
It’s important for artists to keep learning. Taking art classes and joining Skillshare can teach you a lot. Acrylic paints dry quickly, are water-resistant, and easy to clean. This makes them perfect for anyone, from beginners to experts.
Here are some easy acrylic painting ideas to start with:
- Abstract Art: Great for beginners because you can express yourself freely.
- Flowers: They are fun to paint with their simple shapes and bold colors.
- Landscapes: They are relaxing, improve your observation skills, and let you try different techniques.
- Still Life: This helps you learn about color, shape, form, light, shadow, and texture.
- Animals: They offer a variety of textures and designs to explore.
Acrylic painting is not just a way to be creative. It also lowers stress, improves hand skills, boosts confidence, and builds community. Dive into many painting projects to grow personally and let your creativity soar.
Advanced Techniques for Experienced Painters
For seasoned artists, exploring advanced painting techniques can elevate your artwork. Techniques like mixed media painting and palette knife texture add life and complexity to your canvas. They challenge your skills and open new storytelling opportunities in your art.
Mixed Media Projects
Mixed media lets artists add different materials like pastels and textiles to their acrylic works. This approach brings depth and expands the stories your pieces can tell. By combining various elements, your compositions become rich and visually striking.
Layering with different media improves your artwork’s texture and look. Adding mixed media introduces unique textures and dimensions. This makes your work more captivating and complex.
Texture and Dimension with Palette Knives
Using a palette knife in acrylic painting creates bold textures a brush can’t match. The technique is great for thick strokes and impasto effects. With a knife, you layer heavy body acrylic paint, enhancing your painting’s tactile feel.
The palette knife technique adds a tangible quality, appealing to both sight and touch, making your art stand out.
Ready to expand your creative limits? These techniques will invigorate your canvas, creating complex works that captivate. Below, find a comparison of some advanced techniques:
| Technique | Description | Best For | Tools Needed |
|---|---|---|---|
| Mixed Media | Incorporates various materials like pastels and textiles. | Adding depth and narrative | Pastels, papers, textiles |
| Palette Knife Texture | Creates bold, textured strokes. | Impasto and expressive styles | Palette knives, heavy body acrylic paint |
| Sgraffito | Scratching into wet paint to reveal layers beneath. | Adding texture and depth | Sgraffito tools, acrylic paint |
Troubleshooting Common Acrylic Painting Issues
Acrylic painting can bring up challenges for artists. You might deal with paint drying too fast or unwanted textures. We’ll explore these problems and offer solutions to keep you creating smoothly.
Acrylic paint drying too fast is a common issue. A wet palette can help keep your paint moist for longer. If you use the wrong color, don’t worry. You can fix it even after the paint dries. Just check out these step-by-step tutorials for help.
Sometimes, mistakes can be seen even after many layers. To fix this, use isolation coats and thin layers of artist-grade Titanium White. This creates a blank canvas for new art. Removing wet acrylic paint varies by paint thickness and if it’s mixed with a medium.
Common Acrylic Painting Issues and Solutions
| Issue | Solution |
|---|---|
| Paint drying too fast | Use a wet palette to keep the paint moist. |
| Wrong color application | Correct even dry paint by painting over with the right color. |
| Visible mistakes after multiple coats | Apply isolation coats and use thin layers of Titanium White. |
| Ridges in paint | Load less paint onto the brush to avoid unwanted textures. |
When reusing a canvas, apply several layers of quality paint or Gesso. But be careful. Painting over an entire canvas can change how it absorbs paint. This can affect how your artwork turns out, especially with thin paint.
The key to fixing acrylic painting issues is practice and patience. Using step-by-step tutorials can improve your skills. Seeing challenges as chances to learn and innovate will make your art better.
Conclusion
We have reached the end of this detailed guide on acrylic painting. Artists now know the vast range of techniques and tools available. This includes choosing the right supplies and mastering both basic and advanced methods. With this knowledge, you can complete a painting successfully.
This tutorial teaches the importance of regular practice and trying new things. It doesn’t matter if you are starting out or have painted before. Steps like setting up your workspace, picking colors from a small palette, and fixing common problems guide you to improve. We stressed the benefits of using premium acrylic paints for bright colors and great coverage. Also, having brushes of different shapes and sizes lets you explore more.
We covered various painting techniques, such as wet-on-wet for smooth blends and stippling for texture. You can find more help and ideas by joining art enthusiasts on YouTube. There are over 1000 free videos for both new and experienced artists.
It’s also important to start with small canvases and prepare your canvas well before you begin painting. Tips like drying your canvas fully with a hairdryer before adding details like sun reflections can make your painting better. Using different brushes to add sparkles and final touches adds magic to your artwork. This guide aims to be your ally in art, leading you to discover endless possibilities in acrylic painting.
FAQ
What are the basic materials needed for acrylic painting?
How do you prepare a canvas for acrylic painting?
What are some basic acrylic painting techniques for beginners?
Can I follow an acrylic painting step by step guide to improve my skills?
How do I blend and layer acrylic paints?
What is acrylic pouring and how do I get started?
What should beginners know about choosing and maintaining painting brushes?
Where can I find creative acrylic painting ideas and projects to try?
What are some advanced techniques for experienced acrylic painters?
How do I troubleshoot common issues in acrylic painting?
This post contains affiliate links.