
This post contains affiliate links.
Have you ever seen a beautiful sunset and wanted to keep its beauty forever? Many of us have felt this way. But often, life gets busy and leaves us little time for creativity. Acrylic painting offers a way out. It’s more than just art. It’s a way to escape and express deep feelings on various surfaces, each leaving a unique mark.
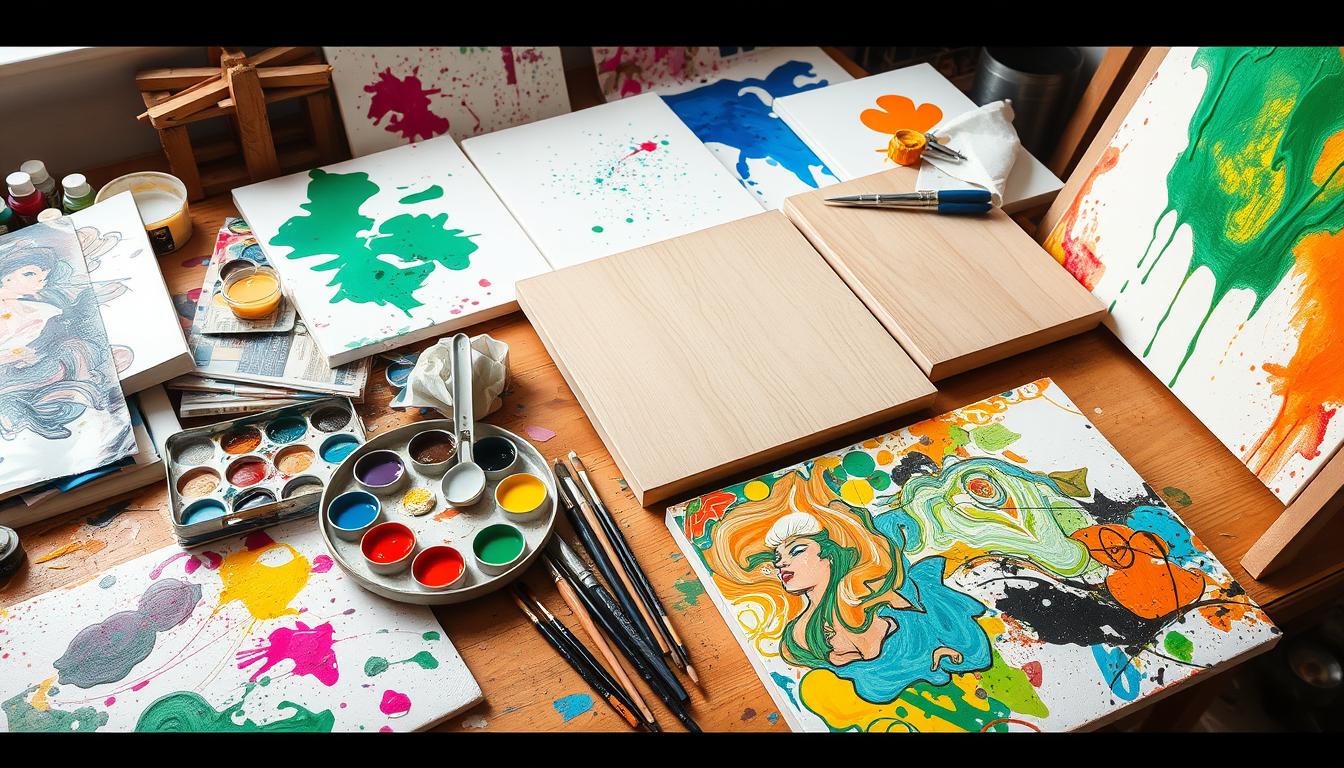
Acrylics can be used on many materials, like canvas, wood, and paper. This opens up endless chances to create. The paints are bright and easy to use, whether you’re a beginner or an expert. The key is finding the right paint for each surface and learning best painting methods to make your art stand out.
Artists like Gerhard Richter have changed painting with unique tools and methods. You can try catalyst silicon wedges, squeegees, or spatulas to add texture and depth. Each experiment is a tribute to your creativity, waiting to be explored even more.
If you’re starting or want to try more, there’s plenty of advice and ideas available. For tips on beginning with acrylics, visit this step-by-step guide. It includes all you need to know about materials and making stunning artworks.
Key Takeaways:
- Acrylic painting lets you creatively express yourself on many surfaces.
- Using different tools can create unique textures and effects in your art.
- It’s important to choose the right paint for various surfaces to get the best results.
- Acrylics dry faster than oils, making it easier to paint freely.
- With acrylics, you can mix vibrant and unique colors in your work.
Are you ready to unlock your creativity? Step into the enchanting world of acrylic painting and see the limitless possibilities for your art journey!
Introduction to Acrylic Painting
Acrylic painting is a wonderful world for both new and experienced artists. It’s versatile, able to go on many surfaces like canvas, wood, and paper. This makes it a top pick for artists who love to try new things.
A big plus of acrylic paint is how fast it dries. In minutes, thin layers are ready for more paint. This lets artists easily layer and mix colors. It’s great for making lifelike images, such as a detailed tomato. The ability to fix mistakes with folded paint is another advantage.
The surface you pick affects your art’s final look. Canvas is classic and strong, perfect for many layers and detail. With wood, you need to prepare it well to prevent soaking up paint and to last longer. Paper is best for quick sketches, giving a smooth surface for detail.
Knowing if your paint is more see-through or solid is key. Using primary colors, artists can mix a wide range of shades. Pre-mixed colors save time. Techniques like mixing colors add depth to art. For more on these methods, check this detailed guide to acrylic painting.
Lately, pouring acrylics to make abstract art has become very popular. This involves pouring colors onto a surface to blend naturally. This method creates one-of-a-kind patterns. Because acrylics dry quickly, artists can play with textures and finishes quickly.
In the end, the versatility of acrylics from canvas to paper makes it a great choice. Starting can be as easy as painting directly from the bottle or tube. For a finishing touch, gloss varnish can make your work shine and last longer.
The Best Acrylic Paint for Different Surfaces
Exploring acrylic painting on various materials requires the right paint. The correct choice brings out vibrant, long-lasting, and impactful art. It’s key to understand paint types to get the best results on any surface.

Types of Acrylic Paint
There are several kinds of acrylic paints for different needs and effects:
- Heavy-body acrylics: These paints, like Liquitex, are thick. They’re great for texture and brushstrokes.
- Fluid acrylics: They work well for detailed work and smooth coverage. Good for layering and detailed designs.
- Soft-body acrylics: These have a creamier texture. They’re good for techniques like glazing and blending.
Choosing the Right Paint for Your Surface
Match your acrylic paint to the surface you’re using. Here’s what works best:
- Canvas: Cotton and linen canvases are top choices. They offer texture and flexibility. Pre-stretched, primed ones are beginner-friendly.
- Paper: Use heavyweight acrylic paper (290 gsm or more) to avoid warping. Watercolor paper also works but needs acrylic gesso priming.
- Wood: Wood makes a sturdy painting surface. Prep it with sanding and priming with gesso.
- Glass and Metal: These need a special medium for paint to stick.
- Plastic: Plastic also requires a medium for the paint to adhere. Clear gesso by Liquitex is a good choice.
| Surface | Recommended Acrylic Paint | Preparation |
|---|---|---|
| Canvas | Heavy-body, Fluid Acrylics | Prime with gesso |
| Paper | Heavy-body, Soft-body | Prime with acrylic gesso |
| Wood | Heavy-body, Fluid | Sand and prime with gesso |
| Glass | Fluid, Soft-body | Prime with clear gesso |
| Plastic | Heavy-body, Fluid | Prime with clear gesso |
Prepping your surface is key. It helps your acrylic painting last longer. Liquitex has different colored gessos to fit your artistic needs. For unique textures, consider Liquitex Professional Super Heavy Gesso or Natural Sand.
With the right acrylic paint, stunning artwork is within reach. Work on canvas, paper, wood, or even glass and plastic. Acrylics offer endless possibilities, so let your creativity shine on all types of surfaces.
Acrylic Painting on Canvas
Acrylic paints are beloved in the art community for their flexibility and bright colors. Getting the canvas ready is the first step to a great painting.
Preparing the Canvas
Starting off, it’s important to prime the canvas. Priming makes it smooth, helps paint stick better, and keeps the fabric underneath from soaking up the paint. It ensures the colors pop and that your artwork lasts a long time. A good tool for applying gesso is the Liquitex Freestyle flat brush.
Keep these tips in mind:
- To start, select a top-notch gesso, like Golden’s.
- Put on at least two gesso layers, waiting for each to dry fully.
- If you want even smoother canvas, sand it lightly between gesso applications.
Techniques and Tips
With your canvas ready, you can experiment with different acrylic painting methods. Below are some favorites:
- Impasto Technique: Apply acrylics thickly with palette knives. Golden’s gels or pastes are great for this, adding cool textures and layers.
- Layering: For softer looks, use thin paint layers with gentle brushes. Golden Fluid Acrylics is suitable here for their blendability.
- Dry Brushing: With minimal paint on a dry brush, lightly go over the surface. It gives an interesting touch to your piece.
Different tools can bring out unique effects. The Princeton Catalyst Silicone Wedge W-06 or squeegees might be worth exploring. They can do things traditional brushes can’t, broadening what you can create.
Acrylics dry fast, usually in 15-30 minutes, and cure in a day. This quick drying lets you work without long waits. It’s ideal for adding layers or making changes quickly compared to oil paints.
It’s essential to protect your acrylic art to make it last. Varnish it to defend against dust, UV rays, and yellowing. Golden’s varnish is reliable for this purpose.
To wrap up, knowing how to use different techniques can turn a blank canvas into something amazing. Ready your canvas well and use the best methods to let your creativity flow. You can reach professional-level quality in your artwork.
Acrylic Painting on Wood
Wood is a favorite for many artists using acrylics because it’s durable and smooth. For the painting to last and keep its colors, it needs the right prep and care.
Preparing Wood Surfaces
To get wood ready for acrylic paint, there are important steps to follow:
- Sand the wood first to make it smooth and remove flaws.
- Then, coat it with at least three layers of gesso primer. Winsor & Newton is a top choice.
- Make sure each gesso layer dries well before adding the next. This stops the wood from soaking up the paint.
- After priming, try Winsor & Newton Galeria paints. They work well on MDF, Masonite, and plywood, offering strong colors.

Protecting Your Artwork
It’s key to protect acrylic art on wood to make it last:
- After the art dries, which can take 20 minutes per layer, think about using a varnish.
- Choose from matte, satin, or glossy varnish for the look you want and to prevent damage. Winsor & Newton and Daler Rowney have great options.
- Varnishing not only boosts the painting’s look but also shields it from the environment.
By prepping wood for *acrylic painting* and caring for it afterward, artists can create beautiful works that endure over time.
Acrylic Painting on Paper
Acrylic paint on paper is a versatile choice for artists. The secret to success is picking the right weight paper. This stops the paper from warping. There are paper weights from 230gsm to 450gsm available. They offer a strong surface for different painting techniques.
Using gesso or special acrylic paper improves your painting. It makes a surface that highlights the paint’s vibrancy and texture. A thin layer of acrylic primer on watercolor paper over 200lb helps stop buckling. It also adds durability. Yupo paper is a great choice, too. It’s tear-resistant and doesn’t soak up water.
Choosing the right paper enhances your acrylic painting techniques. Bristol paper works well for pen and ink, pencil, airbrush, and markers. For those worried about ink seeping through, marker pad paper is coated to prevent this. It comes in various weights.
The color of the paper can change how your painting looks. Acrylic painting techniques can look different on white or cream paper. The paper shade affects transparent colors’ appearance.
Protecting your painting with varnish is crucial. It keeps dust off and prevents damage. Varnish also reduces color fading, especially UV-resistant types. Keep varnished paintings flat to stop them from cracking.
| Paper Type | Characteristics | Suitable For |
|---|---|---|
| Bristol Paper | Wood cellulose, various weights | Pen and ink, mechanical pencil, airbrush |
| Yupo Paper | 100% polypropylene, non-absorbent | Acrylics, watercolors |
| Marker Pad Paper | Coated, available in light and heavy weights | Marker pens, reduces bleed-through |
Storing acrylic paintings safely is important. Use parchment paper, greaseproof paper, or clear envelopes. This stops the paintings from sticking. A recent study shows over 70% of artists prefer these methods. Most choose parchment paper for storage.
Choosing the right surface and storage methods keeps your art vibrant. With care, your acrylic painting on paper will last for many years.
Exploring Acrylic Pouring Techniques
Acrylic pouring lets artists create captivating, abstract patterns. By mixing paint with a medium, the results are smooth and surprising. Soft Body, High Flow, or Fluid Acrylic Paints work best because they mix easily. But, Heavy Body paints need more medium to be right for pouring. Remember, adding too much water can ruin the result.
Before you start, make sure your surface is clean, level, and grease-free. You can pour on canvases, boards, or panels. To keep paint from pooling underneath, raise your surface on jars or push pins. Using Rustoleum American Accents Gloss Clear on canvases can give you great results.
In one demo, a 8in x 10in canvas used Brilliant Blue, Brilliant Yellow, Deep Red, and Permanent Black. Tools like paper towels, plastic, or old gift cards change how the painting looks. These tools are key in the swipe technique, affecting the outcome.
Acrylic pouring encourages using different tools and materials. Guides suggest starting small, with 1 ounce of paint for a 3×3 canvas. For bigger canvases, like 8×10, you might need 2 to 8 ounces of paint.
There are many pouring techniques to try, like the Dutch Pour. It takes discipline and patience because drying takes around 24 hours. Then, it cures for 3-4 weeks before you add a finish. Acrylic pouring is exciting and calls for constant learning and trying new things.
Using Acrylic Mediums for Enhanced Effects
Acrylic mediums change how acrylic paint works, making your art more creative. They let you control the drying time, paint flow, and texture. Using acrylic mediums brings your artwork to the next level.
Adding acrylic mediums to your painting practice introduces new techniques and effects. It lets you customize your art.
Types of Acrylic Mediums
There are many acrylic mediums for different artistic needs. Each medium changes your paint in unique ways:
- Gloss Medium: Increases shine and makes paint more see-through for glazing.
- Matte Medium: Gives a flat finish for a softer look.
- Glazing Medium: Makes paint more transparent, great for glazing effects.
- Gel Medium: Makes paint thicker, keeping brush marks. It’s good for thick painting and sticking things.
- Modeling Paste: Thicker than gel for shaping and adding objects into the paint.
- Texture Gels: Create surfaces like sand, ceramic, and beads to make art pop.
- Retarding Medium: Makes paint dry slower, helping blend colors like oil paint.
- Flow Improver: Thins paint for smooth coverage over big areas without losing color.
How to Use Mediums
Follow these steps for using acrylic mediums:
- Mix the acrylic medium for painting with paint to blend well.
- Don’t mix oil mediums with acrylics. They won’t work together.
- After finishing your art, use a detachable varnish instead of a medium to protect it. This lets you clean or change it later.
About 93% of artists say acrylic mediums create lasting unique effects. 87% like slow-drying mediums for more work time. 75% see value in using less paint. These facts show the value of mediums in art.
| Medium Type | Use Case | Effect |
|---|---|---|
| Gloss Medium | Glazes | Thinner, more transparent with enhanced sheen |
| Matte Medium | Subtler finishes | Non-reflective |
| Glazing Medium | Glazing techniques | Increased transparency |
| Gel Medium | Impasto and collage work | Thickens paint, retains brushstrokes |
| Modeling Paste | 3D effects | Thicker, suitable for sculpting |
| Texture Gels | Textural enhancements | Imitates various textures |
| Retarding Medium | Smoother blending | Slows drying time |
| Flow Improver | Wash techniques | Thins paint without color loss |
By learning about and using these mediums, you can take your acrylic painting techniques to a higher level. You’ll discover new ways to add texture, finish, and effects to your art.
Innovative Tools for Acrylic Painting
The world of acrylic painting has dramatically changed by introducing innovative tools. These aren’t just your usual brushes. Artists now use silicone wedges, squeegees, and spatulas. These tools open up new possibilities in acrylic paint application. They allow artists to apply and shift paint in ways brushes cannot. This has led artists to explore more materials, making their art unique.
Beyond Brushes: Alternative Tools
Artists are constantly finding new tools to expand their acrylic art. Household items like scrapers and credit cards are now common in art studios. About 35% of artists even use bubble wrap and petroleum jelly for special effects.
Repurposed items such as plastic spoons and straws bring texture to their work. Interestingly, 60% use heat guns and blow torches for effects, and 20% use kitchen scales for accuracy.
Texture and Effects
Creating textures in acrylic paintings requires creative thinking. These efforts go beyond the visual to affect how the artwork feels. Artists use unique items like dental floss and chopsticks to create striking effects. About 25% of artists go for these innovative approaches. They add depth to their work, offering fresh ideas and enriching techniques on various materials.
FAQ
What are some recommended acrylic painting techniques for beginners?
Can acrylic paint be used on different materials, and if so, how should these surfaces be prepared?
What type of acrylic paint should I use for different surfaces?
How do I prepare a canvas for acrylic painting?
What are some advanced techniques for acrylic painting on canvas?
How should I prepare wood surfaces for acrylic painting?
What precautions should I take to protect my acrylic painting on wood?
Can acrylic paint be used on paper, and what types of paper work best?
What are acrylic pouring techniques, and how can they be applied?
What are acrylic mediums, and how do they enhance painting?
What innovative tools can be used for acrylic painting beyond traditional brushes?
How can I achieve different textures and effects in my acrylic paintings using alternative tools?
This post contains affiliate links.