
This post contains affiliate links.
If your lines look wobbly or messy, you’re not alone.
Clean lines are one of the biggest challenges in acrylic painting—especially if you’re working in a stained glass style where bold outlines matter.
The good news?
👉 You don’t need a steady hand—you just need the right method.
🧠 Why Lines Look Messy
Before fixing it, understand the problem:
- Too much paint on the brush
- Paint that’s too thick or too thin
- Rushing the stroke
- Trying to “correct” the line while painting
👉 Most messy lines come from overworking, not lack of skill.
🖌 Step One: Use the Right Tool

Not all brushes work for line work.
Best options:
- Small liner brush (long thin bristles)
- Round brush (size 0–2)
- Acrylic paint marker (great for beginners)
👉 If you struggle with brushes, start with a paint marker.
💧 Step Two: Get the Paint Consistency Right
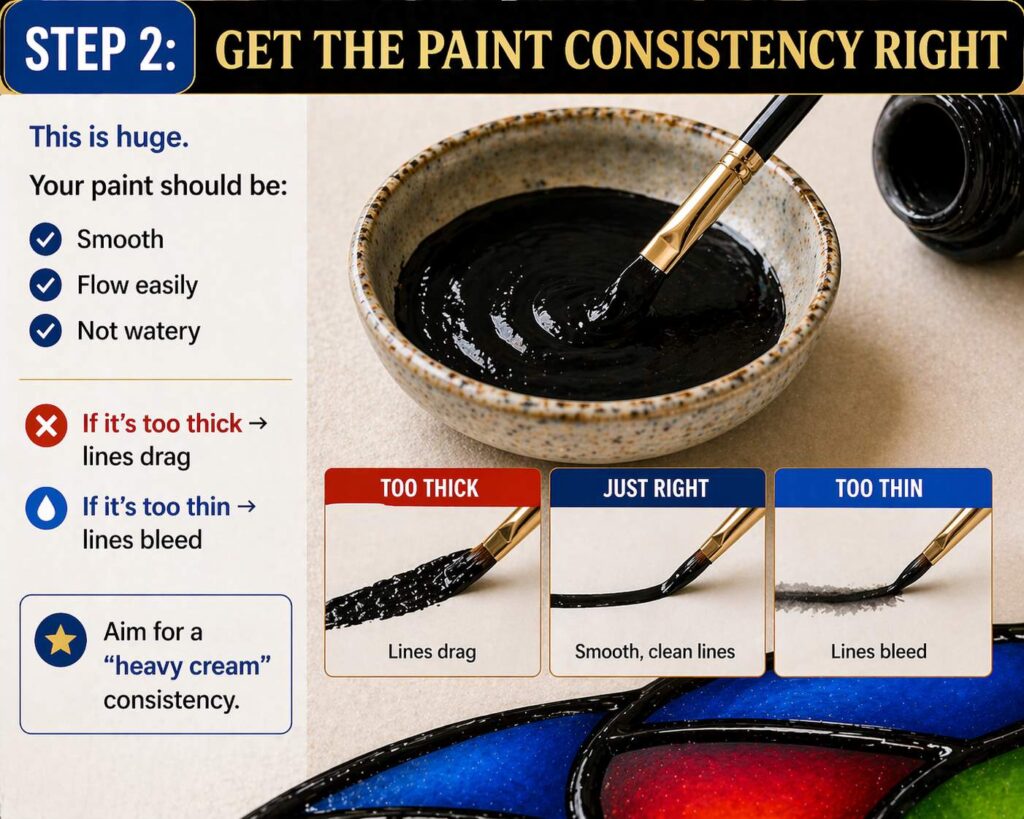
This is huge.
Your paint should be:
- Smooth
- Flow easily
- Not watery
If it’s too thick → lines drag
If it’s too thin → lines bleed
👉 Aim for a “heavy cream” consistency.
✋ Step Three: Stabilize Your Hand
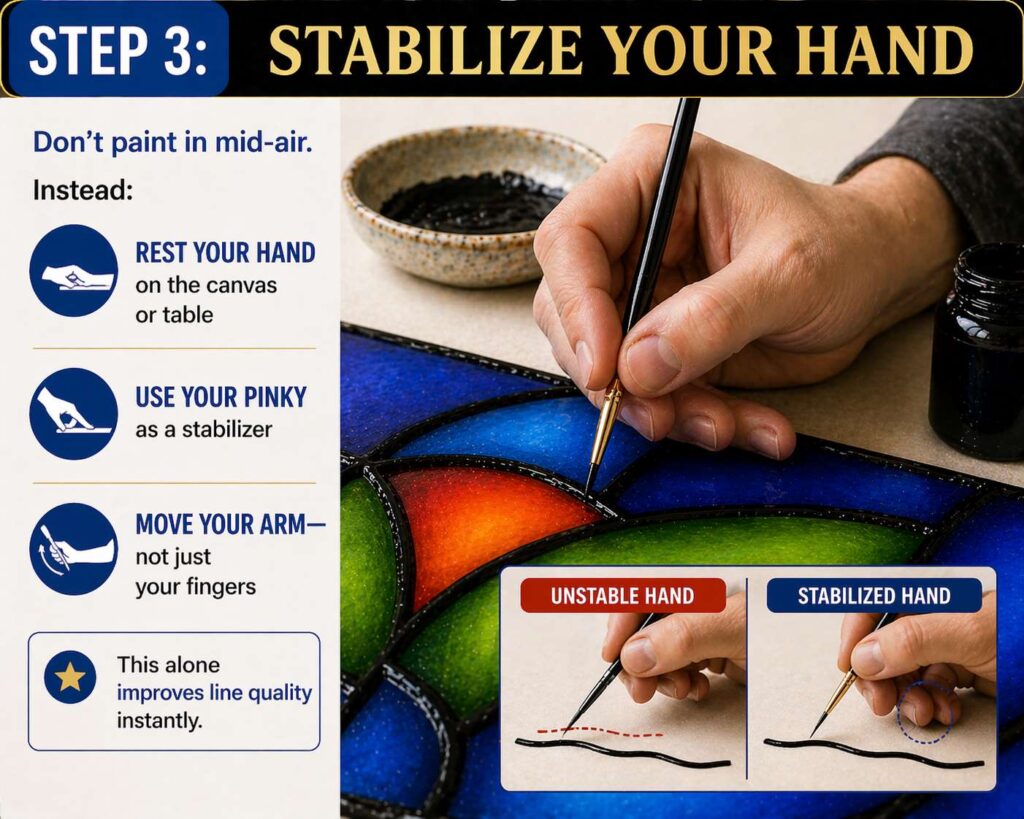
Don’t paint in mid-air.
Instead:
- Rest your hand on the canvas or table
- Use your pinky as a stabilizer
- Move your arm—not just your fingers
👉 This alone improves line quality instantly.
–
–
🎯 Step Four: Pull the Line (Don’t Push It)
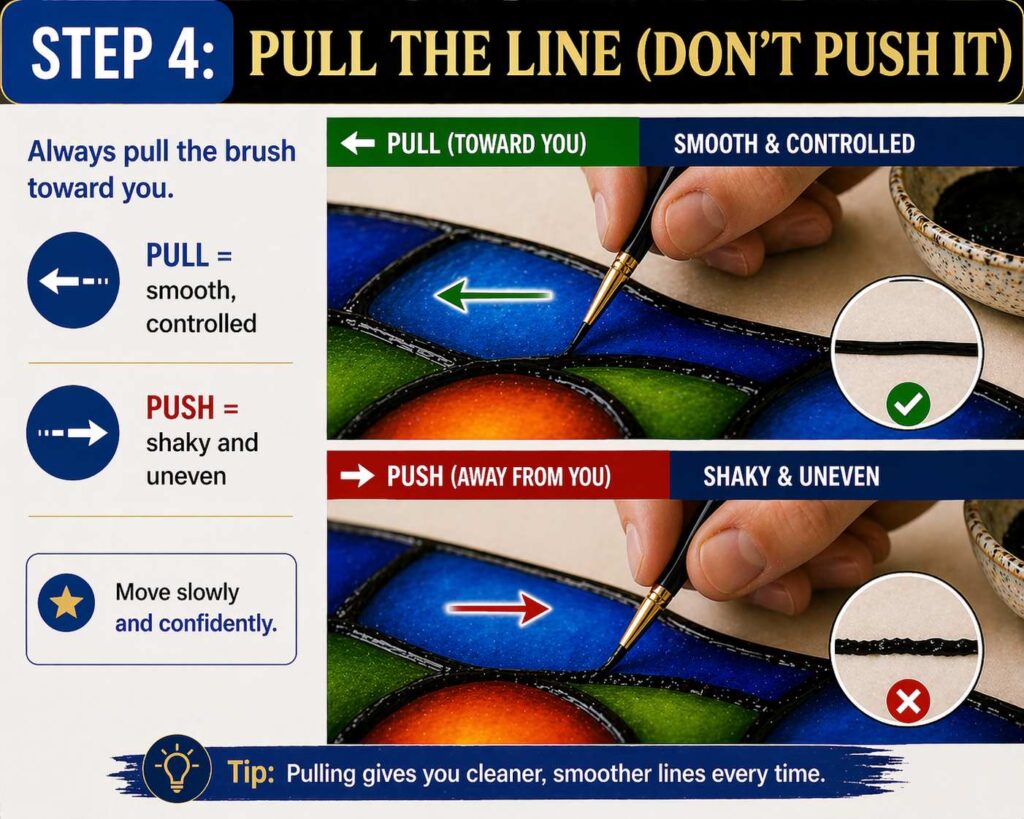
Always pull the brush toward you.
- Pull = smooth, controlled
- Push = shaky and uneven
Move slowly and confidently.
–
–
–
🧩 Step Five: Use Short Controlled Strokes
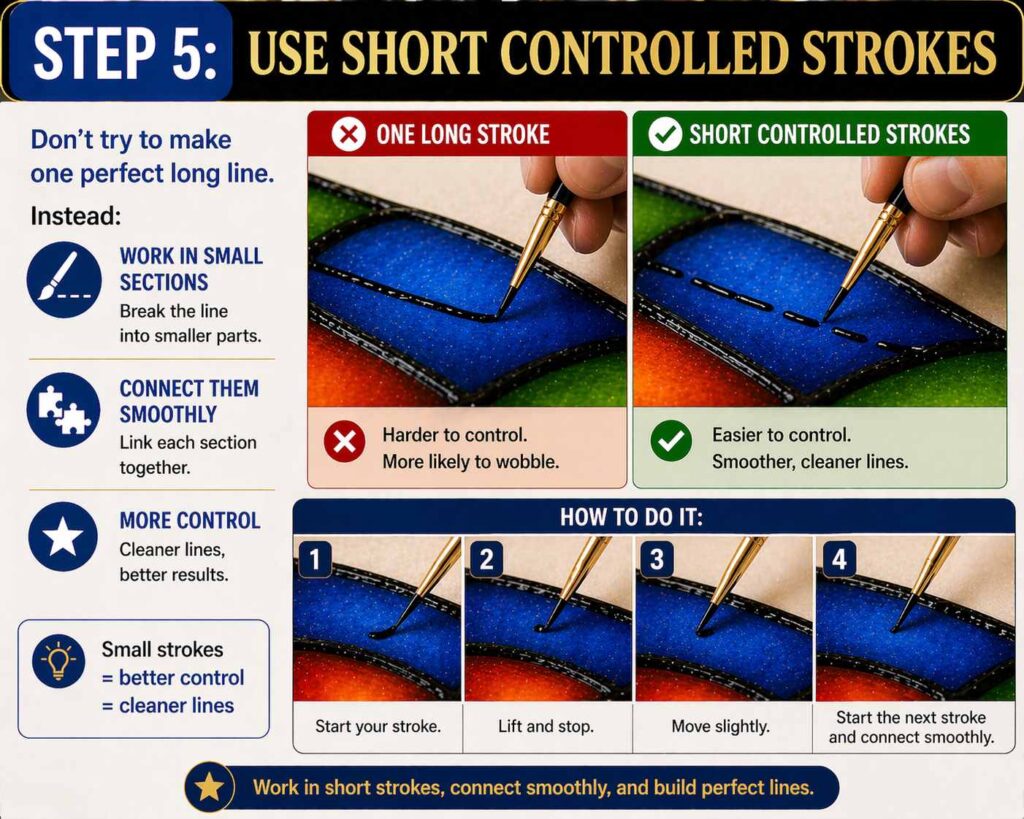
Don’t try to make one perfect long line.
Instead:
- Work in small sections
- Connect them smoothly
👉 This gives you more control and cleaner results.
–
–
🖤 Step Six: Let It Dry, Then Fix It
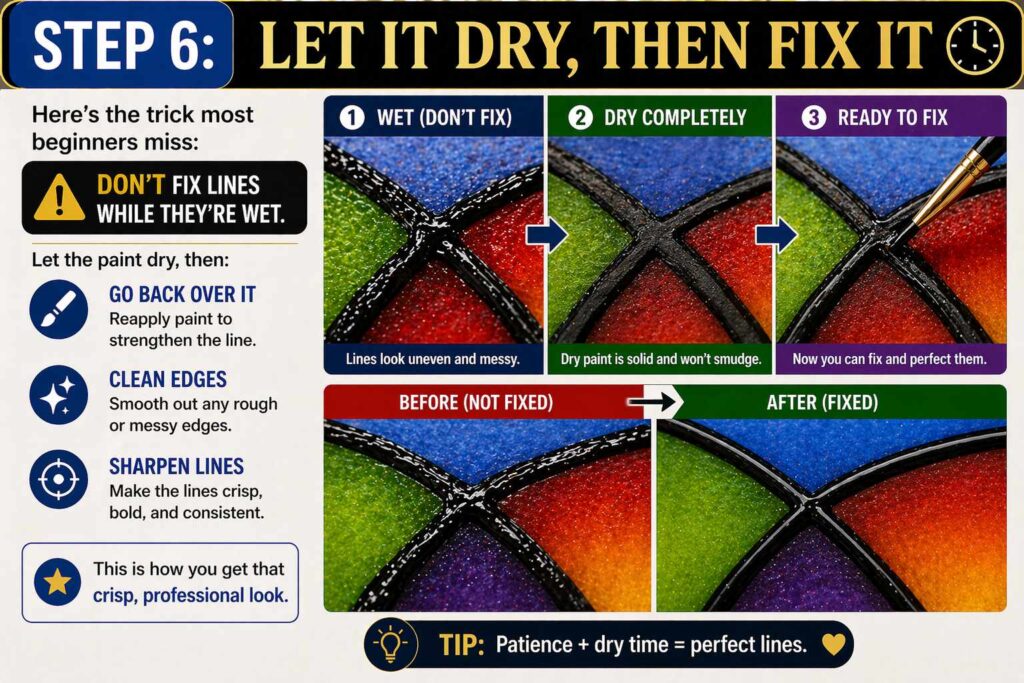
Here’s the trick most beginners miss:
👉 Don’t fix lines while they’re wet.
Let the paint dry, then:
- Go back over it
- Clean edges
- Sharpen lines
This is how you get that crisp, professional look.
⚠️ Common Mistakes to Avoid
- Using too much paint
- Trying to fix mistakes immediately
- Rushing the line
- Not stabilizing your hand
👉 Slow down = cleaner lines.
🎨 Final Thoughts
Clean lines aren’t about talent—they’re about control and process.
Once you:
- Use the right brush
- Control your paint
- Work in small sections
👉 Your lines will instantly improve.
🎯 Want to Make This Even Easier?
If you struggle with drawing before painting, this method helps you skip that step:
👉 https://guywann.xyz/how-i-started-painting-faster-without-getting-stuck-on-the-drawing/
🔗 Related Articles
- How to Simplify a Photo for Acrylic Painting
- How to Turn Any Photo into a Stained Glass Painting
- Stained Glass Acrylic Painting Techniques
❓ FAQs
What brush is best for clean lines?
A liner brush or small round brush works best for control.
Why do my acrylic lines look shaky?
Usually from too much paint or lack of hand support.
Can beginners paint clean lines?
Yes—using a paint marker is the easiest way to start.
💡 Explore More on Artist Corner
This post contains affiliate links.